Leaderboard
Popular Content
Showing content with the highest reputation on 06/07/2019 in all areas
-
4 points
-
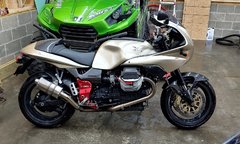
Gotcha. A noble venture to resurrect a fine champagne V11LeMans! For parts, I am dancing between MGCycle/ Wisconsin, Harpermoto/Missouri, and AF1Racing/AustinTX There are also a few V11 being broken here in the Classifieds and more on ebay . . . We're wit'cha, bud!3 points
-
Yep the red frames are the ones to have. Anything else is a fat horrid lazy barge who's owners should be shunned........ Ciao2 points
-
Hello, Frame length aside. Having owned both red frame and black frame variations of the V11 Sport. I found the red framed V11 more lively and fun to ride. The black framed V11’s just felt a little lazy and slower steering comparison. Cheers2 points
-
Pulled both cylinders, bike has 22k miles on it. It burnt the rod bearings and scored right side jug pretty bad. Lost oil pressure due to oil filter coming loose.... Which the dealer did all scheduled maintenance. Its a long, disgusting story. And to top it all off the only dealer within 100 miles of me went belly up.... So now I'm stuck trying to fix this on my own. So if anyone knows of a place for me to get parts I would greatly appreciate it. I want to keep the bike so doing it right is key.... As of now, I need right side cylinder and piston, and the plug and o ring for filter access on the bottom pan since the dealer misplaced it...... Any help is appreciated!!2 points
-
There are a few threads and posts here and there discussing tank removal. This varies from the early (external fuel pump/filter and "chin pad" on top) to the later (in-tank pump/filter and painted top) V11s. The whole process is best begun with the tank very close to empty. Less fuel to spill and less plastic tank deformation while it is off the mounts. Prepare somewhere to place your precious tank while the maintenance is completed. Fuel tank removal post in "How To . . ." by al_roethlisberger Later model "Quick Disconnect" post by Greg Field Gas Tank Removal post by Tom M On external pump/filter V11s, the filter may be in three locations (under the frame, on top, or in front). Removing the right side fuel line first is easiest and will drain the filter the quickest if the filter is above the frame. Yes, the early tank fuel pressure regulator on the right side of the tank looks like it has an extra fitting with no hose on it. It's correct that way. Be prepared to catch 100 ml or more of fuel. If you have an early electrical petcock, there will be two wires to it on the rearmost of the left side of the tank bottom. Simply unplug to shut off. The manual petcocks have a knurled knob and need a lot of twisting to close along with a snug closure from a good set of adjustable pliers like the Channel-Lock brand. Once removed, the two most likely maintenance candidates are the fuel filter and air filter. These may vary depending on your year model and whether there have been modifications. The K&N CG-9002 fits well in the stock airbox, but expect to clean and re-oil it regularly (perhaps once a year or 12,000 miles/20.000 km). The original Weber external fuel filters can be re-fitted with a quality unit for the Isuzu Trooper. They are a tad shorter, and will require a slightly longer fuel line, but are readily available and will need a thin shim inside the bracket for good retention. The WIX that I use is 33310. WIX is also showing a direct replacement for the 1999-2001 V11, but I have not seen it. My apologies that I have little experience with the later tanks with internal pump/filter (no chin pad). We'll add good links as necessary. The purpose of this thread is more to make a list of items to look after while the tank is off: **EDIT/note (2/2015): At this point, many of these bikes have been through a few owners, issues, and "over the river and through the woods." Keep an eye out for "modifications," questionable repairs, or out-of-place bits, melted wires, duct tape, splices, missing fasteners, or general bodging. Some of this can be quite expertly done, some not. > Clean, crimp, seal, and secure the two bullet type Clutch Switch connectors at the front left of the frame. >Locate, inspect, groom and otherwise secure the wiring and connectors from the Side Stand Switch. This is how your V11 gets electrical power to the Run Switch while you are riding along. Without it, you will not be riding along. Might as well have a close look at your side stand mechanism: pivot bolt, backing nut, springs, and foot "lever"(wire loop). Make certain the sidestand bracket fasteners are secure to the timing chest and sump spacer. The main, large fastener here is torqued to 70 Nm! Loose fasteners here could contribute to a broken sump spacer. (no need to have the tank off for this one!) >Inspect, clean, and seal the spark plug wires and their boots coming out of each coil. These are rather in the weather and susceptible to nastiness. Test the resistance of the spark plug caps/ resistors - they should each be around 5,000 Ω. Test the resistance of the ignition wires expecting them to be equal and around 10,000 Ω (~5,000 Ω per foot). >Check the coils are not loose at their vulnerable vibration isolators. >Check, or install, a ground strap from the regulator to the engine and/or frame. "Star" washers make good contact as they cut through painted surfaces. >Inspect, groom, clean, and secure all visible wires and connections. Carefully open connectors and spray clean with a good electronics cleaner. No grease conducts electricity so make your connections clean and dry, then coat them to keep moisture out. I'm really liking Caig DeOxit Gold for this: it promotes conductivity while also lubricating. [NOTE: This product (among others) will soften and swell the AMP/Metri-Pack style connector seals. Be certain the seals and are not exposed to the DeOxit and the connector cavity is clean and dry before reassembly.] The regulator connection that powers the Battery Warning Light on the early V11 is prone to getting wet and causing the Battery Light to come on in the rain. Oh, and, hey: hook up the battery and test that everything works *before* you out the tank back on. Don't ask me how I know . . . >Be certain the wiring lead from the Phase sensor is not "Zip-tied" tightly to the frame leading to a wiring break and sensor failure. Repeat the process of locating and releasing any and all wiring that is anchored tightly to hard points. Re-tie loosely to avoid wiring failures. >Look for chafing or pinching in the wiring, cabling, or hoses that may need attention. >Tighten the battery terminals and seal them with Vaseline® or Caig DeOxit Gold®. If the battery has been out recently, re-tighten the terminals after a couple rides. >Find the straightest, gentlest routing for the speedometer cable. Make sure it is not crimped, kinked, or bent. If you have an early V11 with the white face Veglia, service those bevel drives, especially the one at the gear box (the upper is attached to the back of the speedometer itself). Make sure the brass insert is pressed well into the body of the drive and consider permanently sealing the metal disc before it goes missing along with the internal worm gear! >Inspect the crank case vent breather hose (30 15 7400) under the frame that ventilates the crankcase. It clamps on above the "bell housing" that houses the clutch assembly. If it cracks, collapses, or gets loose the vented oil will emerge from the lower bell housing weep hole making you think the rear main seal is gone. There is a heater hose that can be fitted for this application, but the consensus is that the rubber will not tolerate the exposure to oil. Check that the vent hose is not resting on, and being abraded by, the oil feed lines to the heads at the front of the "V." >Inspect around the distributor blanking cover on the top right of the motor: if it's oily there, give it a new O-ring. Seal the flat area with a good gasket sealer/RTV silicone. >Inspect the oil cooler brackets and oil cooler lines. Any chafing against the sub-frame can be isolated with plastic "zip-ties". >Inspect the throttle cable for breaks between the housing and the left side throttle body. See that the throttle cable bracket is adjusted (bent) in such a way to give the cable the straightest shot at the bell crank. Groom everything else away from resting on the exposed throttle cable. If the bike has been stored extensively, hardened lubricant can obstruct cable movement creating a stuck throttle - inspect, clean and lube with a good cable lube. Note that the early Sport throttle cable is superseded in the Moto Guzzi parts supply by an incorrect part - instead use 01117560. > If your TPS still has the awful Torx fasteners, now is a good time to change them to a hex drive socket head. They are 4mm/ 0.7 thread pitch ~17mm long. Use thread lubricant, especially if your new fasteners are stainless steel. >If applicable, groom the left side fuel line up and away from the cylinder finning. Moving the fuel pump forward in the bracket, shortening the fuel line, covering the fuel line with heat shielding material are all simple methods of limiting heat soak and vapor lock in this fuel feed line. >Change any serrated "worm-gear" hose clamps with high-pressure fuel injection type clamps. BEFORE you remount the tank, recheck EVERY clamp for tightness. You can't get to them with the tank back on, and they'll LEAK if you didn't cinch every one down. (Don't ask me how I know ) >Many tanks have "softened" enough to rest down hard against the side covers and back against the tail piece. Look for chafing or deformation. Shimming the rear fuel tank mount upward may be helpful. While there is much disagreement, ethanol in the fuel is likely problematic - something about formation of binary azeotropes . Traditional wisdom has been to store a bike with the tank full (maybe with a fuel stabilizer), but ethanol doesn't store well, so either store the tank near empty, or with pure gasoline. >Early Sports often rest the seat hard against the battery. Look for signs (chafing on the battery top, cutting into the hold-down strap). Relieving the seat pan with an abrasive tool (ie:Dremel) and lowering the battery basket can be helpful. >Observe the Phase/Timing/TDC/Cam Position Sensor on the left side of the timing chest for leakage. A simple #112 O-ring replacement is often all that is necessary. That said, mine leaked through the wire lead and had to be sealed with an epoxy. Do not increase the gasket thickness as this will change the timing. Sometimes, the fasteners just need to be snugged up. >Service the Oil Pressure Sensor connector near the Timing Sensor - clean and seal with some petroleum jelly (Vaseline) or equivalent. >Check the two electrical connections to the fuel pump. Clean, tighten, and seal. >Be certain the drain holes in the stock airbox lid are clear. >Clean the Air Temperature Sensor inside the airbox with a spray of electronics cleaner. Be certain the connector is cleaned, sealed, and secured well (http://www.v11lemans.com/forums/index.php?showtopic=19681&p=214817); Same goes for the connector to the Engine Temperature Sensor on the inboard side of the right head toward the rear. >There will likely be some oil in the bottom of the airbox that could use some mopping up. It is common for the left cavities of the airbox to accumulate enough oil that it weeps out around the left "inlet trumpet" and down onto the gearbox. Take the time to clean the oil out of the inside of the airbox. >Inspect the heat shielding on the underside of the tank. Expect it to be loose in places and require re-attaching. A toluene based contact adhesive (ie:"GOOP" or "Shoe Goo") works well once both surfaces are clean. This is most important where an open airbox lid has been fitted and the loose heat shielding can block air flow. Some of this shielding is getting so old that the surface foil layer (which covers the inner fiberglass layer) might have to be replaced with a self adhesive foil tape (metalized duct tape). >Inspect the two wires from the fuel level sensor under its rubber boot. They are vulnerable to breakage. Re-secure if necessary. Apply a blob of epoxy where the wires connect to prevent them from breaking. The same applies to the wires entering the electric petcock if your bike still has it. >Later tanks with the pump/filter internal have a special gasket that should be inspected for leaks. >If you have an early tank (1999-2002) with the chin pad, inspect its hold down fasteners. >Open the cap and make sure the drain (left) and vent (right) holes are clear through to the underside nipples using a spray solvent like electronics cleaner and/or compressed air. Also, clear the rubber line(s) that attach to the nipples. >As the tank goes back on, re-secure the tank vent and overflow on the underside of the tank. This is fiddly and the connections may benefit from using small wire clamps that will still allow a press fit. There have been many modifications reported on this routing, but simply be certain your tank vent and overflow route below the engine and exhaust not onto them, even if they are co-joined into one drain tube. US models have a one way valve (small plastic disc) that can become disoriented or obstructed and allow a vacuum to build in the tank (the dreaded "tank suck"). Make sure the valve is oriented for vertical flow and secured. If your tank has suction when you open the filler cap, the venting needs to be addressed. One quick-fix is to open the cap and remove the small rubber seal on the right rear of the cap. I'm not saying it's a good idea, but it has been used as a quick fix. > Check that the right side fuel return hose to the regulator does not press upon the TPS. The regulator can be loosened and rotated with a 20mm open end wrench. This applies to early "chin pad" tanks for certain, but watch for any interference with the TPS. >Be absolutely certain nothing is fouling the movement of the throttle cable or its bell crank including the left side white linkage adjusting knob. Happy bike, happy life!!1 point
-
Here's a list of things to inspect, clean or lubricate while the wheels are off for a tire change: (The wheels don't have to be off to do all of these maintenance points, and not all need to be done every time) >Check the wheel bearings for smoothness and play. >Clean and check the brake pads for wear; polish and grease the pin(s) very lightly with a silicone based grease.. >Clean the brake pistons and restore their motion in and out of the calipers evenly. This involves blocking every piston but one and moving it in an out of the caliper all the while cleaning it with brake cleaner. > This good advice from gstallons on brake drag: http://www.v11lemans.com/forums/index.php?showtopic=20133&p=225343 >Bleed brakes, especially the rear brake while you can turn the bleeder to the top. > Clean the fork seals with a "SealMate", or equivalent, including the dust seals. Performing this simple task routinely may extend the life of your fork seals impressively! >Remove the top and bottom rubber caps from the rear brake master cylinder and inspect, clean, and lubricate. Use only silicone based grease around brake parts (under the master cylinder, inside the rubber cap). Make sure there is good electrical connection to the switch at the top and avoid the silicone based lubes (dielectric) on electrics - simple petroleum jelly (Vaseline®, or better: Caig DeOxit Gold®) will keep the moisture out. Grease does not conduct electricity - it's just to keep the moisture out. http://www.v11lemans.com/forums/index.php?showtopic=18158&p=192643 >Clean the rear brake carrier pin and block; lube lightly and be certain the pin threads are clean, lubed* and well torqued. (later V11s have a retaining clip on the inboard side). *Consider a thread locking compound. Allowing this locator pin to fall out can be catastrophic! On the early V11 (1999-2002), some have decided to torque the pin in place and only use the sliding block to remove the rear wheel, perhaps reducing the chance that the pin would not be reinstalled correctly and safely. >Bleed the clutch. >Clean the gearbox vent and the rear drive vent. >Locate, inspect, groom and otherwise secure the wiring and connectors from the Side Stand Switch. This is how your V11 gets electrical power to the Run Switch while you are riding along. Without it, you will not be riding along. Might as well have a close look at your side stand mechanism: pivot bolt, backing nut, springs, and foot "lever"(wire loop). Make certain the sidestand bracket fasteners are secure to the timing chest and sump spacer. The main, large fastener here is torqued to 70-75 Nm! Loose fasteners here could contribute to a broken sump spacer. (no need to have the wheels off for this one!) >Inspect the rear exhaust crossover hanger and both of the canister/passenger peg subframe supports. >Clean the wheels and rotor carriers ("float buttons") and lube the front carrier buttons (a drop of Breakfree CLP (or equivalent) works well, but don't let it sling out on the rotor surface. Bumping the rotors around with a mallet helps keep them “floating.” Even out the spacing of the rotor on the carrier by tapping evenly around the perimeter of the rotor with a soft mallet. >Check the torque reaction rod (chassis rod) rubber bushings for deterioration and play. With the rear drive removed and driveshaft separated, service the pivot bolts . Clean the pivot bolts and apply something reliable for corrosion resistance, especially the front pivot that has been reported to break. >Check the rear drive bearings; clean and grease the outboard needle cage and its sleeve with a good waterproof grease insuring that you rotate it to a new position. Here is an excellent thread, by Bjorn, with lots of great pictures of this bearing, the swingarm, and the bevel box internals. [edit 26 April 2018: It has come to light that keeping moisture out of the right side needle bearing protects the "nose" of the crown wheel and the inner drive seal. Once pitted, the crown wheel is difficult to restore.) >Clean and grease the drive splines for the hub. Use something super-sticky, like Klüber Staburags or a dry-film moly coat. Avoid over-greasing (it will just sling off). >Lube the driveshaft and its U-joints. Don't put too much grease in the splined connection or it will trap air and not go back together. Before you take the two halves apart, make sure there are clear alignment marks. Consider verifying the Driveshaft Phasing. >Carefully inspect the driveshaft yokes for signs of looseness, fatigue or cracking. Verify the pinch bolts are torqued and the the yoke collars do not slide on the output or input shafts. >Inspect the shock eye connection to the swingarm. The early V11 white spring/blue collar Sachs-Böge are prone to crack. Grease the pivot bolt and junction of the steel bushing and alloy shock eye! >Service the cush drive. The button head screws will not likely come out willingly, so expect a fight (heat and penetrating oil/solvent) and replace with new fasteners. >Clean and lubricate all the fasteners. I use a small wire brush and anti-seize paste. >Inspect, clean and seal the main ground(earth) cable to the back of the gearbox. You have to remove the seat latch release to get to it. If you find the cable is not directly to the gearbox, move it there, but be careful if you remove the bolt entirely as there has been a report by SeanP61that it might not just go right back in. > Mounting the front of the battery carrier basket beneath the subframe adds considerable clearance for the battery under the seat pan. The front tabs of the basket must be slightly contoured to fit between the frame tubes. > Remove, clean, lubricate, adjust, and shim (if necessary) the foot shift lever and mechanism. They get sloppy, loose, crudded-up, and misaligned. So much better with no play, sticking, or striking the frame side plate on the down stroke. > Clean and lubricate the sidestand mechanism; inspect and secure the wiring to the switch; tighten the vulnerable lower bolt (circled in red) and torque the important upper mounting bolt (70-75 Nm!) [edit 22 March 2021]1 point
-
No, that's not normal. That's why I asked. Check the phase sensor. You'll probably find it mounted with way to much distance to the tooth wheel. I recently found this on two engines, both probably as they came from the factory. I removed a 1.5mm shim and changed the 0.5 one to a 0.8mm (two were mounted, so it was 2 mm). Now I have it sitting with 0.5mm clearance - and that cured a lot. At least it's driveable again. It's a Hall sensor, this type is ageing. When new it obviously works also with a gap that big, after nearly 20 years now it doesn't. The interesting part is why especially at 3000 the problem becomes so obvious. Anyhow, check the gap and better get a new sensor. And report your findings please I forgot: I tried several different maps. Would have been better to watch the tach needle earlier and think about what it wanted to tell me.1 point
-
I have had great results with the Ohlins shop down in NC. It used to be run by Stig Petterson, I assume he is still the guy. Stig was great, he did the front forks in my Daytona (GSXR forks converted to fit a Daytona).1 point
-
Cool. Yes. Shorai works great with our V11’s. Some say the computer also benefits from the quicker power characteristics on tap from the Shorai. i use a CTek lithium charger and it works great too1 point
-
I bought Shorai LFX21L6-BS12 battery for my bike. It is a bit bigger than the dealer recommended, but still slightly smaller than the standard battery. It came with lots of different thickness self adhesive foam pads to make it a firm fit in the battery box. It spins the engine faster than the previous battery, so I think it is awesome. The only two downsides are COST, and the need for the Shorai charger for balance charging and storage. It charges fine with the V11 system, and the Ducati regulator hasn't missed a beat (after I fixed some bad connectors and grounds).1 point
-
I installed a Shorai light weight lithium battery and it’s been great! No issues at all and it weighs a fraction of what the regular battery weighs. Cheers1 point
-
Replaced final drive fluid (Guzzi pre mix) Changed oil/filter (Motul 300V Racing) Transmission fluid (Motul synthetic 300) Tires (Michelin 2CT’s)1 point
-
Like this docc. You compress the ends and lock them via a knurled section on the end of the handle then insert them down the bore or hole and unlock them. You then feel them around until they are at the largest dia point and lock again. Remove and measure with your Mike or vernia calipers. Very cheap, this set is $36.95AU on ebay. Ciao1 point
-
Myself and my buddy Bill will attend once again. Would not miss it!1 point
-
Loosening oil filter = use quality filters (no early UFI !) and tighten 1 1/8 (one full turn plus one-eighth) turns past oiled gasket contact. The WIX have not failed me, tightened to that derived spec. (Much tighter than my intuition meter would have suggested . . .)1 point
-
1 point
-
We forum veterans have to pull together to reduce every alibi Al could invoke to miss another Sputh'n Spine Raid . . . It's just "over the hill", buddy!1 point
-
Quick going true, and 16g wiring Cheers tom Sent fra min SM-G903F via Tapatalk1 point
-
Ohlins USA is in NC Henderson or Hendersonville 10min s of Asheville. there is also a gent a few miles west of there...factory trained...grew up on a race team...blah blah blah.. great guy. works out of a garage at his home. looks are deceiving.. I will try and get you his info tomorrow andy1 point
-
speaking of COTA (as posted earlier) Earl's Art Gallery (in N Tex. Illinois Bend) (and it was freeezzzinnnng cold 40 degrees and 40 MPH wind) and then I rode all the way to Stonehenge in Kerrville. After I rode from Earl's-hengde. Who knew there was the Cadillac Ranch, Earl's place and Stonehenge in Texas? Celebrating my cough-cough 65th B-day Disclaimer, I didn't take the last photo, that was by Darren1 point
-
[sign216, I noticed many of your early images in this thread need to be restored . . . > edit: so, lots of images to restore if you various posters would be so kind . . . In the process, I rediscovered how breathtaking this guy's work is: CarbonArt Motorcycle Lifestyle1 point
-
I can't comment on the quality. I installed it a couple of weeks ago. It works. I like the looks. Who knows how long it will last? Mike1 point
-
As if you didn’t have enough advice already: Tank Off Maintenance Checklist Wheels Off Maintenance Checklist1 point
-
This should be good - I’ll be following your progress with great interest & listening to all the useful precautionary tips! 👍 The ‘ol Quota’s been having a bit of a lazy snooze...1 point
-
Should be fine if it hasnt seen too much weather. Apart from oil changes and filters.. new plugs, new tyres. There'd be a few things to check, like the earth on the back of the gear box is clean and earthing correctly. Change the relays. Lube all the moving parts and bearings like the ignition switch, levers, uni joints, swingarm bearings, headstock bearing, new fork oil and seals and probably rechroming the stauncions . New injectors or remove and clean. Same for the fuel pump - get it spinning by air before you apply power and burn out a seized pump. Check the oil pump, no chips in the teeth and spins ok. Spray oil everywhere in the engine and heads. Check and adjust valves tolerances. When you have checked everything, spin the engine up on the starter only (with kill switch on) a few times for about 10 secs each time and for a total of minute Or until the oil light goes out. This would generally happen after about 40secs but if it hasn't primed the oil system by 60secs, you should see if any oil is circulating before continuing. If all good, then start the bike. Ride..1 point
-
1 point
-
Greetings! Last week I got really lucky. After looking for a motorcycle for over a year and a half with no specific model in mind, I came across a really nice example of the 2001 V11 Sport Rosso Mandello. With a little over 4000 miles, good service history records, and a reasonable asking price, I was sold. I am looking forward to getting the bike sorted out this week and hoping for some good riding weather. I am in Denver, Colorado. Thank you for providing this forum!1 point


