Leaderboard
Popular Content
Showing content with the highest reputation on 06/27/2019 in all areas
-
2 points
-
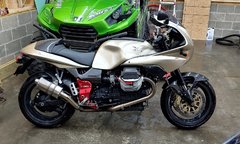
Ten weeks out, to the Fifteenth South'n Spine Raid, and I'm so trying see that the Sport is properly prepared. [ Insert Waving-Wrench emoji that I currently am not allowed post ] If today's shakedown ride is any indication, I'm going to sprain my face grinning in my helmet! Cannot wait to see everyone!1 point
-
Stainless cycle has all sorts of kits for Guzzis. I used one when I de corroded the Mighty Scura. Good quality..1 point
-
https://www.ebay.com/itm/MOTO-GUZZI-V11-6-speed-tranny-polished-stainless-screws-bolt-kit-POLISHED/372643449830?hash=item56c347cbe6:g:ttEAAMXQltxQ5UYy Does this help?1 point
-
The Tach, Idiot lights and Ducati Energia Voltage regulator are all fed from the headlight relay so anytime the Tach is not working chances are the battery is going flat and you need to investigate straight away, first thing to do is see if the headlight is On. Of course if the headlight relay is open the Oil and Charging lights are not working either so you don't have any indication of a charge problem until the engine quits and you have a flat battery. The Voltage regulator must have 12 Volts to turn it On. My usual "get me home" fix is to wrap a wire around the black pin of the voltage regulator and stuff the other end in somewhere hot Some early bikes had the headlight fed through a normally closed contact of the start relay, it must be a 5 pin, This is an earlier version, Carl doesn't have an 03 Trace the Red/Black wire from the headlight relay to the regulator, see how pin 30 of the relay is fed from the start relay, Later versions are a little different, the headlight relay coil is fed from the start relay but the result is the same. You may find a better version of the diagram here but no perving at Carl's girlfriend Haha http://www.thisoldtractor.com/guzzi007/sportissimo.html1 point
-
1 point
-
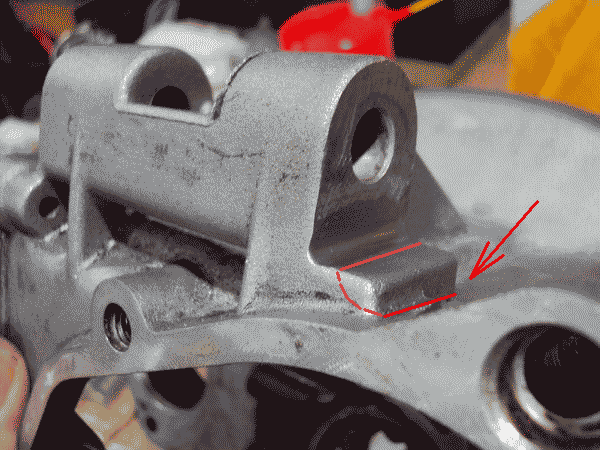
So here's the gearbox mount rework. 4mm round file and take it carefully. Finish off with some 800 wet and dry on the file followed by green Scotchbrite. Important to make sure the finish of the fillet is smooth and free from surface defects that may cause stress risers. Ciao1 point
-
It was the UFI, I'm sure thats what happened as when I went to drop the pan years ago I remember it came off by turning it a couple times, it was so loose it wiggled!1 point
-
Maybe you would rest better using the "hose clamp" stop method to anchor your filter and drop the sump every filter change? I don't love it, but some do.1 point
-
Do you you know what brand/ year of the filter that came loose? Early UFI? (faulty gaskets). Someone put it on "finger tight?" (Bad method for the V11 !/ tighten 1 1/8 turns past the gasket contact) A "quality" filter, properly tightened will not walk off. I say this after my twenty+ (5,000 mile) oil changes . . . YMMV!1 point
-
Docc's experience shows that the standard V11 oil pump is durable and well suited to the V11 engine. If someone is keen to replace it with a different design, then fine, but for normal use, it may not offer any benefits. A higher capacity pump will absorb proportionally more engine power, and surplus pressure will be dumped by the relief valve. The standard pump still has enough capacity to allow use of the oil cooler (if the oil temp gets above 70degC, which is not happening this winter around here). Guzziology says GU 30146400 pump (fitted to the V11) has been around since 1991. It has 16mm width gears instead of earlier 14mm gear pumps, but the oil pressure relief stayed the same. This pump not the same as the 21mm Daytona/Centauro pump, which is not only bigger, but spins faster. Dave Richardson says "these pumps fail at about 35000km because of the lack of a bearing on the driving shaft. A favorite solution was to copy the MGS01". 16mm V11 OEM pump https://www.af1racing.com/store/Scripts/prodView.asp?idproduct=46944&sku=GU30146400&description=Oil+Pump+-+GU30146400 15mm gear aftermarket V11 pump. https://www.mgcycle.com/index.php?main_page=product_info&products_id=19851 point
-
I thought before I get too far into this gearbox stripping and painting I'd better check that the mounts weren't cracked. First step break out the dye check kit. Clean down the mount area and apply the dye. Wait for 15 minutes. Clean it off again with solvent and apply the developer. All good thankfully. Its not hard to see why they can crack here. There is not genuine radius from the vertical machined face to the horizontal area. its just the edge created by the face cutter. I'll create a radius here by hand as there's a decent amount of material and what you lose will be more than compensated for by the removal of the stress raiser from the machining. Ciao1 point
-
I don't use a hose clamp either. I understand the logic. Unlike other bikes (and cars) where if the filter starts leaking because it is coming loose you won't notice as it won't start dripping oil on the ground. With the internal oil filter it can fall off and you will loose oil pressure but there won't be an oil leak. Almost every other motor would have an external oil leak as the filter started coming loose. That would be easy to spot as an issue. That said, I simply make sure the filter is properly tight and so far that has been enough. Perhaps one day I will wish I had used a hose clamp. But so far I am good without one. If I ever start worrying about it I would be more likely to install an oil pressure gauge than a hose clamp.1 point
-
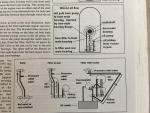
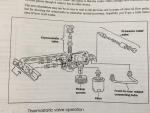
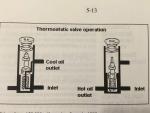
I have found a description in Guzziology that gives a description of the bottom end part of the system and have attached the accompanying pictures. I also located in an old post from 2006 from Pete Roper this description: So lets look at how oil gets to your bearings. Well, it starts off in the sump. In the case of the V11 'Broad Sump' motor the pick-up protrudes down to close to the bottom of the sump from above, through the gauze screen designed to take out the 'Big Lumps' should any suddenly appear! The pick-up goes more or less directly to the pump, this in itself is important because, and here is one of the most important things to remember when dealing with anything that is being pumped, THERE IS NO SUCH THING AS SUCK! The oil pump doesn't *SUCK* oil out of the sump, all it does is create a low pressure area within the pump body and the gas pressure within the crankcase will PUSH the oil up the pick-up and into the pump. Once the oil is through the pump it is then under pressure and being forced along mechanically but until it gets to the pump it is only being pushed by a fairly weedy sort of pressure. For this reason it is important to have as few impediments to flow as possible, that means a short, wide, gallery with as few bends as possible. While the pick-up on the V11's is quite nice and large the oil does have to turn through 90 degrees, twice, before it reaches the pump and the gallery in the block is no bigger than the earlier motors. Once the oil is through the pump and pressurised it is sent to the filter where the bits are strained out, (we hope!) the good news is that Guzzi motors are very clean and there isn't much inside them to wear or shed bits of 'emselves and load a filter up. Once filtered the oil then passes on to the oil pressure relief valve which is contained within the oil filter/thermostat housing bolted to the bottom of the block. The purpose of the relief valve is simply to prevent the oil pressure rising too high either when the oil is thick and cold and possibly at higher RPM. The oil itself has internal friction and if the pressure is too high it will both sap power and also try to spin the bearings. While the 'Ring' type main bearing inserts Guzzi uses are not prone to this and the back clearance of the shells to rods also seems to be pretty good a spun bearing is a rare thing in a Guzzi, or any other engine, nowadays but it can happen. Maintaining the correct oil pressure also means that the filter won't become over-pressurised, pop it's gasket or explode, which tends to be messy! After this the oil will pass over the thermostat which, when it gets hot enough, opens and allows the oil to pass through the cooler before going off for delivery to the bearings. From there on the oil simply has to get to the bearings and it does this through a series of galleries and pipework bolted on to the bottom of the block, essentially though it's very simple. After the thermostat the oil delivery is split. Some of it is sent to the front main bearing, some of it to the back. Both front and rear mains have a groove in the centre of the bearing face that allows some oil to circumnavigate these bearings and from there go on to the front and rear cam bearings. Also, above this groove, in the journal of the crank's front and rear main there is a hole drilled at a 45 degree angle in the crank itself that goes up to the crankpin. The crankpin itself is hollow and cross-drilled so that once the oil has filled the gallery in the pin it can flow out thrugh the big end bearings and out of the side clearance of the rods. The camshaft too has a gallery running down the centre of it and some, but not all, Guzzi cams have cross drillings to allow oil that is forced up the inside of the camshaft to spray out and feed various bits like cam followers with oil by splash, Some of the more aggressive aftermarket cams even have cross drillings in the cam lobes themelves. Finally oil travells up one further gallery to the top of the block above the front cam bearing where there are two drillings, one to take the oil pressure sender unit and the other one that takes the feed to the rocker gear in the cylinder heads.1 point


