Leaderboard
Popular Content
Showing content with the highest reputation on 08/14/2020 in all areas
-
4 points
-
Sure...Pic of the ring..they are fairly un obtrusive, and Pics of Sport Bag and Daypack bag..they also make larger ones..I like them because they do not touch the paint and they are very secure...not sliding all over the place..easy quick release of your bag on and off when you want to add fuel. .3 points
-
A number of months ago I translated an Italian AG forum posted in 2006. For O2 equipped V11 owners I share what started as some interesting research and culminating in implementation which I’ll come to later... Let’s get into it! 👍😎 Google translated: motoube wrote: I'll tell you what I know and why in my opinion the probe used on the Guzzi can be thrown into the rock and replaced with a more modern one. the lambda probe, which some call the O2 sensor or lambda probe, is placed in the exhaust line. we are interested in the one positioned upstream of the catalyst. this probe generates an electrical signal (in our case between 0 and 1 volt nominal) whose value is related to the oxygen content in the exhaust gas this content varies with the variation of the more or less fat carburation. the control unit reads this signal and, taking into account many other factors (TPS position, air temperature, engine temperature ...) makes corrections using the maps it has loaded inside. it will increase injection times for fat and shorten for lean. in general, above a certain speed, the probe signal is ignored. the probe used by Guzzi corresponds to a BOSH probe which has certain characteristics corresponding to the BOSH specification "LSH15", in jargon called the LSh15 calibration curve this probe was used on cars starting from 1992/93, it was immediately seen that its sensitivity and response speed were INADEQUATE TO THE REAL CONDITIONS OF USE OF THE VEHICLE. BOSCH ran for cover and created the probe with the LSH24 calibration curve. much much faster and much much more sensitive. realize that the LSH15 probe has such a slow response time to the variation of the exhaust gases that the control unit takes a thousand or more readings of the lambda value .... the LSH24 instead has a very good sensitivity and a response time equivalent to the reading interval of the ECU. on the cars the lsh15 was replaced starting from 94 with the lsh24, ALSO ON THE CIRCULATING WHEEL, for example FIAT ordered the assistance network to replace the "office" probe on all the cars that for any reason showed up in the workshop but they did not make a nominal recall of the call. in this way, 95% of the current assets will be remedied within two years. it is for this reason that I recommend (and do) to replace the probe originally equipped with the most updated version. it costs something, but the bike is better, the catalyst benefits from it, consumes less, the bike is more fun, etc. among all the probes available on the market, I have indicated to you to ask the spare parts dealer for the PUNTO 55/60/75 probe from 98 with a single 4-wire connector. because'? because it has the same connector that we have, because it has the longest cable but it doesn't create problems because it is the version with the right calibration because that pointed model is the most widespread car of that period and therefore it is the car model for which the greatest number of spare parts are sold, which increases their availability and decreases their price. the same probe is in the universal version, without connector, it costs about 65 euros, you have to cut the wiring of your probe and weld the wires and seal wire by wire with heat shrink, you have to respect the correct wiring (ground, signal, two heater wires) , sometimes the color of the threads does not match. do what you like and let the guzzi do what she wants. I'm replacing the probe. Uberto End translation. It certainly pricked my interest so I went searching here @ V11lemans for more information - & found one lonesome piece of advice by SimoneV11 but it appears it may have been overlooked as no further discussion referenced it. Another excellent article source was found giving more helpful depth into what’s exactly required of the role O2 sensors play. If this interests you please take the time to read. http://www.autodiagnosticsandpublishing.com/feature/o2-sensor-testing.html So I’ll just add one more link for now about the O2 sensor upgrade (about 2/3’s down page). Ignore the heading ‘Breva’ as it pertains to our V11’s. http://www.guzzifan.com/moto-guzzi-tuning-codes-infos-tips/ Have to leave this for now but will get back with further report. 💤2 points
-
You cant leave the upper clamp in the position you have it. The underside of the clamp must be flush against the bearing adjuster nut. The upper clamp acts as a fail safe to prevent the bearing adjusting nut from the possibility of backing off. Ciao2 points
-
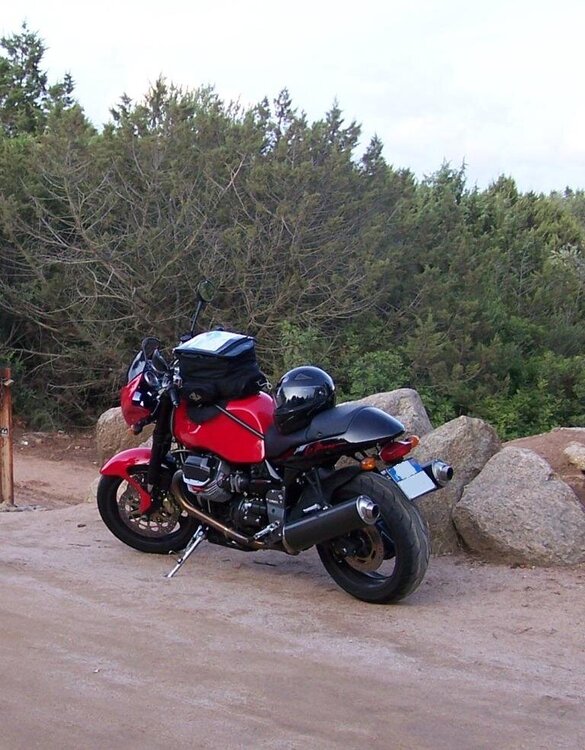
I have one on my Rosso Corsa Lemans...Having owned a lot of Aprilias I recognized the cap . Order the tank ring for a 2002-2005 Aprilia Tuono...same exact thing..went right on in 10 minutes..Got it from AF! racing https://www.af1racing.com/store/Scripts/prodView.asp?idproduct=94017&sku=TW-TRT.00.640.17500.B&description=SW+Motech+Quick+Lock+Gas+Cap+Tank+Ring I have the Quick lock " Evo Daypack" and the Quick lock "Evo SPORT" tank bags got them from Revzilla Love them2 points
-
So for those of you keeping score,it looks like the list for round two is as follows: Kane (2) Tom (2) Vic (1) Hammershaug (1) Footgoose (2) Doslemans (1) Vee eleven (1) TOTAL (10) This looks like a good start.2 points
-
I would put an amount of electrical grease in the cavities before plugging it up for a perfect connection .2 points
-
I've mentioned before in posts that the sound of the clutch engaged changes depending on how you release the lever as well. On my bike ( previous 2 valver with std twin plate clutch) when I start it and it settles into an idle the clutch will be a little rattly. If you then give the clutch a quick as you can disengage and re engage it quietens down by a good 75%. So a quick pull and release of the lever and it quietens down. I assume its the friction and drive plates re aligning on the splines and taking out some of the backlash. I used to do it after every start to avoid public humiliation and so people wouldn't think I was riding a Ducati:) Ciao2 points
-
That will be the pinions lashing about in the box. Balance the TB's and make sure the idle speed is 1100 rpm or so and it will probably be better.2 points
-
For example: https://www.revzilla.com/motorcycle/sw-motech-quick-lock-evo-tankring-adapter-kit Or any of the similar ones from other companies. My 20 year old Moto Guzzi bag that I got with the bike has been starting to fray, and I've already had to sew up a blown seam. Starting to explore my options. My assumption is that there must be an adapter out there such as these which will fit the V11 Sport, even though the manufacturer doesn't list one. Hoping someone here might know. Thanks! __Jason1 point
-
Hi, I still get emails asking for the V11 BIN I made available several years ago. I can't find my post with the download links, which don't work anymore anyway, so here's the current download link. https://drive.google.com/file/d/1e7MMuO6vrUZGFfmkCtL3zsW1qeS6uDgY/view?usp=sharing The base setup, and that's quite important to follow to get the best results, is: - TPS set to 157mV with all mechanical connectors removed and throttle completely closed - Both bypass screws completely closed - CO trim set to 0 - Idle sync with both (if so required) throttle stop screws - Running sync as usual And while we at it, here's the link to the Jackal (works with any California with 15M) BIN. Same base setup as V11, but I recommend a larger valve play of 0,3mm for exhaust and intake. The Jackal BIN is quite recent. https://drive.google.com/file/d/1Wb2LXrRrgDI1WO0krnb_GeiAvewbwA1K/view?usp=sharing Cheers Meinolf1 point
-
sorry if I'm misreading this situation but I'll suggest it another way. Leaving all the upper stuff as is (but loosen the center pinch bolt on the upper triple clamp) then loosen the fork pinch bolts on the lower clamp, and slide the whole mess down through the lower clamp holes. The relation between the top of the forks and the upper clamp and your bar position will remain the same as it is now. The center cap bolt will go back as it was before you removed it. There should be no change to the cables fitting. This is essentially "lowering" the forks in the clamp, and raising the bike in relation to the road. Keep in mind you'll have to raise and brace the front of the bike and possibly remove the front wheel to do this. I've not done it without the front wheel off so I couldn't say for sure.1 point
-
1 point
-
I copied the "Image Location" from your duplicate thread and pasted into your reply, then deleted the duplicate thread. (Hope that's okay, bud . . . )1 point
-
1 point
-
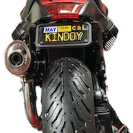
thanks Kindoy2. got pics of your kit by chance?1 point
-
1 point
-
1 point
-
Put me up for one too. Need a backup in case the first one proves to be lost over the Atlantic.1 point
-
Sounds like a proper nice garage! When the Norge first came out I had reserved one to rent from Agostini’s, and was pretty excited. Plane broke down in Detroit on the way over to Italy, and I spent my “work vacation” in Wichita getting the plane fixed. A painful memory. Rode Red to work today, during this brief interlude from the hot summer temps (I know.... hot is all relative). Was about 50F in the morning, and the cool clear air along with a fresh throttle body sync helping to lift both our spirits, she purred like a kitten. Love it.1 point
-
Having a Norge and a V11 (Scura), well and a Griso in the garage, each does its thing well. But agree, the Norge is a mileage muncher and much more comfortable for the passenger! I see you bought the proper Silver color as well...Enjoy!!!1 point
-
1 point
-
Of course, @Guzzi2Go and @luhbo were entirely correct that in spite of all the little things I tried, the battery light flicker at idle after riding remained. Until I finally changed the regulator. Although the charging remained 14.2V or above, it appears the old regulator had "failed in a special way" and was "on its way out" with continuity developing between the red charging wire and the case. I never thought of monitoring for continuity there, but it makes sense. New regulator: no more flicker.1 point
-
1 point
-
1 point
-
1 point
-
The sound of pulled clutch is ok. But when I release the clutch lever (the lever doesn't touch the handlebar) the sound of the engine isn't the same. Sometimes it is very noisy and sometimes it's quite silent. The same effect is after revving the engine. Sometimes the idle knocking is silent. Sometimes very loud.1 point
-
Yes, the 'Chinky-Chinky-Chinky' sound when the clutch is pulled is made by the intermediate plate teeth rattling in the flywheel splines as the flywheel accelerates and decelerates with the power pulses of the engine.1 point
-
Is it normal? When the clutch lever is released, the sound always changes.1 point
-
I have a set of hard bags for sale that I removed from a recently purchased Centauro. Bags are both in excellent, barely used condition and have the Guzzi emblems on the sides. The only flaw is one of the internal straps needs the buckle sown back on. Two keys included. I also have the mounts and hardware for a Centauro with mounting instructions. I would prefer to sell them as a set. Looking to get $475 for all and you pay shipping. I'm located in PA, USA. Message me for detailed photos and shipping info.1 point
-
1 point
-
Hopefully everyone knows the smaller #s will be intake clearance and the larger #s are the exhaust clearance because of the hotter components and will expand taking up clearance .1 point
-
Yes, I typically state valve clearances Intake first, then Exhaust. I'll edit posts to make clear it is opposite.1 point
-
This would be the 3rd set of different valve clearances I've seen from Meinolf for various bikes and probably due to language differences the usual intake/exhaust way of expressing the figures he has now given them as exhaust/intake so just be careful to not get them the wrong way around if this is what you want to use. Maybe docc you might want to change it around in the post or maybe highlight it. Or maybe its just me? Ciao1 point
-
Hi, I'm not sure if I know what you mean by “world spec”. The service manual recommends 0.15/0.1mm for exhaust/intake, I use 0.2/0.15mm respectively. But it's not critical in regards to my BIN. Cheers Meinolf1 point
-
0 points

