Leaderboard
Popular Content
Showing content with the highest reputation on 02/01/2022 in all areas
-
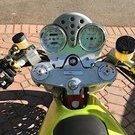
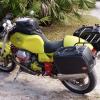
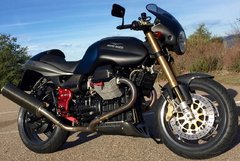
Hi guys, am back after a break while my V11 was spending time at Sean’s moto spa and rehab center. I was pretty much off-line a lot for the time, which was nice to take a break from the screen. Anyhoo, the badass V11 green goddess is back on the road with a new Mistral crossover, Ohlins shock, Racetech fork springs, and a bunch of little leaks and other stuff sorted out. Also now running a Roper windage plate and the Chuck & Scud shift spring and bracket, as well as Knight Design lower pegs. All of this compliments the Michelin Road 5’s I put on her recently. She’s running great, fun as hell, the suspension upgrades really brought her to life. I have a few more things to sort out like a dead speedo and a few more leaks to chase, and I have just received from Ghezzi-Brian a carbon rear hugger and pretty nice looking red pod filters, so am planing on cleaning up the rear wheel and air box areas. In the meantime I’ve been using the Hypermotard as my daily driver, and managed to get a 1,000 mile camping trip on her up and down the coast which was a blast. Also been borrowing an Energica electric for a bit which is a hoot. But since getting the V11 back on the road, and with the upgrades and improvements, I still love this bike the best. It’s good to be back on the Guzzi. I hope all has been going great for you all. Cheers!8 points
-
So I sourced a used pair of late model 43mm fork assemblies for the V10 Sport. Naturally when they arrived they were not quite what I expected condition wise probably due to the less than ideal packaging. Both legs were leaking with one side disguised by a piece of absorbent material under the dust seal and the other not. There was obvious damage to the other chrome slider as shown below. Both are dead straight and the stanchions are in good condition considering their age with minimal wear. The bushes were also fine for wear but they'll get replaced anyway. The real issue is removing the brake and axle brackets to get the sliders re chromes and ground. There is a small grub screw in the brake bracket which comes out with some heat to release the Loctite but the damage to the slider threads it causes needs to be addressed before the joyous job of trying to remove the sliders themselves. I drilled a small 5mm screw ( locking grub screw size) down the centre screwed it back into the bracket then took a 3mm drill ground flat on the end with some cutting clearance ground on the tip and used that to remove the damage caused by the pointed grub screw. Worked well. A 3mm end mill would work better if you have one. Next issue is the bracket removal itself which needless to say is held on with loctite on the very fine threads used on the chrome sliders. These are notoriously hard to remove and need quite a bit of heat application to break the locking compound. I bought a 43mm clamp and also drilled a hole in the bench for an 8mm steel rod to fit through the holes at the top of the slider to provide even more resistance to turning. You have to love the flexibility of a wooden bench for things like this. I also machined up a pair of bushes that I could clamp into the forks that fitted a piece of steel rod I had on hand. I wanted to provide as much support to the axle lug as I could. I don't have an axle at present but I thought I'd need a bit more leverage anyway. So gas burner and temp gun in hand I heated up the bracket and they finally released from the thread locker. There's a bit of loosen and tighten work involved initially but eventually taking it steadily off they came without damage to the threads. As you can see there's a lot of thread locker on there. Most people leave this sort of thing to the fork re chroming/refurbishing guys but I like a difficult life and it saves $50/leg in costs. So next job is off to get the sliders re chromed and ground. I have a seal and bush kit on the way and I need to refinish the brackets and repair a slight graze mark from an obvious trip down the road. The objective is to replace the std cartridges with aftermarket jobs and machine up a Titanium axle. Packaging! Damage. To the sellers credit he refunded me the cost of repair to this leg. The bench setup Brackets and axle bobbins I made up. The graze on the lower bracket looks worse than it really is. I'll just use some Devcon F to fix it and shape it back before re painting in 2 pack. Thread damage from locking screw that requires addressing before bracket removal Ciao4 points
-
The red frame v11 sport (KR) got some bad reviews in Germany and other places, because not as other old Guzzis, it wasn't so stable. They were delivered with 170 wide tire on 4,5", what is a to wide tire for the rim. And that makes the tire shape to pointy. German tuner Dynotec made a corrected version of the first gen V11 sport, other offset triple clamps were part of it. But in Italy, Aprilia just owned Moto Guzzi, and didn't want the bad publicity so they took drastic measures. The second generation(KS) got a wide tire rear, the popular 180/55 on a 5,5"rim. The area between swingarm and gearbox got a extra steel rods to make it stiffer. with extension to the engine crank case. The front engine mount was reinforced. And the steeringhead was extended to have more wheelbase. The third generation(KT) kept same geometry but got optical tweaks and the 43mm forks where this subject is about. Not all changes occurred at the same time, first mount old stock before making new. It has been always the same. The Dynotec v11 http://www.dynotec.de/presse/DynotecV11_2000MO.html4 points
-
That "Viton" addition is very important in my experience. A PO of my bike installed a non-oil-compatible o-ring there, which had swollen so much it pushed the sensor far enough off the phonic wheel to not make the engine run properly >3k rpm anymore. Took me ages to find the cause...3 points
-
Just to try and clarify that Guzzidiag is the most available way to see, and set, the CO Fuel Trim. Many V11 have been reported in the negative double-digits. This should be made > zero <, at least. Besides that, the entire V11 tune-up is largely analog using a feeler gauge (valve lash), voltmeter (TPS baseline), and some dual vacuum interface to balance the throttle bodies. Guzzidiag will also show you the correction value (discrepancy) in RPM between what the ECU sees and what our tachometer shows. This is especially important when selecting the idle RPM if the tachometer reads 300-500 RPM high and our 1100 RPM idle selection as actually 600-800 (very unhappy!) . . .3 points
-
There may also be the UV factor implied. You know that UV rays affect the molecular structure of elastomers. This is why you always need to put your o'rings in opaque bags, so they don't catch the light, besides the 10 years shelf life. We have a lot of sun here in this State. I have seen what that did to my joints on my cars, which have hardened precociously. There are different compounds to fight it. But nitrile is one of the cheapest, and one of the most prone to UV alterations. None of the tire manufacturers are going to tell us what recipe they use, but for sure hard light induces premature aging.2 points
-
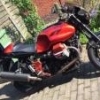
I really like what he did and his eye for details, but it looks like he had a bottomless wallet. What I really don't like is the closed swingarm. It's too bulky for my taste. And the red line on the fairing does not line up with the red line on the tank/seat piece. But overall: hats off!2 points
-
Pauldaytona supplied the answer to this. The RC, Rosso Corse has 2 types of Ohlins forks fitted a larger and small dia axle type, so T5/6 refers to that plus some other small changes. If you want details about stuff like this Paul is the man to ask. Ciao2 points
-
In the Guzzi Fiches I have found that revisions or specs are given in the last part of the breakdowns. In reference to T5/T6 it shows Up to Frame KT211300 =T5, After frame KT211301 = T6. Paul B1 point
-
I remember you reporting this. Maybe it is my safety culture, but if I had been a dealer, knowing that leaving your on the road with a worn out tire was not the best course of action, I would have made an exception. If only for keeping my peace of mind. Because if you had had an accident and it had turned out a worn out tire was the culprit, there is some kind of mental liability there. I understand what you mean with riding solo. Riding in a group implies responsibility; some riders don't understand it. It is no longer individual driving and different set of rules apply. Else, there is no point. I did a lot of team road riding before, I am more into solitary rides now. Not that I don't appreciate tandems or more, but I like to stop to take impromptu photos whenever I see something I think can justify it; which is against the group safe ride procedures which have determined stops established ahead of time.1 point
-
Opps. Thought you meant the fork springs. Shift spring works as a direct replacement, at least the one I got.1 point
-
1 point
-
It is not as bad; I requested the tires on December 29th; Davey said he would tell me when he would be ready to install them. He asked me to bring the bike on January 21th; I brought the bike on January 27th. From the 29th until the 27th, it was hidden time since I kept riding. I could have gone to another shop and gotten the tires installed in one day if it had been an emergency. I am just a faithful guy.1 point
-
Understood! I have started to plot my course yesterday, and given that Paris and Gladewater are still in the stop list, I was going to put Donie on my way back from Paris, like I did in 2021. But I can also do the one day transience. Depending on how late in March since I have something already in the pipe. I am not (yet) too preoccupied with the Guzzidiag; it is more a "I want to get it working" than a real need. Davey showed me some vintage bikes that he restored for Sunday riders, and it must be taking a lot of time just to source the parts. Six weeks is the magic number the lady at the front gives you for whatever you want to do.1 point
-
You've been waiting 6 weeks to get tires on your bike? Or am I reading this wrong?1 point
-
Correct...the Sidecar company in Donie, they are having an open house in late March. Part of the Giro di Texas, bag a stop, have a nice lunch and hopefully a fun ride up and back with a few other folks who plan to join me. One Beemer, Yamaha and another Guzzi (Stelvio). Now the difficult decision, take the Norge, Scura or Griso...I registered them all for the Tour of Texas so depending on the day, I can pick which bike to use for getting those tour stops. I posted up on another thread in case any other Guzzisti want to join, weather permitting, should be a nice ride up. If you need any assistance on Guzzidiag, send up a flare. Could be the firewall! I've never seen Mike or Davey turn down a job based on how many $$'s it will generate, but that could be a factor in prioritizing the work for sure. However I've done some big jobs and it still took 6 weeks, so maybe there's really no method to the madness, other than FIFO.1 point
-
OEM Part Name: intake air temp sensor / Magneti marelli Moto Guzzi Part Number:GU 30729330 Replacement Part Part number or other identifier:GU 30729331 Differences from OEM (if any): none but 1/2 price.. Other Compatible Vehicles:Aprilia 1000 Tuono R Factory / Aprilia 1000 Tuono V4 R etc Other Comments: Website link for source:https://www.stein-dinse.biz/product_info.php?products_id=465661 Link to Further Discussion or Tips:1 point
-
I haven't spent a lot of time trying to figure out the science, but I have two premises, one is that the rear tire temperature is almost always 10 degrees C hotter than the front ( I use my Steelmate TPMS to monitor both pressure and temperature), and I suppose carries more weight due to panniers and rider position. I would imagine the temperature is driven off multiple factors (downstream of engine, exhaust?, weight), but I would think heat is a primary contributor. Others who are more expert can chime in...perhaps there are other factors as well.1 point
-
Good suggestion, and yes, we've ridden this and all of the national forest roads hundreds of times over the last 25 years...always alert, and watch out for the boys of the FM3090 Sport bike club who like to run 100+ regularly from Navasota up to Yankee Tavern, and have unfortunately been responsible for the signs up there warning motorcyclists to watch out...several have not made it.1 point
-
Thats not a bad srike rate Scud, 2 out of 3. Mechanical engineer,entertained, you can work on the missing piece:) I've said more than once that I dont need to be the smartest guy around because I know smart people to ask. This thread proves it. Ciao1 point
-
1 point
-
I ordinarily would not trust calculations hand-written on "notebook paper." but since about a third of the lines are melted off by *some unknown solvent*, I feel really good about this effort. I presume there may be *special tool fluid* involved . . .1 point
-
OK, I'll hold... and I'll try to get a more precise measurement of spring travel. It's hard to see the exact angles of the springs when they are installed, so I assumed a right angle for the short arm. As I calculated on the last page, a little less than 2.5 coils translates into more pressure (which I've been calling preload, even though that's probably not the right term). Using the variables you provided, I can find the degrees of travel with the thinner wire to produce the same pressure as the original spring (in the at-rest position). That works out to an 886.5 degree coil (just 13.5 degrees less than 2.5 coils). What's that funny quote about being a member of Moto Guzzi's post-production R&D program?1 point
-
Sounds worth trying. I don't think that the lever needs much pressure at all to be pushed back into position. I'd be willing to invest $300 from my Play-Pal account on 50 springs. Fine-tuning idea follows: I estimated travel for downshifts at 38 degrees. The extra coil gives us 48 degrees range - but carries the potential risk of a too-weak spring. What if we use half of the 10-degree excess available travel for preload? 2.5 coils is 900 degrees. Therefore, 895 degrees would be 2.48 coils. I reckon that would give 5 x 1.8 inch/lbs as pre-load to compensate for the weaker, thinner wire. Does that make sense - or is that too small of a difference to mean anything? The at-rest spring would appear a little more open - the opposite of the fatigued spring in your earlier picture, which is 12 degrees closed. If I understand this correctly, these are the pressures applied by the two springs when installed: Stock (1.5 coils): 2.9 in/lb x 22 degrees = 63.8 in/lb Thinner (2.5 coils): 1.8 in/lb x 22 degrees = 39.6 in/lb We could get to 48.6 in/lb with 895 degrees of coil (5 degrees extra preload), or to 57.6 in/lb with 890 degrees (10 degrees extra preload) Gosh, this is more analysis than I signed up for... but I want a spring that won't break.1 point
-
Thanks Chuck - that's how my pre-emptive replacements looked too. It seems that one potential solution is to stay with the existing thickness, but manufacture it so it looks like that - slightly more than 1.5 coils. That would keep the downshift travel under the limit you calculated. If the current downshift travel is 38, and the maximum safe travel is 30.48, increasing the coil length by 12 degrees would cut the downshift travel to 26 degrees. The fatigued springs work perfectly, until they break. There are no symptoms or advance warning. Another is to use thinner wire and add a coil - but maybe we could add 7/8ths of a coil or something like that. My thinking is that if the thinner wire is weaker (and less likely to break) that it will also allow more travel. Using some more travel in the at-rest position would increase the tension - possibly close to what the current spring does, or at least what a fatigued spring does. I can measure that space tonight, but in effect we already have a measurement. It is exactly 3 times the thickness of the spring. The third wire (in pic above) goes in like a tight feeler gauge. And this is kind of fun. But it would not be any fun at all if this was not a spare tranny and I was anxious to get a bike back on the road.1 point
-
It's hard to get a good measurement with the spring installed, but I estimate that the spring is at 22 degrees at rest when installed. Springs on the towel approximate the installed position. It relaxes slightly on an upshift: This looks like the spring might need to travel 38 degrees for a downshift. So... I'm no engineer, but what if the 90-degree tab was a little further along the bend. The current active coil is 1.5 turns, or 540 degrees. If we put the 90 degree bend at 550, that gives us 1.53 active coils. But more importantly, it cuts 10 degrees off the installed position, which would bring the downshift travel within spec.1 point
-
Piano or music wire definitely has standards. All I've been saying is detailed in my ancient (naturally) copy of the mechanic's bible. The composition of the alloy, and how it is manufactured. There is a whole chapter on making springs. This stuff isn't rocket science. It's been known before the turn of the last century. 2017-11-08_12-50-01 by Charles Stottlemyer, on Flickr1 point
-
^^^^^Where did you come up with that? Uhhh, there are standards for piano wire that have to be met. For instance for 304 stainless wire.. If there were no standards, making a spring would be a crap shoot.1 point
-
The spring has 1.5 active coils. A thinner spring might be part of the solution. And extra coil would take us to 2.5. I'll take a bunch of measurements tonight. I fit a much thicker wire (the one I made out of solder) - so maybe a thinner wire with an extra coil would fit? A thinner spring brings a concern about it being able to hold the arm in place. From what I can see, the arm does not require a lot of tension to be held in place. Braking will flop it forward and sometimes land it in the right position. That's how I was able to get a few shifts on the way home after my recent spring-break (it sounds like more fun if you call it Spring Break). But when I found 3rd I was close to home so then I left it in 3rd. I also noticed that when I pre-emptively replaced the spring on the Scura that the original was significantly weaker than the replacement, which broke shortly thereafter. I put the original, weaker spring back in and it's been fine since - but maybe that's because there's a spare under the seat.1 point
-
Just for giggles, I ran the numbers with 2 active coils instead of 1 and got 48 degrees safe rotation. Don't know if there is room for that or not.1 point
-
1 point
-
Faith. It does work both ways. OTOH, I was in Arkansas in June and no dealer in Russellville (Honda and Suzuki, two dealerships) would put a tire on my Ducati. The Honda dealer would ONLY work on Hondas- they were backed up for months. But the tire change would've taken, what 20 minutes? I think the big shop in Fayetteville would've done it and had me on my way. I was heading home anyway and it was a good excuse to leave with riders I wasn't comfortable with. A word for the wise when traveling.0 points

