Leaderboard
Popular Content
Showing content with the highest reputation on 05/25/2022 in all areas
-
I've been waiting to fill my rear drive until my Chevron Delo Gear ESI 85w140 came in. Today was the day. First thing I noticed is that considering the labelled viscosity, it seems pretty loose in the container. Far sloshier than a heavy conventional gear oil. <wary look> Visually it's darkish golden, not much different than other lubes. No particular smell. I added ~255-260cc to my dry, clean gearbox. While hard to see through the fill hole, it's quite obviously far above the 'level plug' on the back of the box, and someone has probably figured out before that the level hole *might* be correct if it was horizontal to the ground with the axle. Turning the wheel, the oil appears thinner than the Redline heavy shockproof I had in it, as well as the Lucas/moly additive just lastly. But it also carries up the gear well and leaves a heavier coat than I expected. All my research says this should be as good as it gets, and has alien magical properties unknown to lesser oils. I'd say 'we'll see' about how well it works, but truth is there hasn't been any shortcoming in previous oils to compare to. <shrug> I feel good about it, which is about all we ever get to say about gear oils.5 points
-
3 points
-
The 1980 T3 California has made it out! It has been a long cold Spring around here. Still cold!!3 points
-
Awhile back I placed an order from McMaster for all relevant sized bolts in stainless, mostly socket head and include flat washers and Schnoor in several sizes. Small bags of each. Not a huge amount of money and darned handy to have a little hardware store in stash, having a few metric bikes. I replace everything with stainless where it's low torque or of no consequence.3 points
-
Yes, indeed the early "chin pad" tank will "hold" 5.8 US gallons. It just will not deliver it all through the left side fuel tap having trapped about 3/4 US gallon in the right side tank "saddle." More than once to my chagrin.3 points
-
Problem solved, I had reconnected bullets earlier, bad mistake. I cut wires and put in a different connector and all seems good. Grateful for this board, I love this motorcycle but without you guys helping I think I would have pushed it off a bridge by now.2 points
-
Living on the Seacoast myself, I have to admit it's a constant battle to keep the brown menace at bay- 'Rust never sleeps'. I replace anything I can with 316 Stainless and what I can't get in stainless I get in a phosphate black and coat it with Cosmoline RP342, either sprayed or applied with Q-Tip. Once dry, you can wipe away any excess you find distracting and it will remain in the pores for the rest of eternity. I haven't seen a spec on anything I've used it on, ever. Shouldn't be a surprise given that was it's purpose from day one, but nobody thinks about Cosmoline except when they have to clean it off a WWII relic.2 points
-
2 points
-
buongiorno a tutti... cerco disperatamente i codici colori per una v11 sport scura, cerco anche tutti gli adesivi, qualcuno può aiutarmi, grazie in anticipo a tutti1 point
-
1 point
-
1 point
-
1 point
-
Metal fatigue failure from years of overloading the Tekno pannier. At first I thought the welds failed, but it was the three metal tabs that broke. My fabricator decided to connect the entire frame tab to the tubing instead of the three separate points. He also addressed the other side preemptively.1 point
-
Docc that looks ugly! What was the cause of that carnage. A lay down or a tie down? I've seen some funky poor welding on a variety of alloys, but that repair looks quite good.1 point
-
I found a spare parts catalog titled V11 Cat. 2003-2004. I downloaded it and shared it on Google drive. Anybody clicking this link should be able to access it and download it. https://drive.google.com/file/d/1gKVAaksRzY3CGASXp0ubwHprffQxac6r/view?usp=sharing1 point
-
I've had some good luck at Ace Hardware, they have lots of screws, metric and SAE, different heads. In fact for the V11 rack, I wanted longer screws than those which came with the original package, and found exactly the same recessed hex head shaped, but a bit longer to get more purchase on the thread at my local ACE hardware. They were silver, so I just painted the heads black to hide them on the rack frame. You might have luck finding something similar for these, and they have a long metal frame in the bolts section that you can match your thread to so you can guarantee it's the right coarseness and thickness.1 point
-
Ho parlato con Agostini questa mattina con questa richiesta, e poi anche ho mandato un email al signore con cui ho parlato. Spero trovare la informazione pronto. Si vuoi parlare con Agostini direttamente, il numero e (39) 0341 735448. Saluti da Texas.1 point
-
When I purchased my first Japanese motorcycle in the early 70's, they all came with cross head screws. I did not know at that time that Japanese cross heads were different than European ones. We ended up destroying the heads rendering the screws useless. But dealerships sold socket heads replacement kits for all your motorcycle cross headed screws. The V11 is equipped with socket head fasteners, but not stainless for the most part. I wish there were stores like before, where you could go and purchase the exact amount you needed, rather than packs of several.1 point
-
A lot of the fasteners on my bike need treatment. I was hoping it was only cosmetic that I could address after completing the Tour of Texas. It seems that I am going to have to remedy that situation sooner than later. The head snapping off clean on that screw is a wake up call.1 point
-
Early tank off bike and sealed up, but no lid. I poured 22.4 liter of water as accurately as I could measure, up to the bottom of the nylon collar, not touching it. Given the inevitable swelling, this supports the 5.8 gal capacity.1 point
-
Your idea of using the two-nut method is good. Simply precede the attempt with a penetrating oil and heat application. Looks like the other fastener should also be addressed . . .1 point
-
My tool box is pathetic Docc.... I have nothing but odds and ends. The proper extraction tool from Facom is expensive. But this is something a guy with a workshop and continuously working on bikes would have. Already finding Metric size fasteners or anything metric is challenging here. So far, I have purchased all the metric tools and fasteners from McMaster.1 point
-
Good plan! Better than the drill + screw extractor. Those fasteners look very rusty, typical for a (Gulf) coastal bike. PBBlaster has worked for me, but maybe not as well as "Ed's Red." (50-50 mix of acetone and automatic transmission fluid). And heat. Did I mention *heat* . . .1 point
-
@docc I can confirm the screws are M8, length 25mm. I removed the elastic stop nut from behind with a 13mm flat wrench. Rather than using a vice grip, I am going to try the old trick of using two nuts one against the other. There is also a tool that grips the threads, I forgot the name. Here's the tool that I would need to use: https://www.grainger.com/category/machining/machine-tool-maintenance/bolt-screw-extractor-tools/bolt-screw-extractors?attrs=For+Bolt+Size|6.00mm&brandName=FACOM&filters=attrs%2CbrandName1 point
-
"The Price Is Right " relays are why I carry spare OMRON G8HE or high current rated CIT onboard. Not for mySport, but for my V11 buddies that didn't get the memo . . .1 point
-
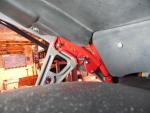
Is there enough threaded portion of the remaining fastener protruding inboard to get a clamping pliers ("ViceGrip®") on the turn the fastener inboard to remove (after a liberal soaking of penetrating oil-of-choice plus, maybe, a bit of heat gun)? Sorry for this scary view of my broken frame tab, but it shows how the fasteners can protrude inboard . . .1 point
-
I'm quite amused by all this forensic interpretation of long or short internal or external fuel tank capacities verses an ITALIAN owners manual specification. That of course together with the almost universal degree of tank swelling these tanks suffer on Ethanol fuels and whatever happens dimensionally to a 20 year old nylon fuel tank as it ages. The only way to really know what the "useable fuel" is for a particular bike is to set the bike on a stand upright and drain the fuel out via the fuel tap until it stops running then close it off and add the measured quantity to bring it up to the full level (whatever that is as everyone has a different assessment of what "full" actually is at the petrol pump) Ciao1 point
-
Have you looked here: MG Colour Codes (mgcn.nl) or Moto Guzzi tuning, codes, infos & tips - guzzifan.com - the site for Moto Guzzi fans Stickers are available here: Sticker and Decal sets - Stein-Dinse Online-Shop Emblems, décor, stickers (hmb-guzzi.de) MOTO GUZZI - New parts - Stickers & Badges - Page 1 - TLM Nijmegen1 point
-
When you say "get older" and "oddball things" in the same sentence, I get a creepy feeling and have to take a leak and swap my relays around . . .1 point
-
1 point
-
I haven't had much luck with *anything* I've purchased over the past 10 years. I assume anything new is Harbor Freight, regardless of the label. The Chinese Conspiracy is pervasive.1 point
-
I have a Blue-Point made by Jaco that's about ... 40? Years old now. Doesn't have the safety relief but has been reliable, accurate, and consistent across time. I did have to replace the plastic disc in the pressure release button once about 15 years ago.1 point
-
I learned about JACO from a trusted friend, SpineRaider, and expert technician. I like the analog dial, built in pressure relief valve, and angled chuck (they have other products and configurations): https://jacosuperiorproducts.com/collections/tire-pressure-gauges/products/tire-pressure-gauge-elitepro-series-100-psi1 point
-
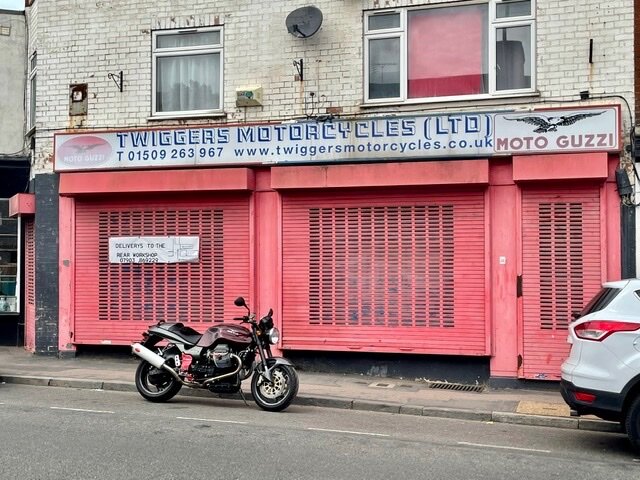
Throttle body balance today for the “grape ape” at Twiggers in Loughborough. Although they haven’t sold new Guzzi’s for several years, and the retail part of the business is now closed, their workshop is open for repairs & servicing. There aren’t many independent Guzzi specialists left in the UK, and I value being only 15 miles away1 point
-
Gotta say, riding mySport today about 100 miles/ 160 km, the improved braking feel and power after cleaning and rotating the front brake pistons (plus fresh fluid) is really pleasantly noticeable. So worth doing with every tire change!1 point
-
This is about as "before" as it gets. Day One: August 3 , 2000 . . .1 point
-
Thanks, my man! I've always tried to keep them "wiped down" and especially when I do the brake fluid bleed. This time I went with a new method and used hot water, brush, and the SuperClean degreaser that I learned about from @Chuck. Thorough rinse with hot water and the brush, then compressed air. Finished up with a rag and BrakeClean while I cleaned and rotated all the pistons. Thanks, again, for noticing and commenting! I thought they came out great!1 point
-
Shakedown begins for the Eighteenth South'n Spine Raid, less than four months out now. Fresh front tire (#26 + 35 rear + the two that came on it = tire #63 for this Sport), new front wheel bearings (only the second replacements), cleaned the calipers/ pistons, silicone greased pins, fresh brake fluid (in 20 months went from <1% water to >3 %).1 point
-
Lol, brilliant. I should be able to squeeze into a 17 inch tyre despite excessive pie consumption1 point
-
1 point
-
This gets us closer to the true explanation of what changed between the 1100 Sport-i and the eventual V11 Sport. It may not, actually, be about a change in a "half degree" of rake milled into the triples, but the transition from the 26º->25º change in frame rake while retaining the 45mm offset triples from the earlier gen 1100 Sport before introducing the 40mm offset triples for the 25º rake of the V11 SpineFrame, especially in the Short("Red") Frame version. I have found "offset" very difficult to measure with the forks mounted to the bike . . . I tried.1 point
-
Back in the day, a SoCal Beemer mechanic I knew decided to put on some aftermarket lights. I'm not sure if he ever got it going again..0 points


