Leaderboard
Popular Content
Showing content with the highest reputation on 12/17/2022 in all areas
-
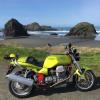
No pictures but a couple of funny town names... Well finally a free weekend and what to do? The green one was sitting forlornly in the carport and the weather was screaming ...Get out there! It's officially Summer but Winters not letting go with week after week of RAIN WIND RAIN and temps of 5 to 17 degrees with the odd good day during the week whilst we're at work of course! But, here we have an Oasis of Summer in a weekend with no chores no where to be and no one to see! A quick call to Dave and he's up for it. So, 9.30am Sunday morning we're togged up and heading for the servo in Warragul to gas up. Bloody hell there's another Green V11 Sport at the pumps. I nearly fall off the damn thing when I see it. A laugh / chat with the owner about common as muck these things/yeah one on every other street corner and we're gassed up and ready to go. Dave's on about heading for the hills but the forecast is for a slight chance of rain about the ranges now with a storm front coming through mid- afternoon and the radar confirms it, so I suggest we head for the coast. Off we drone down the highway to Trafalgar and turn right up into the Strzelecki ranges (no rain about these ones, but don't mention the R word just in case). Once you climb up straight away it's a great twisty rollercoaster of a ride along the top to Thorpdale (Victorias spud capital) and then right to Mirboo Nth. Great wee bakery here so we stop for a pie and water as it's starting to get warm at 10.30. We sit and catch up for a while as it's been a while since we caught up! We then decide to take the back roads down to Meeniyan whereupon we wrong turn and end up in Fish Creek. When we stop I assume Dave wanted to stop for lunch at the Art Deco pub which has great food but no he's on about stopping at the Poowong* pub and mucked up the directions ha ha. * ( I've been meaning to stop in there for years ). So we backtrack to Wonthaggi. It being a great weekend for a change, there's heaps of traffic heading for the Prom (Wilsons Prom = Tramping mecca on Melb's door- step) so good to be heading in the opposite direction. Jeez it's getting warm now, feels like mid 30's or more. Really noticed it sitting at a couple of traffic lights in Wonthaggi! A few minutes later and we're back on open road again but hit more of Chairman Dan's ubiquitous road works! God knows we NEED THEM but do we have to DO THEM ALL AT ONCE so you cannot move ANYWHERE in Victoria without encountering them. It's particularly galling to have to crawl through k after k of 40 kph limit when THERE'S NO ONE WORKING - Arghhhh end of rant! As if in punishment for the criticism it would appear that the great ( ??- cough cough ) Omnipotent socialist dictator directed one of his bugs of monumental proportions into my briefly opened visor (for some air) and straight onto the left lens of my glasses rendering my left eye almost useless! Bugger (literally)! I try to flag down Dave to explain I need to stop and clean my glasses but by this stage he's turned right and heading back up into the ranges and starting to disappear... I should've just stopped and cleaned them but then thought he'd panic and think I'd binned it so pressed on with one and a poofteenth eyes! Of course, it's a tight twisty road in typically crap condition and WINDY as hell up here on the exposed ridgelines.. made all the more fun with said one and a poofteenth eyes! It would be fun with both eyes though! Despite all this I only cocked up two very tight switchbacks when my glasses slid down a bit due to sweat and had to wobble round till I could open the visor and push them back up again! Now which way did he go? Doubt he'd go through Kongwak but then again wouldn't be the first time he's taken a roundabout way but guessed he'd head straight on to Krowera and guessed left again to Loch rather than right to Bena. As it turns out I guessed right (well left actually ha ha ) and there he is at the servo in Loch. I pull up and mention I can't see too well and need to stop and clean my glasses as can't see outa my left eye! He doesn't understand (well an idling Guzzi and Mv both with aftermarket exhaust systems and old fart ears so hardly surprising I suppose) and heads off again! Oh dear, another tight twisty goat track but 5 minutes later we're in the main street of the bustling metropolis of Poowong and the OASIS that is the Poowong Hotel. We walk into a bloody beautiful air-conditioned public bar bubbling away with locals and folk's from the car and hot rod show and shine in our home- town of Drouin stopping off just like us on their way back to their home- town of Wonthaggi. Ha ha as we walked in,their first words were jeez you boys look HOT..this coming from a particularly good looking blonde lady of somewhat lesser vintage than ourselves BUT and I mean BUT she was referring to our ( mostly mine) hot and bothered disheveled appearance.... What a great atmosphere and after a couple of cold drinks (lemonade for me) and a really enjoyable Bruschetta it's back out to the heat and the bikes for the 40 or so kays ride home. Having THROUGHLY CLEANED my glasses the ride from Poowong to home was a Fookin RIPPER...... Home about 3 ish and peeled the leathers off, into the togs (swimming togs this time) and straight into the pool. I'm sure there was steam as I jumped in.... Glass or three of rose at wine o clock finished off a neat wee day out.... Till next time cheers Guzzler6 points
-
I have 26,000 miles on these now. Soon to find out if they will last longer than the average Veglia . . .4 points
-
I told my wife about taking that "short-cut thru Nayook to Noojee ." She had a good laugh. Then slapped me and told her dad. Again!3 points
-
3 points
-
2 points
-
I use a combination of idiot light and trip odometer to determie my fuel needs & range. I've run out of fuel on my Eldo twice last summer cause I'm an old fool and that bike has neither trip odometer or idiot light and l ran with both fuel taps open versus one open/one closed so I'd have some reserve fuel. Glad you made it to a gas station. Yeah, riding boots ain't made for walking. Art2 points
-
2 points
-
2 points
-
1 point
-
It's supposed to be Summer mate but no sign of it yet.. Except for that wee glimpse of it. I don't wanna know about 24 deg F brrrrr1 point
-
Moto Guzzi V11 Le Mans [2003] - Getriebe in Niedersachsen - Wennigsen | Motorradersatz- & Reperaturteile | eBay Kleinanzeigen (ebay-kleinanzeigen.de) Moto Guzzi le mans v11 Getriebe in Bayern - Ingolstadt | eBay Kleinanzeigen (ebay-kleinanzeigen.de) Getriebe Moto Guzzi V11 Sport / Le Mans / Scura /Ballabio etc. in Bayern - Memmingen | eBay Kleinanzeigen (ebay-kleinanzeigen.de) Rolf1 point
-
Start of summer for you...nice! Woke up to 24°F this morning, coldest of the year so far. No fooking rippers for me...1 point
-
Since we're speaking of the instrument cluster, how is everyone measuring their fuel, merely the odometer? I ran out the other day. I tipped the bike over toward the petcock and made it another 2 miles to the gas station.1 point
-
1 point
-
Bummer! I trust it will get resolved quickly, you can count on the germans for their efficiency... I had to resort to SD customer service once as they sent the wrong part and they were very responsive, covering the return shipping fee and sending the new part right away.1 point
-
I got my foxes fixes at Joel Levine. Docc, has a complete set-up from Speed Hut that's a near replica of the stock gauges with Guzzi eagles and everything. Just search here and you can probably find the link and order the exact same one.1 point
-
title had me a little bit worried at what I might not be able to unsee ... bit since it was in tech topics and not in idle banter thought I'd give it a go1 point
-
My reply from Joel Almost always it is the odometer that stops working on that model moto guzzi. If neither the odometer and the pointer are not working it is “ usually “ the cable or the drive, although sometimes ( rarely ) it is the gage. Please call for any questions. Thanks Joel Joel levine J Levine inc. 610 south Chattanooga street Lafayette Georgia 307281 point
-
Yeah, while the speedo can break internally, more likely perhaps is a simple issue with the cable drive. I would look into the easy stuff first.1 point
-
Do you have the angle drive for speedo cable top of the tranny? If so check the cap. Those are prone to falling out and releasing the cable core to fall out on the road.1 point
-
No. The dual disc sounds more 'troubled' than the single and a bit louder imo. The aftermarket RAM single plate is somewhat less noisy than the oem single and operates buttery smooth.1 point
-
1 point
-
Gene, ride down to the Spring SSR & I’ll show you what Docc’s talking about with the clutch noise on my Rosso.1 point
-
Yeah, six speed. Five speeds are ten a penny. I sold all my *Old* Guzzi munt a few years ago including several five speeds in various states of distress but I've still got one n the shed! I'm sure it just got squeezed out of some other space/time continuum and simply popped into existence in my garage because I sure as shit didn't put it there!1 point
-
The red paint is thicker. That decreases the clearance. Also, the front zerk has a special antigravity coating that repels the grease gun.1 point
-
1 point
-
1 point
-
Bike came with Koni 230, but WAY to soft. Have had very good experiences with Wilbers on other bikes. Just had to run the oil varm and running carbs dry before hibernation today. Just 15miles, felt soo m better. Nkr 12879. Price is around the same all over I think. I can't order from Germany, just local dealer here in Norway. It's amasing what good suspension will do for your bike. Cheers Tom.1 point
-
https://youtu.be/R1_JjlmdSvM You might be able to play it now, I made it public. Luke1 point
-
Truly. I've long thought that there are three simple parameters that motorcyclists would like prominently displayed that *car people* don't get: 1) Fuel Odometer 2) Voltage 3) Ambient temperature1 point
-
Well, yeah . . . you know where to post your results! Wild Guzzi? [moderator edit: ] Sent from my iPhone using Tapatalk1 point
-
I just noticed Docc you put the ACTUAL mileage into the odo, that's awesome!1 point
-
Thanks for being patient while I've worked through documenting the installation. Immense gratitude to all the members who have posted their efforts and results in this thread.1 point
-
Setting Odometer: In order to change the odometer on a GPS you will need to follow these steps. 1. After it acquires, go through the menus till it shows Speedhut's phone number. 2. At this point press and hold the button until it tells you to release the button. You will repeat this step right after you release the button. 3. Next the gauge will start doing a self-test and the pointer will start moving. Keep an eye on the menu screen till is says odometer. 4. At this point you will press and hold the button and then you can follow the prompts for how to change the numbers. 5. When you have it set to what you want just let it time out and it will save the setting. Illumination compared to the Veglia . . .1 point
-
Before posting my attempts at weatherproofing, I wanted to try and show how much wiring can be reduced with careful planning and the bold use of side cutters and a soldering iron. As delivered: The pile of stuff left over after the installation (163 grams/ over 1/3 pound):1 point
-
+1 - and good job reducing the wire clutter that comes from Speedhut. The constant power for the speedo only keeps the last location in memory when the bike is off. It's not powering the GPS function. I forget the numbers but it's a tiny amount of power - far less than running a clock - so it would take a very long time to drain the battery. I regret not hooking that up on my installation because the bike "forgets" where it is even when I turn it off to get gas. Then I have to wait for it to acquire the signal before I can reset the trip meter. Thanks, guys! Speedhut says that draws 25 micro amps. As Scud says, it isn't actually operating the GPS. I suppose if it were stored for a long period, that fuse (circuit breaker in my case), could be pulled. I'm about 98% on the installation. I managed to fish out the speedo cable housing without entirely removing the tank. That will not be possible for those whose cable housing is routed tightly along the frame or zip-tied excessively. By changing the connectors on the Speedhuts instead of the V11 harness, I eliminated probably 90% of the provided wiring and several bulky connectors. I used the individual inverters that each have a single connector, so no bundles of unused connectors. I did not use the *dimmer* as it does have a chain of eight connectors and the potentiometer itself is not weatherproof at all. Just looked too bulky and unreliable to me. It is revealing that the V11 wiring (and connections) differ on the Veglia versus the ITI. It appears the Veglia wiring is easier to convert because of the spade connections. Turning my attention to the final weather proofing.1 point
-
OR... remove alternator cover, there is a 24mm nut, use 24mm wrench to turn over the crank. Before doing this remove the plugs. You can also watch marks on flywheel - S for Sinistra (Left) D for Destra (right). Don't forger to check that the pistons are in compresion turn - in TDC the piston should be in its verytop. Check this by putting some soft wooden ply in the plug hole. Also check that the push rods are spinning free. Voila, you have the piston in TDC and you can adjust yout tappets. Doing the other side is just the same. Turning the nut in front of alternator seems to me bit more "profesional" and easier that turning the engine by moving the rear wheel, but of course, it is an option too! Good luck Slavek1 point
-
Moto Guzzi V11 Sport Valve Adjustment and Head Bolt Torque Instructions Steps 3-5 can be skipped over for a simple valve adjustment; no need to retorque the heads. (Thanks to Docc for the feedback) Tools: Spark Plug tool Torque wrench with from 20 to 34 ft/ LB. (27 to 44 NM) setting 17mm socket 10mm allen socket 10mm socket 5mm allen key or 5mm allen socket Ratchet with (at least) a 3" (75mm) extension Feeler gauge, probably .01mm (004") and .015mm (.006") see Step 6 details 11mm wrench Tool (such as 4mm open end wrench) to hold valve adjustment screw A shop stand or bike lift A light as a flashlight (torch) or work light Optional: To turn the engine via the alternator nut add #2 Philips screw driver to remove the four screws holding the alternator cover 24mm socket (better) or wrench (OK) to spin the alternator nut Notes: Your author is not a Moto Guzzi expert, what you will find below is a combination of basic mechanical experience, advice from people who are experts, the Guzzi manuals and the wonderful book "Guzziology". Only you can determine if you should undertake this work. If you are at all uncomfortable consult an expert or simply take your bike to a professional mechanic for this work. Guzzis are fairly easy to work on but, like any engine, they can be severely damaged by even minor errors. Proceed at your own risk. All of this should come apart and go together with a minimum of force. If anything requires more than a slight push STOP, something is wrong. If you can't figure out what is causing the problem consult an expert. Cleanliness may or may not be next to godliness but it is a very good thing for engines. Keep your tools clean, the surface you are placing parts on clean, etc. It is optional but anytime steel is threaded into aluminum it is a good idea to use a small amount of anti-seize paste to prevent corrosion from bonding the parts together. Read the whole article before you pick up a tool. The engine shown below is a 2001 V11 Sport. Your Guzzi should be similar but may not be identical. The gaskets under the valve covers seem to last a long time but having a spare or two handy can be an advantage if Murphy's laws comes into play. This is the same reason having a flat fix kit prevents flat tires. ;-) The factory manual is not great but it is good to have. The real thing in expensive and not always available. A couple of places offer photocopies. Sport Cycle Pacific for one. The book Guzziology is invaluable for a Guzzi owner. Read a sample of Guzziology at the Moto International web site. You can find the book at your Guzzi dealer, Moto International or at Amazon.com. Step One: Make sure the bike is completely cooled off; overnight is recommended. Put the bike on a shop stand or bike lift. If you do not have a shop stand or bike lift you can work on the side stand but it will make the work more difficult. MG Cycle sells a very nice shop stand. Select the "V11 Sport" link for more information. Remove the spark plugs and valve covers (8 X 6mm bolts with 5mm allen heads). The valve covers may require a light tap with the palm of your hand to pop loose. You will then see a nice, simple OHV pushrod valve train. Note the numbers on the image below. The items marked "1" are the five 17mm head nuts; note that two are almost completely obscured by the rocker arms. That is why the rocker arms must be removed before the head can be re-torqued. The single item marked "2" is the cover for the sixth bolt. Both the cover and the sixth head bolt are 10mm allens. The two bolts marked "3" are 5mm with a 10mm hex head. They hold the pivot shafts for the rocker arms in place. Step Two Find TDC for the cylinder. First, remove the black rubber plug over the flywheel. The plug is behind the right cylinder and directly below the right throttle body. Once the plug is removed you will need to find Top Dead Center (TDC) for each cylinder BEFORE you begin working on that cylinder. This is where the light will come in handy; shine it in the inspection hole while turning the crankshaft. In the graphic below the left cylinder (indicated by the "S") is at TDC. For the right cylinder a "D" indicates TDC. You can spin the engine by putting the bike in a high gear and turning the back wheel or by taking off the alternator cover and using the 24mm nut to spin the crankshaft. The next problem is determining if the cylinder is on the compression stroke or not. This is very important, only at TDC on the compression stroke are both valves closed. If both valves are not closed removing and replacing the rocker arms without causing damage is nearly impossible and adjusting the valves after the head is torqued is impossible. If the engine was running well before doing this work there is a simple test, on the compression stroke both valves are seated and therefore the pushrods should spin freely. If one or both pushrod will not spin turn the engine one revolution and try to spin the pushrods. If they both spin you are ready for the next step. If not, something is wrong. Do not take anything more apart until you can be sure you are on the right stroke. Tracy Martin has a neat way to make finding TDC easy. If the above doesn't work for you try Finding TDC on the Guzzi tech pages. The procedure for the right cylinder is the same other than using the "D" mark on the flywheel to indicate TDC. Step Three: Remove the two bolts (marked "3" in the first graphic) holding the rocker arms in place. Very carefully slide the pivot shafts out of the head. Note the rockers and the washers and springs SHOULD stay in place but may not; be careful. With the pin completely removed slide the rocker arm and the washers and springs out. Again, there is a small amount of spring pressure, don't let any parts get loose. Carefully note the orientation of the parts. Reassemble the rocker arm, washers and springs, exactly as they came apart, onto the pivot shaft. Put the rocker assembly aside in a clean, safe place. Repeat on the other rocker arm. Finally, use the 10mm allen tool to remove the plug over the 10mm allen head bolt, this is marked "2" in the first graphic. I would advise you to only disassemble one cylinder at a time. This makes it easier to keep the parts organized and gives you a reference in case you have a problem. The order of assembly for the rocker arm shaft in the "square fin" Guzzis engine should be (from top where the retaining bolt is found) silver (steel) washer, spring, bronze washer, rocker arm, and bronze washer. Note that this is a good time to replace the rubber O-ring under the plug (item "2" in the first graphic) hiding the sixth head bolt. I understand it is a pretty generic part, anybody have a part number or description I could give my local parts house to get a bag? Edit (Gio): with recent concerns on tappet / lifter wear it would be a good idea to inspect these whilst the rocker arms are removed Step Four Now you have access to the head nuts and bolt. Using a crossing pattern (i.e. top left to bottom right, etc.) gradually loosen the nuts and bolt until they spin freely. Once all the nuts are loose you can (finally!) torque the head. Set your torque wrench to 20 ft/ LB. (27 NM) and start to tighten the nuts and bolt in the same crossing pattern. You can re-set the wrench to 32-34 ft/ LB. (42-44 NM) and tighten nuts and bolts in a corossing pattern or you can slightly reduce the stress on the head by repeating the pattern in steps of two or three ft/ LB. to the final setting of 34 ft/ LB. Step Five Re-assembly is pretty straight forward but here are a few hints: The best way to reassemble the rocker arms by sliding the pivot shaft into place from the top. Place the washers and spring on the shaft. Being sure the washers and spring are still on the shaft push them (and the shaft) back to provide room to slide the rocker arm in place. Finally push all the parts (washers, spring and rocker arm) up enough to slip the final washer into place. However, if you have not removed the fuel tank this is not possible. If you are willing to be very careful and patient you can reassemble the rockers with the tank in place. I have found the best way to replace the rockers with the tank in place is to make a "sandwich" with the spring and the two washers. I do this by putting the three parts on the shaft below the lower mount and squeezing them together. Without letting the spring expand put the "sandwich" in place above the rocker arm and slide the pivot shaft into the top mount. The pivot shaft bolts are tightened to 6-8 NM or roughly 53-71 in/ LB. In Guzziology Dave Richardson has an interesting bit to say about these simple seeming parts. Buy the book, read this and many other useful things. Books I couldn't find a torque setting for the 10mm cover for the allen bolt. I used 20 ft/ LB. anybody have a verified value? Step Six: Next, check/ re-set the valve clearance. Since the cylinder is already on TDC you simply need to use the feeler gauge to check the clearance and, if necessary, adjust the screw and lock nut on the pushrod end of the rocker arm. The lock nut is a standard 11mm; the adjuster is an odd shape. The best tool I've found is a 4mm wrench from my ignition wrench set. There may be a special tool to hold it but I am not aware of it. As with any pushrod engine, a little pressure on the pushrod side of the rocker arm (see graphic below) will take up the "slop" in the parts between the camshaft and the rocker resulting in a more accurate setting. Now, what should the clearance be? This seems to be about like asking for the best beer, lots of opinions. The one thing everyone seems to agree on is that the US setting of 0.002" intake 0.004" (or even 0.002"!) exhaust are too small. On the plus side, the US settings will slightly reduce the clatter from the valves. Personally, I used the "world" settings of .004" (.01mm) intake and .006" (.015) exhaust. Another thing commonly done is to add .002" (i.e. .006" intake and .008" exhaust) to the setting for engines with new head gasket. This is intended to allow for the compression of the new gasket. Also, if you are building a new engine Guzziology has a procedure to compress the head gasket, again worth the price of the book. Step Seven: Repeat on the other cylinder, replace the valve covers, put in new plugs (gaped .032" or 0.7mm), replace the rubber cover on the flywheel inspection hole (hint, a little silicon lubricant helps it go back into place) and you have torqued your heads and adjusted your valves. For the next several thousand miles (18,000 according to my manual) you can skip steps 3, 4 and 5 and just adjust your valves. By the way, all 6mm bolts (including the six allen bolts that hold the rocker cover in place) are tightened to 8-12 NM or roughly 77-105 in/ LB. Being a middle of the road kind of guy I use 10 NM or 90 in/ LB. Good luck, Lex1 point


