Leaderboard
Popular Content
Showing content with the highest reputation on 02/07/2023 in all areas
-
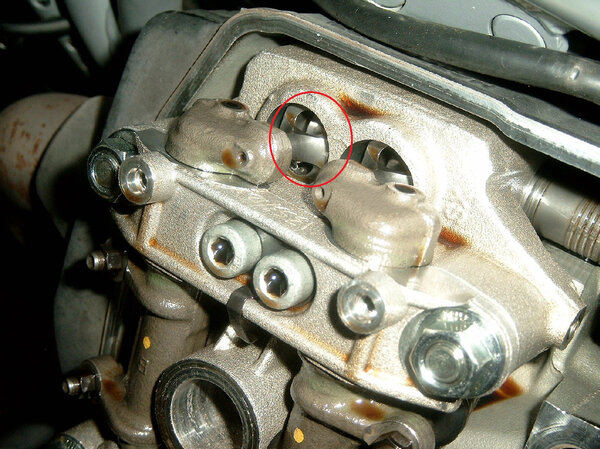
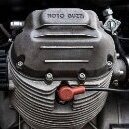
The 'Definitive Guide to Rollerisation' This is something I've been meaning to do for a while as, despite the very youngest flat tappet bikes being nine years old now there are still a large number of them out there and in this post I'll try and cover both the procedure and pitfalls liable to be met during the rollerising process. Firstly let's cover which bikes need rollerising. Most importantly it is ONLY the four valve per cylinder, (8 valves all told so I'll refer to them henceforth as 8V's.) engines that were subject to the Flat Tappet Fiasco. None of the CARC bikes that use the venerable two valve per cylinder pushrod operated OHV engine suffer from chronic cam and lifter problems. Next, don't be fooled by the fact that some 8V models were referred to by the factory as '4V'. This nomenclature has been the source of some confusion but the easy way to identify an 8V motor is to simply look at their rocker covers. 8V motors have the 'Quattro Valvole' logo cast onto them and the back of the cover has a black plastic shroud over it. Like so. Both the 1200 Sport and the 'Small tank' Stelvio, (2008-2011.) were designated as 4V but use the 8V motor. Grisos and Norges were all designated 8V from the outset. No, I have no idea why either. Moving along from that we should look at which flat tappet 8V's need rollerising? The answer is simple. All of them. I know that some people are still in denial. Their engines don't make any unusual noises therefore everything is OK? Sadly, no. If people want to believe through magical thinking, or good luck, or using some special oil that "It isn't going to happen to them"? Well, good luck with that but the only person you'll be kidding is yourself. There is some anecdotal evidence that the last iteration, (There were at least three.) of the flat tappets will last longer than some of the earlier ones. I personally have seen no evidence of this. The problem is also very varied in when it manifests itself. Engines have been known to fail in a couple of thousand miles. Some soldier on for tens of thousands! Invariably though they will, all, eventually fail. With one notable exception all 8V's changed over to roller tappets and cams by the middle of 2012. The factory's engine numbers for the changeover point are listed as; Stelvio- Motor#AC12596 Build Date 12 March 2012 GRiSO - Motor#A813524 Build Date 12 April 2012 Norge - Motor#AA12214 Build Date 18 April 2012 The exception to this is 1200 Sports, none of which were ever made with roller engines at the factory. It's my belief that this is because the last of them were built before the advent of the roller top end and although they continued to be sold and plated as 'Current model' up until at least 2015 in the Australian market they were in fact 'New Old Stock' manufactured prior to rollers. We'll now move on to which 'Kit' will be required for any given bike. Due to changes made to some parts of the top end over the period of production of flat tappet bikes not all of them require the same parts to convert them from flat to roller tappets. For this reason Piaggio produced four different kits to perform the operation on the various engines. Which one you will need and the cost involved can vary enormously and not getting the right one means you can end up with a costly 'White Elephant' on your hands that may be hard to on-sell or can only be done so at a substantial loss. So let's look at this firstly with a timeline. The earliest 8V motors were made using chilled cast iron flat tappets, these were in 2007 through to early 2009. It quickly became apparent that there was a problem as the tappets started to fail. At this point, from memory around the end of 2008 or the beginning of 2009 the factory DID issue an actual recall but not to fit roller tappets as these hadn't been manufactured yet. The first attempted fix was to replace the chilled cast iron tappets with forged steel ones with a 'Diamond like carbon', (DLC.) coating on them. This was supposed to be 'The Fix' and as with all recalls was supposed to be publicised by both factory and dealers and, to their credit, most owners were so notified and in my experience it has been very rare to find a cast iron tappeted bike in circulation after the recall. The problem was it didn't fix the issue. 8V's, the 'Great White Hope' of the Guzzi range was self destructing at an alarming rate! Some geographical locations it seemed to be worse than others, (I for instance long remained skeptical about the problem because I just wasn't seeing it in bikes I'd serviced from new. My problem was I wasn't looking in the right place!). Then in 2012, after the launch of the porcine California 1400 which had the honour of being the first roller tappetted production engine the new roller top end was adopted across the 1200 range with the aforementioned exception of the Sport. This left though all the bikes manufactured before this time with wonky, failing top ends. 2007 to 2012 was a five year window when it should of been fixed but wasn't. Not only that but issuing a full blown recall would of been poisonously expensive. So they didn't. They fudged it. Instead of a recall there was what was described as a 'Technical Update' released on the Service Motoguzzi web portal laying out how the factory would handle it. Firstly it was stated that failures were a rare and unlikely event. They aren't. The attrition rate is 100%. There would be no pre-emptive replacements, the tappets had to fail before a claim would be accepted and the claim for a roller conversion kit was dependent on the owner having a full service history completed not just on distance but also on time, (So if you only did 5,000km a year you were still expected to get a full 10,000km service performed annually and recorded in your log book.). No service history? No kit! The inspection for damage had to be performed by an authorised dealer or service agent and provision of the kit was entirely discretionary. The owner was responsible for the labour component of both the inspection and, if the claim was successful, the installation of the kit. In certain markets with stronger protection laws there was a bit more wriggle room but for most people trying to negotiate a kit was and remains a nightmare. One not helped by the fact that even to this day many dealerships remain seemingly woefully ignorant of the whole sorry affair! So let's look at the four kits and what needs to be done to install them. Needless to say there is no sense at all in their identification as A, B, C and D kits don't follow any sensible timeline! First cab off the rank is bikes built from 2007 through to early 2010. These will all need to be fitted with the C kit. The C kit includes new camboxes, shims for under the inlet valve spring seats, valve guide oil seals for those valves, inlet and exhaust manifold gaskets, tampons, plug tube o-rings and rocker cover gaskets along with the hemispherical 'Pads' that go on top of the tappet towers in the rockers and all three thicknesses of head gasket. For reasons I won't go into here the larger inlet valves require shims under the spring seats. This means the heads have to be removed to fit them. Since you won't know what thickness head gasket you will require until the head is off the kit contains all three gaskets and this adds substantially to the price. There are ways to get out of this cheaper than purchasing th C kit but I'll cover that later. While removing the heads isn't that bothersome per se it can, on some models, most notably the Norge and Stelvio add substantial time to the whole rollerisation operation. Next up in the timeline are bikes built from early 2010 through to late 2011. These bikes require the B kit which doesn't contain manifold gaskets or head gaskets because during this period there were changes to either valve springs or the way the valve spring seats were machined rendering the shims under the spring seats redundant so on these bikes the heads do not have to be removed for rollerisation. From this point on on all models except the 1200 Sports the lack of need for the head to be removed is identified by a drill mark in the paint on the head on the side facing the valley of the engine adjacent to the manufacturing date stamp. From late 2011 through to the changeover to roller tappets at build in mid 2012 there were a number of revisions to the top end that I will cover in the next section. These bikes require the A kit which is similar to the B kit as it doesn't require the heads to come off so no head gaskets, or manifold gaskets are included. Finally, there are the final run 1200 Sports. These use the stand alone and stupidly expensive D kit. This contains all the gaskets as the heads have to come off to shim the inlet valve seats but, unlike the earlier Sports which were confusingly labeled 4V they use the later type heads and camboxes I'll cover in the next section. OK, having listed the kits we'd better work out what the differences are to the top ends of the motors and I'll explain why it is so important to get the correct type of kit for your engine. There are some traps for new players so it is important not to get it wrong as expensive damage can result if you get it wrong. There are basically two versions of the single spark 1200 Hi-Cam top end. The early versions that use the C and B kits and the later versions that use the A and D kits. Let's look at the differences. Most notable is the way the plug tunnel is sealed. On the right you can see the early system. These motors have a long plug tube that passes through the rocker carrier/cambox casting that is sealed at either end with an o ring. One in the head casting and one in the rocker cover. This system uses what is known as a 'Non floating' rocker cover. The later system can be seen on the left. On these machines the *Tube* is much shorter. It is still sealed at either end by an o ring but now it seals in the actual rocker carrier/cambox casting and the top of the tunnel is sealed by a neoprene gasket of the same cross section as the rocker cover gasket itself. This means that the rocker cover is not solidly indexed to the head or rocker carrier and 'Floats' relying on the comparatively light compression of the four cover bolts and their tampons to keep it in position. Note also that there are two different types of tampon and it is important to use the right ones if leakage is to be avoided. So let's first look at the rocker cover of the early type. Here you can see the plug tube and how it inserts in the cover. Note that when the rocker cover is lifted the tube may remain in the head or it may lift with the cover. Damper climates will tend to encourage the tube to rust into the cover and it will lift. Drier climates the tube will tend to remain in the head. Since it is a lot more bothersome to replace the o ring in the head it's a good idea to use some rubber grease on the top, rocker cover, o ring to encourage the rocker cover to come off the tube easier next time and leave the tube in the head. When removed from the rocker cover the pipe reveals the o ring and the groove in which it sits. Note there is no o ring in the groove on this cover. The later versions with the short tube have a similar groove machined into the bottom of the tunnel in the cambox casting. And the top of the plug tube is sealed between the carrier casting and rocker cover by the neoprene gasket. Which in turn fits into a groove in the inside of the rocker cover. Moving on to the two camboxes/rocker carriers there are notable differences here as well. By comparing the two side by side it is possible to see several reasons why they are not interchangeable. In the picture below you can see the later type at the top and the old type at the bottom. See also from looking at the pic above the hole in the casting of the old type is larger to accommodate the passage of the tube. The long tube simply won't fit through the 'New' casting. By looking at them from the side you can see the substantial difference in height of the plug tunnels. The shorter one being the old type as the plug tube pokes up through it to seal with the o ring in the rocker cover. The later one uses the casting itself to act as one of the mating surfaces for the circular gasket used with the 'Floating' cover. Note again new on the left, old on the right. And now we come to one of the, if not the most important difference between the two different assemblies and the reason one must make absolutely sure you choose the right one. During the time when the factory was thrashing around feebly trying to find a solution to the problem of the flat tappets self destructing one thing they tried is deepening the weirs in which the cam lobes actually spin. One assumes that this was in the hope that keeping more lubricant on and around the lobes and tappets would save them. Sadly this was another bit of magical thinking that didn't work but these deeper weirs were added at the same time as the swap to the late type plug tube and rocker cover sealing system in 2011. To accomodate the slight extra depth of the weir castings in the camboxes the actual cylinder head on these later motors is machined under the weir to provide extra clearance. Earlier model, 'Long' plug tube heads do not have this machining. Since all of the roller conversion kits are manufactured using parts cast for the California 1400, (Hence the extra, redundant, plug tunnel.) which also have this machining to the head the weirs are all of the 'Deep' type. Now woe betide you if you try and fit one of these later type camboxes from an 'A' kit to an early bike! While the difference in depth isn't great if you try it you will be rewarded by a 'Clink' noise as you torque the main head/cambox retaining studs down. That'll be the sound of the weir cracking and costing you a considerable sum of money! You can probably guess how I found that out? :oops: Anyway, the way that this issue is addressed with camboxes for the early motors is very simple. Rather than machining the head to give more clearance it is simply the bottom of the weir that has a chamfer machined onto it to give the required clearance. See below the weir on an A/D kit cambox with no chamfer. And a B or C kit cambox. Side by side you can see the difference more clearly. So make SURE you know what you need to order before ordering. I've had several enquiries in the last year from people who have been sold or bought the wrong kit and as I say, this can be a very costly mistake. It is also quite possible for people who need a C or D kit to make substantial savings by buying a B or A kit and adding the other bits required. I've already listed them elsewhere so I'm not going to do it again here. Also, if anyone isn't sure of what they need or would simply like the required parts organised I can happily do it for them. I order direct from Europe and the parts are despatched from there direct to the customer. It'll not cost the customers a cent more than if they buy them direct but I get a substantial trade discount as I put tens of thousands of € through my account every year. I can also guarantee that the correct parts are supplied and can advise on other sensible preventative maintenance at the same time. I hope that has been useful. If people would like further details of what else changed in the top end on the change from 'Old' to 'New' I can continue that later.10 points
-
4 points
-
4 points
-
I bought a 2012 Stelvio 3 years (8,000 miles ago) from a friend which had about 22k miles on it. I am third owner, previous two are close friends of each other and me, Guzzi enthusiasts and look after their bikes. The bike had been used about 98 % on pavement, but used through rainy weather on longer trips when that occurred. This one was a pre rollerization from factory and had the correct rollerization kit installed by the dealer at about 10k miles. It has the running lights rewired to ensure no shorts. The issues I have had are fairly common I think. I now have about 30K miles on it, and just follow the service recommendations. 1. Rear suspension and swingarm needle bearings I noticed the rear suspension link was due for servicing (24K miles) of bearings and also the swingarm bearings (there are no grease nipples on any of these). When I removed all the rear suspension link needle bearings and seals they all needed replacing (almost no grease in them and rust in many of them). Apparently both the needle bearings and swingarm bearing came from factory with only a smaller amount of light grease at new. I would just take apart and grease it all as a preventative measure, if there is no history of it being done. The swingarm tapered needle bearings had little grease and just a very slight indication of rust around the edges starting. I replaced the link bearings and seals, and cleaned up the swingarm bearings, replaced the seals on these as well. I used marine grease for all of these ( packed full of grease), as it tends to keep the water from getting in at all. Apparently it is fairly common for these to get contaminated with water. With the bike on the double stand removing the linkages and swingarm is quite easy and pressing the needle bearings out of and into the linkages is straight forward with a small hydraulic press. Allows to clean up and lubricate the drive shaft, etc. at the same time. 2. Spoke wheels leaking at nipple O rings Excessive leakage from wheels through the O-rings on the spoke nipples. The rear was loosing 2 to 3 psi per week, and just annoying me. I put the wheel in the water tank and realized that a lot of the spoke nipples were weeping past the o rings ( very small bubbles very slowly). Next time I changed the rear tire I ended up taking them all out one at a time to replace the o rings, clean out and spray each nipple bore in the rim with a engine block enamel to give a smoother finish and then reinstall the spoke/ nipple with proper silicone grease. No leaking in two years since.3 points
-
Sorted, I hope . . . That technical post belongs in its own topic to be archived as best we may . . . To wit:3 points
-
You cannot directly upload photos into your thread. The site has no storage capacity. You need to post the link and the HTML code will automatically resolve for the link to embed the photo in the thread. However you need to upload your photos to a site that allow embedding. For example flickr.com; this is what I use, and you can upload 1000 photos. Once you have uploaded your photos, just copy the link into the thread, and the link will resolve to show the photo. Click on the pics below, that will take you to my flickr page test it. @activpop this is the Stelvio I went to test ride. I did not have enough strength to put it on the central stand. But as I told you, I am old and decrepit.3 points
-
No, it's not strictly an OHC design. It's what is known as a 'High cam' motor. The cam resides in a cambox beside the combustion chamber rather than above it. Previously used by both Moto Parilla and Riley to name two manufacturers. The flat tappet set up has much smaller *Holes* in the cambox and the tappets have small 'Dumbell' pushrods in them that activate the rockers.3 points
-
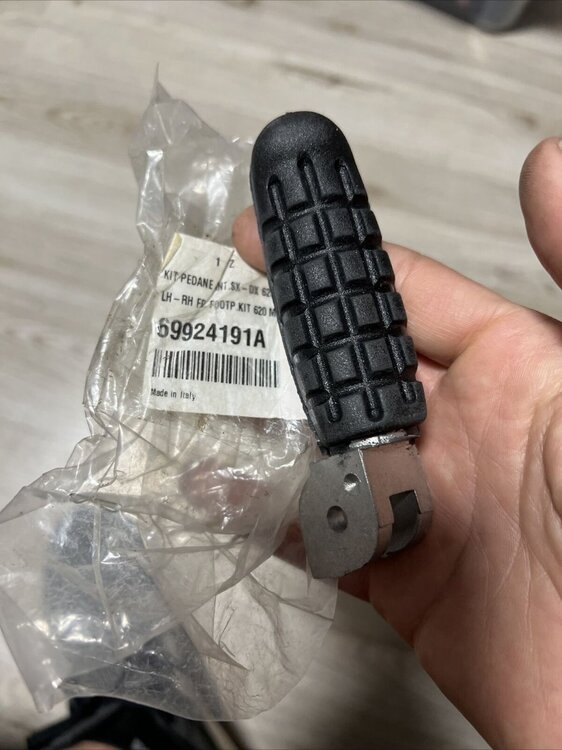
Yes early Duc Monster. Here's one from my saved search. I've purchased several a LOT cheaper and nicer, being patient. They appear to be the very same as the MG oem's with the addition of a rubber covering. That thickness is how much higher your foot will ride. (2-3mm?) Reduces vibes on the feet. New from Duc is like $80 iirc. https://www.ebay.com/sch/i.html?_nkw=464.1.018.1a&_svsrch=13 points
-
The Auxiliary fog lamps on the '12-'15 Stelvio can occasionally short out the 12 volt supply due to wiring inside the lamp rubbing on the housing. Since the lamps are not fused, the main 30amp fuse blows and the bike will brick until the 30 amp fuse is replaced. This fuse is not located in the bank under the seat, but behind the right hand side cover to make it more interesting when you don't know about it. A popular mitigation is to replace the stock fog lights with high beams, and add a fuse on the wiring.3 points
-
For what its worth as a mere mortal to the experts on this forum. I owned a 2001 Silver V11 Sport new that I later added a Fast by Ferracci drop in pistons, FBF Power Commander w a custom map made to make peak horsepower, lastly FBF carbon exhausts. What Mike Wells & I created was one of the coolest deep toned 2v Big Block Guzzi's ever. We also created a vibration machine that even with Throttle Meister heavy bar end weights couldn't resolve, leaving you with numbness on demand. Many years later, my new to me, low mileage V11 Sport Rosso Mandello is running a custom map (idle is higher), everything balanced to spec with stock bar ends, no power commander. Riding to the 22 Spine Raid last year, rarely did it create enough vibrations in the seat or the hand grips to create the same sensation as the FBF Silver V11 Sport, remember I'm 20 years older. *So there really is a sweet spot on these bikes as far as tuning is concerned to make them more comfortable, again devoid of the technical data supplied by the elite mechanics on the Forum.3 points
-
Correct of course, but you've missed the point. It's not the engine we're concerned with, but the handlebars and footpegs and seat. These things have resonant frequencies, and riding with engine RPM in those resonant ranges is uncomfortable. Changing balance factors can uncouple resonant auxilliaries. My carrillo engine is not smoother because it shakes less, but because it isn't felt in the frame and controls. Vibration energy is a function of crankshaft rotating weight, which tries to drag the engine cases with it in a circle. The weight of the reciprocating parts counteracts that even, circular pull but only in the plane of the cylinder; The median balance factor is 50% (that is, crank counterweight is 50% of reciprocating) which then reverses the rotation of the crank action against the cases and minimizes the peak energy at any given direction. A 100% balance factor ends vertical shake (for vertical cylinders) but then the horizontal peak has become twice as energetic. I suspect you know most of this already but it's clarity in the classroom.2 points
-
2 points
-
Thanks Docc, it is also up on ADV rider, I think in the Stelvio thread? Can't remember? But it is useful for those who are after an 8V. Once their foibles are worked out they are a magnificent motorcycle and the Hi-Cam 1200-8V is very reminiscent of the old Rotax motor used for years in Aprilias in the way it delivers seamless torque from idle to wherever you set the rev limiter, although they run out of breath above 8,250. Mark ran his limiter at 9,000 in 1200 guise and bounced off it the whole time but when we built the 1400 motor he's currently running it was dropped back to 8,250 in respect of the 30 gram heavier pistons. It's a torque monster but we haven't lost a rod yet! His Griso is currently running a single 60mm throttlebody with a Cali 1400 plenum but still utilises the W5AM controller. That thing will tear your arms clear out of their sockets and stuff them up your arse with mustard on them! It's a beast!2 points
-
Sorry, Docc or someone will have to sort the pics. Whenever I try to post pics here I'm just told they're too big. All the girls used to tell me that too, (Ha! In my dreams!).2 points
-
In my (now Son's) '85 LeMans, I installed Carrillo rods, cut the heads .010", and installed a Web 85b cam. It's dead smooth compared to stock, at any RPM. The lesson here, of which I have many examples, is that 'engine balance' and especially 'factory balance' are theoretical models coupled with testing to achieve a target RPM at which the engine is smoothest. If you ride outside the bell curve of balance, or you like the higher and and your particular engine tolerance stacks to balance at a slightly lower RPM you get more buzz. So then let me state for the record that piston weight is not any sort of structural threat, and only affects balance in a small way- sometimes making it better, sometimes making it worse. Flat track engines (back in my day anyway ) were often balanced to a factor of 100%, which kept all the vibration in the horizontal plane, with the claim that it helped traction. Certainly, at very high RPM in lightweight solid mounted frames it kept felt vibration way down, which was probably of more benefit than any claim to traction. This is sort of rambling, but balancing engines which are not used to the margin of their structure is simply a matter of comfort.2 points
-
The owner asked me if I could post this here: HMB-GUZZI is now HMB-MOTO as of today, we have changed our internet access as well as our email addresses. The shop itself will remain unchanged, the existing customer/login data will continue to apply. The new shop address: www.hmb-moto.de The new email address: info@hmb-moto.de2 points
-
Oh they'll have their foibles too. I believe the V100 uses the same swingarm bearing set-up as the CARC bikes which means first order of the day with it will be to pull the swingarm off to pack them with grease.2 points
-
Hi all Some of the red frame V11s had an issue with severe engine vibrations. There is no way to cure that with foam or silicone grips or bar end weights. I remember a road test in an italian motorcycle magazine by Alan Cathcart with a very early V11 that mentioned also the engine vibrations. My very much beloved black V11 from 2000 was also one of the bikes affected. I was happy with the bike until I changed bike with a friend of mine driving a Lemans3. He was shocked by the amount of vibrations generated by the engine. Me too experienced how smooth the old Lemans engine was running. The red frame V11s suffered of two factory rework issues: one related to the gearbox, the other to the conrods. For my chassis number only the gearox rework was listed and carried out by my fellow dealer. I suggest my bike suffered also the rod issue. Guzzi mentioned the rods were prone to crack on bikes frequently revved near the engine rpm limit. My conclusion was the rods on the affected bikes were too heavy and so the engine balance was out of spec. For my bike there was nothing to be had from Guzzi, so I decided to balance the crankshaft myself. At 9k km I dismounted the engine from the frame and teared it down to bits. I weighed all the parts necessary, calculated the master weight and put it on the crank pin using lead sheet stripes. The balancing was carried out only statically on a balancer very similar to tools used for tire balancing. My crankshaft needed removing of material mainly in the area of the crank pin. When the engine was completed and reinstalled, the running behavior was absolutely different: The severe vibrations were gone, the engine was almost smooth as the LM3 engine.2 points
-
1 point
-
1 point
-
al_roethlisberger They bolted right on, no mod needed. The quality is great, no complaints. They've been on my V7 for a few years, no problems at all. The truth is, most any you purchase, are coming from China anyway.1 point
-
1 point
-
I am sure you are correct that the "tune" makes a difference When I first bought my 2002 LM 21 years ago , I think I was a bit more interested in wringing out engine and suspension "performance" than I would be now, where today I would be focused on reliability, economy/efficiency, comfort, simplicity, and then only consider any additional performance opportunities that don't significantly degrade the first four After I get the baseline issues sorted on my bike to make it road-worthy again, "phase 2" will be to revisit the state-of-tune for this very reason to simplify and step back from "top HP" goals and instead focus on a smooth and efficient tune.1 point
-
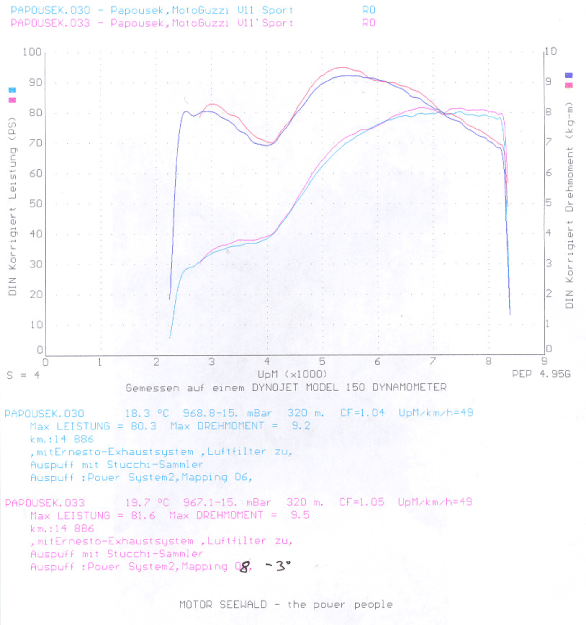
Hey Joe From my point of view this engine was missing some measures necessary: The hi comp pistons with a CR of 11:1 are over the top for a V11 in my opinion. The piston dome is higher, thus the compression chamber shape gets worse. And note: The big valve heads like in the V11 still have the worst combustion chamber shape of all Guzzi heads. The best solution to overcome this problem ist installing twin spark ignition which shortens the time to burn the air/fuel mixture. The Guzzi engineers invented this when they created the Breva engine. This leads us to the ignition map: The V11 has extremely high ignition advance figures. At max rpm and WOT the advance is 44° which works only with the low VE the standard engine generates. When you increase the pressure in the combustion chamber by either aspirating more air into or a higher CR, the engine burns the mixture faster which allows us to reduce iginition adance. The same goes for the twin spark: the mixture burns faster, ignition avance can be reduced. A PC can only address the mixture, with an appropriate ignition map your engine would have beeen performing a lot better, be it power or vibration level. The graph below shows the influence of ignition advance on power and torque on my own V11. The only difference between the two measurements is for the red curve ignition advance was reduced by 3° at full throttle which indicates the stock advance figures were over the top.1 point
-
I do really like the Stelvio for long multi day, 10 or more hours per day trips, and for some nice gravel back road. It is very comfortable and I am old. I love my V11 for sport riding and shorter day or two trips, even 8 hour one day trips is ok.1 point
-
I've never ridden a Stelvio,but lusted for one for quite a while;I actually made a decent offer on a NOS 2014,but thankfully the dealer turned my offer down. With all the taxes,prep,freight charges etc,the price would've been 3 X what I paid for my V11 and at this point,that tall & heavy a bike really isn't what I need. From all the reading I did,the Stelvio owners,describe it as a tall heavy bike,that handles far better than you would think it should. Many describe it as the most comfortable touring rig they've ever ridden;IF that's what you're looking for in a motorcycle. fwiw1 point
-
It's true, I've had many more failures than the average.1 point
-
1 point
-
The pegs really fit perfectly and don’t seem to be modified in any way, but no guarantees!1 point
-
Oh those look nice too Did you find them to be well-made and a tight direct no-mod necessary fit?1 point
-
https://www.aliexpress.us/item/2251832622654235.html?spm=a2g0o.order_list.order_list_main.39.21ef1802KSAcWS&gatewayAdapt=glo2usa&_randl_shipto=US i'm using these on both my V7 and V111 point
-
1 point
-
It can't be a 2002 as they weren't built then. All 8V's, (And all Stelvios use the 8V motor despite the early ones being designated '4V'.) manufactured prior to the middle of 2012 used the flat tappet top end and they all fail. There are no exceptions. Some may last longer before they make a noise than others but make no mistake, they ALL fail. The only cure is to convert to the roller top end and there are four different kits to achieve this depending on year and model of machine. If people would like I can post up my 'Definitive guide to rollerisation' here but someone, presumably a mod, will need to insert the pics as I can't seem to work out how to do that here. Other major factors to be aware of are swingarm and shock linkage bearings which if they haven't been greased by a previous owner will require replacement and it is wise to replace the sump spacer gasket between the sump spacer and the block with one of the thicker aftermarket gaskets available as they tend to blow out around the front oil delivery gallery if the shitty original gasket is kept. Finally, make sure that the previous owner has not used a K&N type air filter and that the drain hoses from the airbox are intact, attached and plugged. This is very important as the 50mm TB's are very sensitive to damage. Also check that the yellow paint on the throttle stop screws is intact and they haven't been fiddled with, few workshops seem to know how to tune a W5AM Guzzi and if the throttlebodies are messed about with by someone who doesn't know what they are doing it is possible to turn them into scrap very easily. They are no longer available as a spare part. The stock mapping is pretty pedestrian. The W5AM has been an open book for well over a decade. There is no need to pay preposterous money for 'Reflashes' as you can swap maps easily and safely using Guzzidiag 'Reader' and 'Writer' programs and there are several aftermarket suppliers who can offer you much improved maps in both closed and open loop format for little or no money. You will need a laptop with Guzzidiag downloaded but you should have that already for your V11. You cannot tune a W5AM bike without it. Just saw your last message. 2012 was the changeover year to roller tappets. Only way to be certain is to lift the rocker cover and look. If it is still a flat tappet bike it will require an 'A' kit to rollerise it.1 point
-
All Stelvios bar the first 250 or so came with the bad followers ,mine was amongst the very first ones built and i did 65000k without any problems before i sold it. While in Mandello i enquired about getting a repair/mod kit just in case and in view of my engine number was told that i was a very,very lucky guy, that the second batch of followers was crap and people putting in a claim were sent another pure mozzarella set of followers and so on, some had 3 faillures in a row. I think that the V11 engine has much more character than the Stelvio. Always found the Stelvio very ackward to maneuvre around parking, more over with luggage.1 point
-
No experience with Stelvio or Griso. I do have a 2016 Norge (last year they made). Have mod'd fueling (GTM reflash), suspension (Matris fork upgrade, Ohlin rear shock), exhaust (Y pipe and Mistral muff), etc. The fueling upgrade makes it much smoother ride. My buddy who is also a long term MG owner/rider has ridden my Norge and says it is the smoothest, best handling MG he's ever ridden. (He owns 5 MGs, including one V11, but no CARC bikes).1 point
-
Stelvio came out in 2007... What model year are you looking at? All 1200 CARC before MY2012 came out of the factory with flat tappets with DLC coating that fails overtime and need to be "rollerized". That would be the number 1 concern!1 point
-
The Fast by Feracci domed pistons were the same weight just higher compression (domed), installed by a top notch motorcycle mechanic. My point was that you can over tune a bike w higher compression and map it to make the bike faster but at the cost of more vibration. https://www.ferracci.com/products/piston-kit-92mm-11-1-v11-sport-lemans Fast by Ferracci Moto Guzzi - PISTON KIT - 92mm CR 11:1 V11 Sport/Le Mans code F27700 $589.95 Regular price$900.901 point
-
It's highly unlikely they will have been looked at. Likewise the shock linkage bearings. Which CARC model are you looking at? Ask in the 'Newer Models' section if you want and I'll fill you in on the things you have to check.1 point
-
The drop in pistons are supposed to be the same weight as the originals, but have higher compression. If your piston weight changes, or the piston and / or rods are not the correct weight, you certainly can run into vibration issues. I am not sure that Guzzi built motors with connecting rods that were the wrong weight (lighter or heavier, either one would vibrate). But it is certainly possible. It is also possible that they simply did not properly balance some engines. Vibration can be caused by balance issues. Or it can be caused by tuning issues (the two cylinders not running evenly).1 point
-
Dunno about a "sweet spot", but Ernst (who really does know what he is talking about, far more than me....) mentioned a crucial point. He suspected con rods heavier than spec. You wrote about having changed the pistons. Both of those (can) mess up the balance of the motor, and make it vibrate (and in the worst case, self destruct.). As far as the conrods go, if one were to suspect that as an issue, one would have to find out the correct weight and weigh the ones in the motor. As far as swapping the pistons goes, I would weigh the old ones and the new ones. If there is any difference, the crank should be re-balanced (as far as I know). Same goes for swapping the conrods...1 point
-
The wealth of info here is great for a new guy like me...thanks for all the input. I'll be checking on this too. Although I would like to put this on the lift, I think I can keep it sturdier on the floor. Swing arm coming out next weekend. At least it's not riding season yet.1 point
-
Yeah, those marks are not obscure...two white slashes on mine. It's a no brainer.1 point
-
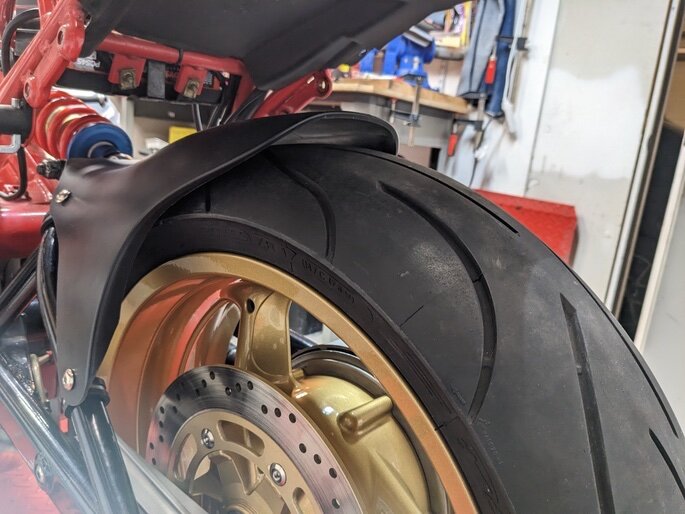
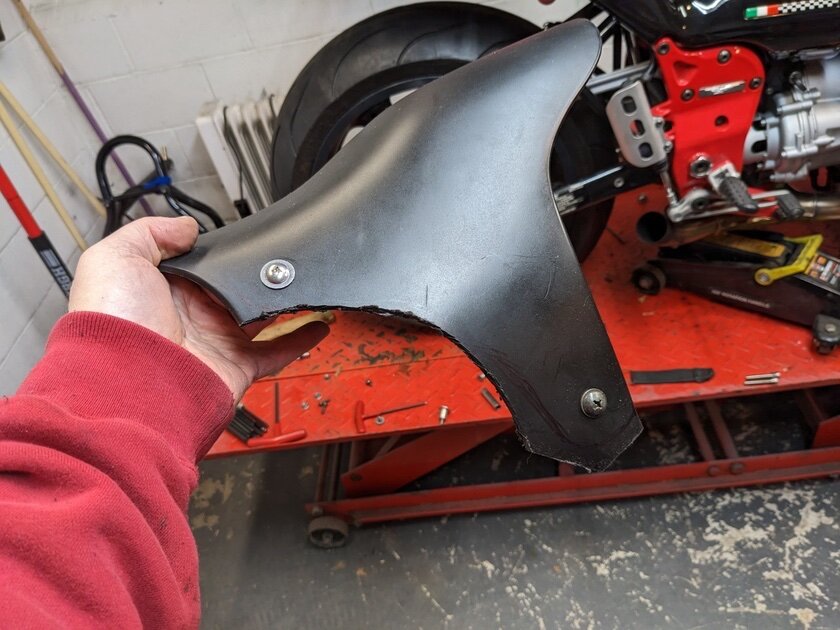
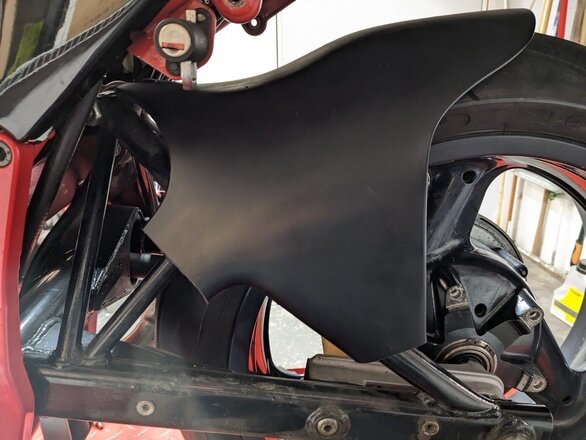
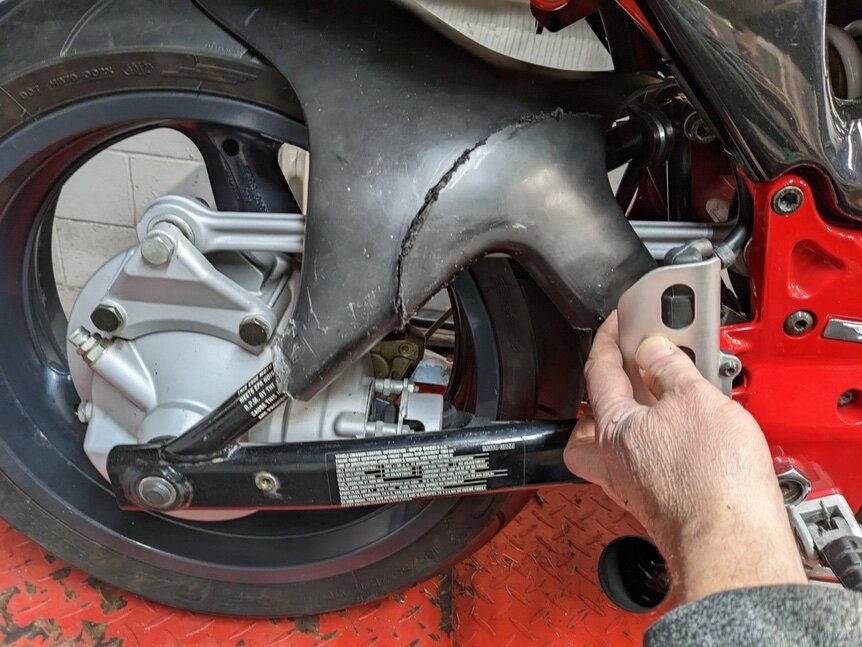
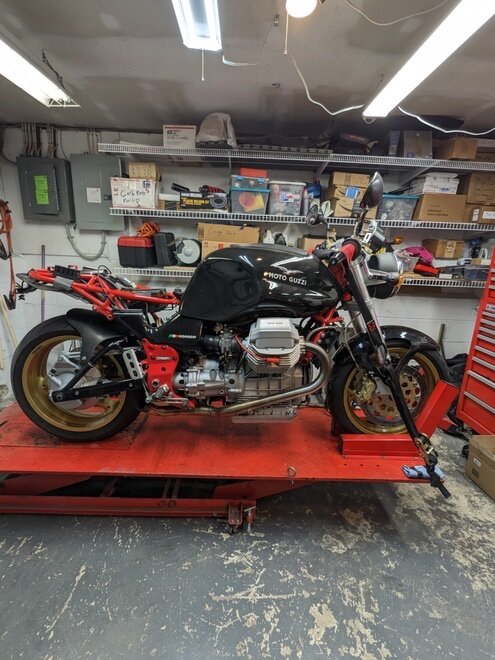
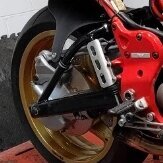
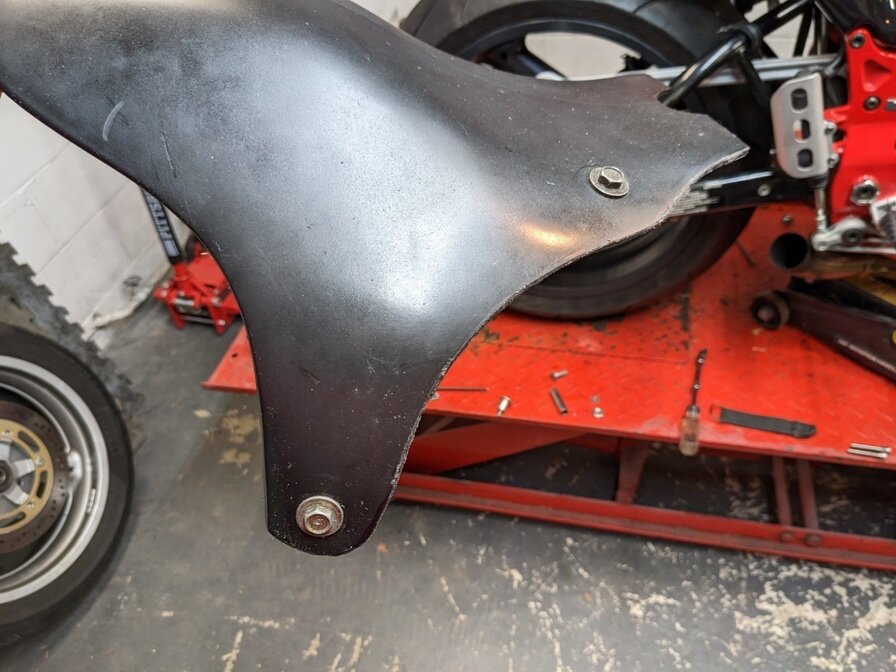
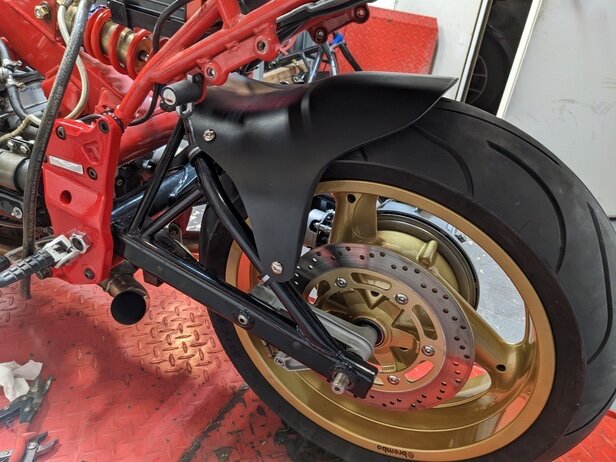
The wheel is the later 5.5 x 17 with a 180/55/17 Michelin Pilot. The powder coat was done by IPC in Rockaway NJ. Cleaning up the powder coat masking at the cushdrive interface was time consuming. It’s completely hidden, but the cushdrive sealing o-ring rides there. 83 degree valve stems were installed, new bearings were installed (and the rear spacer shimmed out to 113 mm, thanks docc!). I removed the stock fender / swingarm cover / hugger and carefully, incrementally, cut it, test fit and trimmed until I was happy. I had also done this on my Silver V11. I like the look. I have some pics of a few cuts but reducing the file size is tricky for me, I don’t know which apps I can trust with that access to my phone! Anyway, it’s held in place with standard rubber protected pipe clamps from a local hardware store. The Rivet Nuts in the swingarm that hold the stock fender hardware on were removed by inserting a ~20mm long, 5mm thread button head screw 2 turns in and carefully hammering on the button head until it allowed easy extraction with some needle nose pliers. 10mm black plastic flush furniture hole plugs press into the empty holes. The information decals on the swing arm were removed with a heat gun. Also in the photo is a 500 lbs Eibach spring on the stock Sachs shock. I need to send my Penske out for a revalve, as funds allow.1 point
-
Worthless opinion; Trademark protection should be invalid for commerce which *cannot be entered into by the trademark holder*. That is, Moto Guzzi obsoletes a part, they don't get to pursue protection from those who continue to provide it. This thread has reduced by half the possibility I'll buy a new V100. Or whatever their new watercooled aeroplane is called.1 point
-
1 point




.thumb.jpg.91a67db8641cea72590980876d22ff5a.jpg)

