Leaderboard
Popular Content
Showing content with the highest reputation on 02/11/2023 in all areas
-
Al, as far as I know, all Ducati regulators benefit from a dedicated ground wire. I *think* the last V11S models had one, but an extra can't hurt.2 points
-
Some questions raised in this thread about "wasted fuel", tank capacity, and how the older and newer tanks differ may be partially answered in the threads below. And as pointed out, the incandescent dash indicator and warning lights can all be changed to LED without any modification, except for the low fuel light. One either has to leave the fuel warning bulb as incandescent, or apparently per a reply above the LED can be wired in parallel with the low fuel incandescent bulb for the bias between the bulb and thermistor in the fuel level detector to continue working properly. Although I then have to assume one loses the gradual brightening effect of the incandescent warning bulb. I changed mine all out to LED except the fuel warning bulb, which I left incandescent. It doesn't light that often or for very long, so I would assume that bulb should last forever.2 points
-
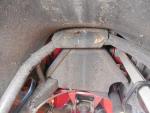
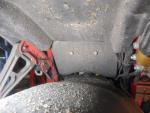
Oh boy, this is was an informative read...scary too. I'll be pulling my swing arm maybe next week and will be able to get eyes on this. I have a bracket coming to install, hope I have the frame tabs and no cracks in the tranny.2 points
-
If you have sweating and stiffness in a V11 hose, I believe that you should replace it. If original, it is 20 years old now. Make sure that you get the right specification of hose. The correct material for sub 50psi external pressure hose will not last if submerged in fuel. The correct material for hose immersion in a tank will not last outside when exposed to sun and heat. Low pressure hose for carburetors is not suitable for injection systems. A good summary is given here, both for hose and hose clamps. https://www.onallcylinders.com/2021/10/24/buyers-guide-how-to-pick-the-best-flexible-fuel-hose-for-your-vehicle/2 points
-
2 points
-
Tire/Rim size fitment recommendation: 180/55-17 => 5.50-6.00 170/60-17 => 4.25-5.50 These 2 tire sizes have different aspect ratio and although you could go either way on the 5.5" rim that came with the later models, mounting a 180/55 falls on the lower side of the recommended rim width where the 170/60 is on the higher side. The 170/60 will definetly sit a bit flatter on a 5.5" rim but the 180/55 with a smaller recommended rim size span would be just right. In fact, next tire size up, 190/55-17 will only properly fit on a 6.0-6.5" rim. There are so many other factors to handling performance not only with tires of different brands - even between models within the same brand - with different actual size and shape but also tire pressure, carried weight, ergonomics, etc. and most importantly suspension setup that it all comes down to personal experience with your own setup when it comes to tire choice. Don't forget that motorcycle tires have come a long way in the last 20 years and the 180/55 - 5.5" rim combo is pretty much today's standard for most sport/sport touring liter bikes. I personally favor that combo on my bike - it looks right and it feels right - again just a personal choice... YMMV1 point
-
1 point
-
Well, I had already attempted to wire in an ATC fuse holder, and then a MAXI fuse holder, outside the fuseblock. The location of the circuit breaker's connections back under the tail cowl required an extension of the nefarious little green/red charging wire from the regulator and I built a larger gauge new wire connection from the circuit breaker to the battery. Not that adding a bigger wire downstream from smaller one helps in any way . . .1 point
-
Indeed it is... I had a brain fade there I remembered late last night because I was searching old email to see who I had purchased the shock from, etc, and found an old email from them. Well, now we have them in the thread for twice the impact!1 point
-
1 point
-
Thanks for the quick response! @doccAnother quick question just to clarify: To install the CB, did you literally just pull out the spade connectors from the 30A location in the fuse block, cut off the female fuse spade connectors, and then wire the CB serially where the fuse had been?1 point
-
So, last question first: No change to the charging wire other than removing the termination from the fuse block and extending it to to the circuit breaker. The circuit breaker has been in service over eight years, almost 30,000 miles/ 18.500km with no issues. It has never tripped and I have used it repeatedly as a service switch to isolate the regulator from external battery charging (a procedure of debatable necessity, but I do it still). The case of the circuit breaker looks weather resistant, but IDK if it is sealed and TYCO makes no claim to waterproofness, although there are stated humidity and salt spray ratings. Where I have it mounted, tucked into the tail cowl behind the fuse block, it has never gotten wet. Even in that Kentucky Frog Strangler we once rode all day in . . . As chuck said, all Ducati Energia benefit from a robust ground strap from its case to to the timing chest/engine. While all V11 wiring harness have a ground to the regulator, it is far too small and travels the entire loom back to the battery, defeating its effectiveness. All V11 benefit from enhancing the grounds, both this one and, very especially, the main ground to the back of the gearbox behind the seat latch:1 point
-
1 point
-
Clamping is pretty easy, one controlled squeeze of the tool and its done. You can't over or under tighten. It's the removal where there is a bit of risk. They don't come off so easy. Stainless steel is a metal that does not take to cutting easily. My method of removal has always been using a pair of diagonal cutters gripping the base of the crimp and twisting until it snaps...there is some force involved and backing up what it is attached to is important. I tried what I think Kindoy2 suggested, I couldn't get it to snap off. I must be missing something.1 point
-
This is a great thread. Once validated, it would be helpful for future reference for someone to post the correct hose type and size for the external lines on a 2003+ (in-tank fuel pump) model. Then it will be tracked here, and maybe in the FAQ section later. The thread below has a little additional information I gathered about the 2003+ (in-tank fuel pump) tanks:1 point
-
This is an important and good read . If you are going to use the crimp type hose clamps , practice using the clamp/tool on a practice hose to get good at this style clamp system. You say your bike has the "in tank" fuel system ? Be careful working around these fittings. You break this stuff and you are going to be ANGRY !1 point
-
Yes, they require a special tool, maybe $50. I use these connectors a lot on pex piping, but think they are overkill for low pressure fuel lines. I might use them if they were easy to take off, but they are not. They have to be cut off, and too much force might be put on what they are attached to.1 point
-
These require a special tool to crimp? Are they re-usable? https://www.oetiker.com/en-us/1 point
-
The fuel pressure is 3 bar (40-45 psi), IIRC. How about using high pressure "fuel injection" style clamps? Otherwise, perhaps your hoses have hardened to the point they will not seal well . . .1 point
-
1 point
-
1 point
-
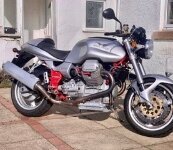
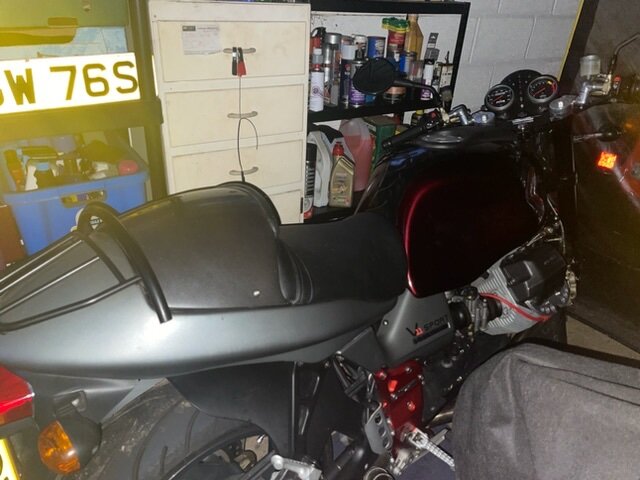
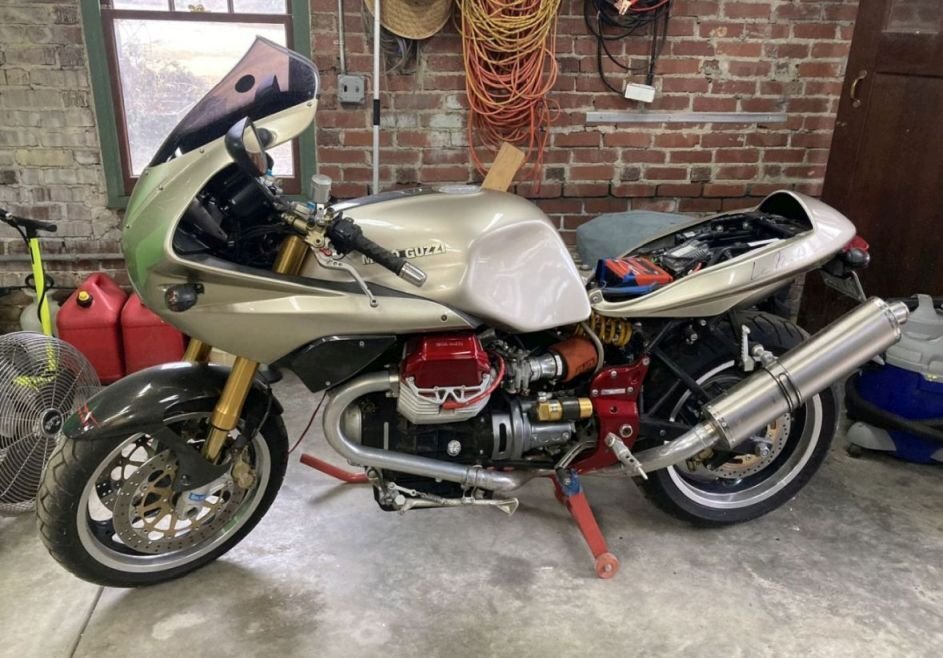
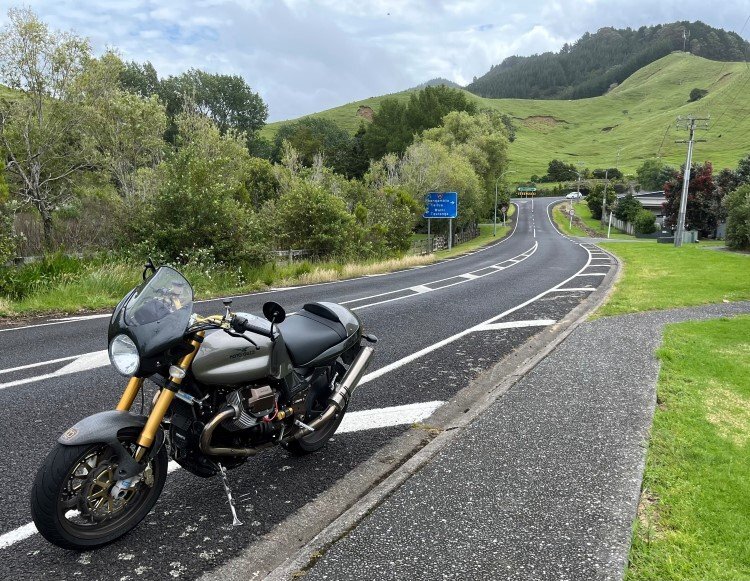
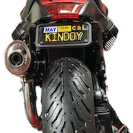
A poignant contrast of V11 in their natural January/February habitat: Rotorua, NZ (note curvy road) : Michigan, USA (note battery charger):1 point
-
Here is a good source Left rear https://www.mgcycle.com/index.php?main_page=product_info&cPath=37_156&products_id=83 and Right rear https://www.mgcycle.com/index.php?main_page=product_info&cPath=37_156&products_id=841 point
-
1 point
-
In my opinion THIS is the best bet out there and at not such a terrible price if you really want one. considering is it has all the bits you need to mount it except the 2 hose clamps ..which you can get anywhere..the mounting bracket, rubber bushings and proper inserts, stainless nuts etc..all are not so easy to find.. https://www.ebay.com/itm/354444595918?hash=item52868b52ce:g:6RYAAOSwjNJjld1A&amdata=enc%3AAQAHAAAAsHvewL77P4baGc71WNa4DCsyJUeuYaBURmdZpUIlhjPM09NB8esyOF2RieDI7fowUGwapcgyGPWDEBXA1X%2Fj%2BJkUXGtHGmv2fp2Sg1TdgdnDWOWlpyfJLZ3sHb%2FT89s0Gyj68UAZOgxoV%2BEduWp9eS7nOQuF%2BXvoTlwGs5d9SOtsBA8l82eSxXEx%2FSoS0YyROTQc31Q3tlnHm%2BoEJ7OU4L7ALvN4HE%2Fxepj0lgIPTK4U|tkp%3ABk9SR6ai68qlYQ1 point
-
Greenie came with led signals. When going thru the bike, lot's of extra wiring and resistors. All that gone and working fine with the cheap orange flasher, bet mine is the same as po18guy. Using the same flasher on Rosso Corsa with led bulbs. Cheers Tom. Sent fra min SM-A525F via Tapatalk1 point
-
My '04 has clear signal lenses and the following is the combo I settled on. I have used these for about two years now - no problems. In addition to the side LEDS which use the OEM reflector, the bulbs have a projector lens on the ends which focus the light straight behind you. https://www.amazon.com/iBrightstar-Newest-Extremely-Bright-replacement/dp/B07BXNMNRF/ref=sr_1_22?crid=NJN75N30DW71&keywords=ibrightstar&qid=1658273217&sprefix=ibrightstar%2Caps%2C159&sr=8-22 And this flasher unit - adjustable blink rate -also works well. https://www.amazon.com/Motorcycle-Flasher-Electronic-Signal-Adjustable/dp/B091PXFXFD/ref=sr_1_23?crid=1603YA1WSJQ6M&keywords=led+flasher+unit&qid=1658273542&s=automotive&sprefix=led+flasher+unit%2Cautomotive%2C147&sr=1-23 It even has the tab to fit in the OEM location.1 point
-
Agreed. Avert the eyes of the squeamish and hide the women and children . . . [ @czakky knew I was waiting for this moment to pounce . . . ]1 point
-
P6X...it may be prudent to take a 1 or 2 liter fuel bottle with you when you do venture to Big Bend, just in case as a bit of extra reserve in case you find yourself in a pickle or the gas station in Marathon is out of gas! They also do make some relatively small Rotopax items that you could consider on this longer more remote section of the Grand Tour...would provide some comfort and extend the range a bit...you could even deliberately run out of gas just to see how far you really can go, knowing you have some reserve on the bike with you. I use these 4-5 gallon ones for fuel and water on my Rover adventures for back country exploration. https://rotopax.com/ They even have a section for "blemished items" at 50% off prices...well worth it! https://rotopax.com/1-gallon-gasoline-blemished.html1 point
-
Had good luck using this Motion Pro gizmo bleeding the clutch. Just make sure its fully seated..there's a gasket thing in the socket to direct the fluid thru the tube. If you decide to tackle this before a tire change, removing the starter motor et. al. provided decent access.1 point
-
I think I've mentioned this before but what makes a surprising difference to fuel range is cold start cycles. So you may fill your tank and then do 4 short, say 10 mile round trips to work for instance, look at you trip and think, yep still got 120 miles of fuel.....nope, no where near it. It's a way greater effect than a single 40 mile urban commute. Obviously suburban riding hurts the economy but it's the cold start cycles that have the biggest effect. If you add the start enrichment map and the engine temp trim map figures together the overall fuel metering can be well over double the delivery at running temp fuel mapping. Ciao1 point
-
So as long as we're just talking about gas and fuel and have pretty much gone off topic, I'll play. So far as my Greenie, I've never gone more that 160 miles, and it was coughing when I went to the gas station. I've never gotten better than 37mpg from it. And I'll mention my Ducati. I average about 43mpg from it, it has has a much smaller tank. I took a recent trip to Ark on it. I wanted to make some curvy roads. I'd never ridden with the crowd I was riding with. When I showed them my route, they all declined, too many twisty roads for too many miles. So we would meet for lunch in Marshall, they'd take the interstate and I'd take my route. I didn't consider: 1) our motel was 50 miles further out than I'd done before and 2) there are no gas stations in rural Ark. Anyway, I'd had a blast of aggressive riding and was following some great roads when my low fuel light came on. After riding a ways, I saw a sign that said I was 30 some miles from Marshall. I ride through a couple of small towns with no gas. I finally get to a town, I see someone by his house and ask if there's gas station here? He said to follow him. I did, filled up, called my guys who said they were eating at the "Daisy Queen in Marshall". I asked the attendant "How far is it to Marshall?" He said "You're in Marshall". "OK, where is the Daisy Queen?" He pointed at a drive-in about two blocks away, "Over there". wheew.1 point
-
AFAIK all the fuel warning lamps work the same way on nearly all Guzzis of this era It's a thermistor, so the resistance lowers with increasing temperature, which is mounted in series with the lamp. When the thermistor is covered by fuel it's kept sufficiently cool by the surrounding fuel (its in a metal jacket). This keeps the resistance high enough to stop the lamp lighting When the level drops, the thermistor gradually gets uncovered, the resistance drops and current can pass through the lamp. That's why the lamp initially starts to glow, it will become brighter the more of the thermistor gets uncovered and it gets hotter resistance dropping further. However because the thermistor is passing current self heating also takes place. So (I see LowRyter has beat me to it) it will become brighter as level drops, but personally I'd never rely on it and I too use the odometer. They are also quite fragile and can be irreparibly damaged by connecting, I think it's the electric petcock on some bikes to it by mistake. The one on my Sporti is "tits up" and they are expensive to replace, if you can even find them1 point
-
I was worried someone might ask this. I wanted the clock mounted some other way than a Velcro sticky pad or a double sided pad so I made up the following. This aluminium plug is a slight interference fit in the steering stem tube and is tapped in with some locktite on it to the required depth. The cap screw in the ctr is held in place by a rubber oring so it doesn't fall out when the clock isn't installed. So the cap screw head faces downwards and can be accessed from the bottom of the lower triple clamp up the hollow centre with quarter drive extensions and a 3mm allen head bit. So because you cant get a single long extension up the steering stem tube with the front wheel on you feed 4 short extensions up there as you go. The bit holder on the end has a collar I made to centralise the holder in the centre of the tube so its a simple task of feeding the extensions up the tube and connecting them 1 at a time and when the 3mm bit arrives at the allen head screw just twist it until it drops into the head. Simple and easy as the tool is centred and all you need to do is apply upward pressure and rotate until it engages. With the triple crown nut I machined it down until it was 1mm above flush with the top of the clamp and drilled out the std hex hole round to locate the spigot on the back face of the clock. With the hex drilled out you need a way to install and tighten the top nut now so I drilled 2x 3mm holes which you use a pin wrench on. The pin wrench is the small brass tool in the image above. The object was to have the clock as close to the top surface of the triple clamp as possible but the holding force of the fixing screw was taken by the spigot on the back of the clock so the fixing screw wasn't trying the pull the spigot out the back of the clock rear cover. So here it is ready to slip the clock into the locating hole with one hand and with the other on the ratchet and extensions tighten it down. Easier to do than it sounds. If you had the front wheel and fender off it would just need 1, 12" 1/4 drive extension and the ratchet. Yes I know, sanity is in short supply here. Ciao1 point
-
After reading docc's original post on this I liked the idea he had and the way he did it so I went out and looked at the 30 fuse receptacle on my Greenie , even though it was still functioning it was indeed burnt and starting to disintegrate ..so looking to head off a future issue I followed docc's link for the aircraft breaker mod and ordered one up, and then try to copy his install ....fun little project and satisfying as well!!1 point
-
WANTED: Somebody to take over the crafting of Edge Guards for the community. I have been off the grid for a few years, the Guzzi is gone, and I have a box of molding blocks and tools that I used to make "Edge-Guards" for the community. I have the original rear strut mold, and various templates for the battery box, upper shock lug cover, etc... What I am looking for is someone with simple craft skills, passion for the community and mark, and willingness to keep making them to fill the demand. It's takes Kydex sheet plastic, a small router/dremel for cutting plastic blanks, and a heat gun to form, as well as a V11 to hand mold the lug covers. I made a couple hundred for the community in the day, did them at cost +shipping world wide (and made lots of friends in the process). Don't bother me if you’re not all in on this, trying to make a buck, or will leave it sitting on the garage floor. I'll send you what I have, and walk you through the process for putting together the kits. It was a simple solution to a common problem (search it). Sorry for the delay on offering this back to the community but I hope the right guy/gal steps up.1 point
-
1 point
-
Well Docc, no ride report just yet, but here's a walk-around video that I made over the weekend. I forgot to include the first start-up clip ( ), so I will turn that into a separate video altogether. I really enjoyed overhauling this bike, and all the work, time, and money seems to be worth it so far! I love the sound of the bike, the torque, handling, and it's a totally unique experience, in the opposite direction from the big Norge 1200. Thank you Docc, and the rest of the guys who helped me out. I will continue to report on the bike's progress here, as well as making an official ride report at some point! This video is unlisted and is intended just for you folks- Enjoy! http://youtu.be/0Z0oQKs7TfA1 point
-
New OEM brake and clutch reservoirs! I think I am done with cheap aftermarket reservoirs. This isn't an area to screw around with sub-standard parts. Installed!1 point
-
It's a little late in the season for wooly worms but I hit one with my front tire in a similar turn and it brought me down immediately. Like hitting a teaspoon of grease just right.0 points


