Leaderboard
Popular Content
Showing content with the highest reputation on 02/18/2023 in all areas
-
Playing cards attached to the seat-stays of our bicycles with clothespins =>=> "Braap-Braap"... that's how it all starded!!4 points
-
I just knew I could find some of our references to the "VRROOM" motor in our archives . . . From @footgoose ("batteries not included !" : And @paulnaz coming clean on his e-motor thing . . .4 points
-
Lots of info on the subject over the years, tank swelling and paint bubbling caused by the propensity of ethanol hygroscopic nature to absorb moisture which in turn is being absorbed by the plastic. This affected the tanks made of PA6 Nylon by Acerbis for Ducati, Aprilia, KTM and Moto Guzzi(V11, Norge, Griso, etc.). It affected Ducati’s owners so badly that a class-action lawsuit was filed against Ducati North America, which they lost, having to replace the tanks of thousands of bikes albeit with the same ones, only with a longer warranty time, thus kicking the can down the road... One of the solution to the problem for people unable to avoid filling their tanks with ethanol laced gasoline has been to coat the tanks with Caswell epoxy. Reports of successfully eliminating the swelling abound but also failure for some as the coating would not adhere properly to the inside of the tank. Most likely due to inadequate application process?! As gstallons said, use your best judgment... https://www.v11lemans.com/forums/topic/22148-fuel-tank-expansion-due-to-ethanol/ https://www.v11lemans.com/forums/topic/16928-caswell-tank-sealer-failer/#comment-181275 https://www.v11lemans.com/forums/topic/20071-install-deformed-fuel-tank/ https://caswellplating.com/epoxy-gas-tank-sealer.html4 points
-
This one goes out to some folks I haven't heard from in a while . . . "All the telephone lines are down . . . "4 points
-
I found the Vrroommm bicycle ad but wasn't smart enough or could remember how to put it up here. Also , we would buy the baseball cards , throw away the hard piece of gum and clip the cards to the bike not caring if it were Bob Gibson giving his life for my listening pleasure or anyone else . Also , we learned to tie ballons to the same spot . Not as good but annoying just the same.3 points
-
2 points
-
fren' of mine once told me.... the phone line runs both ways SRV was the pinnacle2 points
-
"Realistic Motor Sound" it sez on the tin...2 points
-
I used Caswell's Dragon blood tank sealer on my RC tank when I first noticed some blistering under the decal. Lots of info on it on the Ducati forums where they used plastic tanks like our V11's did. Its a two part epoxy, red in color and has held up well, prevented further blistering for about 10+ years now. You have to follow the how to do it very closely, and if you spill any of the prep fluid (zylene?) it will eat the crap out of your surface clear...I slopped some despite carefully wrapping the tank in plastic and had to do touch up on one of my lower panels where it ate up the clear coat, but not the color underneath. You toss a bunch of metal screws in your tank to rough up the plastic so the epoxy has more grab. I was able to use a small sewing needle to puncture the blister at the bottom, drain it and have it lay flat afterward, so it looks very good now.2 points
-
Sure, oldies but goodies Look in "Albums" al_roethlisberger - Moto Guzzi V11LeMans.com Forum [docc added image]2 points
-
1 point
-
1 point
-
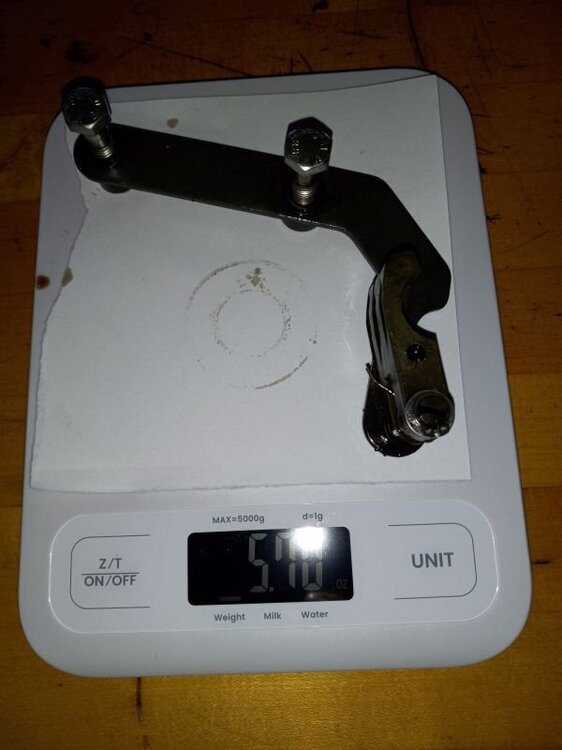
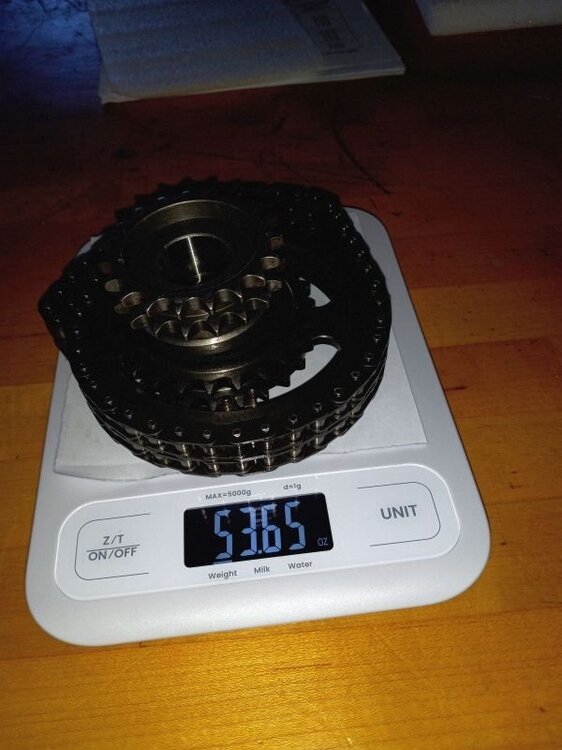
So far as the 18k Desmo service. I was quoted about 4 hours. Not much different than a 4 cyl sportbike. I got hosed on the parts. I took it to my local mechanic but was in a hurry to make a trip so I told him to get the parts from the local dealer. Ducati charges $90/ea timing belts ($180) and $45+/ea for plugs ($90). OK, by aftermarket, the belts are $60 and NAPA will sell you the plugs for less than $20. So I paid $270 for parts should cost $160. Easily cudda saved $100+. But wait, there's more. I did put a chain on it at 18k, it might've gone further but was getting a slight tightspot. The rear sprocket is another piece that's hard to find, I ordered mine from Italy for about $75 IIRC...I think they're better than $200 from Ducati -not a standard or generic design and hard to get (many places want to sell some kind of special quick-change sprocket and carrier deal for $400). After all that, both sprockets looked OK, so I have the new one in my parts stash. The front is a standard $20 generic but I recommend going with 14T front, this is about 7% lower gearing than stock. It wakes the bike up, the close ratio transmission is geared a little high in the lower gears and the opposite for the top gears. With the sprocket change, this is the only bike that I never have to downshift passing someone on the highway. I still get about 42 mpg. Then I put tires on it. Same Dunlop Roadsmart 3's I have the Greenie. One other concern about the bike, that saddlebag bracket has a tendency to sheer two of the bolts. We've learned to tap out the receiver in the bracket and replace with larger bolts. The bracket is pretty easy to remove. I keep it preassembled and can reinstall it in about 20 minutes. The bike would be near perfect if it had another 30hp and cruise. All things considered the cost of ownership has been less than my V11 Sport. The Sport is fun bike but the Duc is quite a bit more reliable and useable. Of course I'm comparing bikes that are 15 years apart.1 point
-
Hallo Al, maybe know you my channel already ;-) The CalVin looks great... ... but the build quality could sometimes be really lousy. You have to invest a lot if you want a shiny bike and with the original mapping the bike is running much too lean. And even though my CalVin ended up being perfect, I think the power should be greater for such a heavy bike.1 point
-
docc, I always love your "out of the box" thought train, good on a routine basis for much levity . Part of the reason why I lurk in the V11LM shadows so much1 point
-
"VRROOM ", baby! This is not a new concept . . .1 point
-
Think of the possibilities! A high revving 2stroke sounding e-car with slightly burnt oil incense piped in through the air conditioning! 😂1 point
-
1 point
-
I have also seen this designation as "N/A" = Not Available And, for V11 purposes: GHoSoV11LM "Get Hold of Someone on V11 LeMans(.com)"1 point
-
Thanks for the warm welcome! I've been lurking on this site for years and finally decided I should start posting. When I saw the craigslist ad for this Rosso only 35 miles from home I knew I needed to jump on it really fast. I called the owner the day it was posted, went to his house the next morning and put down a deposit and didn't even think about trying to quibble over the price. He had multiple people calling him when I was looking at the bike so I knew I had to make a deal really quick. My 2002 Lemans runs and rides really well but this new one is just a little bit better in all categories. The ti exhaust sounds amazing, the tune is spot on, has a bit less vibration and lots of eye appeal around the dash especially with the rizoma reservoirs, black faced dials, and Ohlins forks. With having purchased a 2008 BMW R1200RT recently, the BMW will now be my long distance tourer, and the Rosso Corsa will be the "special rides" bike from now on. I'm going to start to investigate what it will take to bring the tank paint back to 100%. Is there a source for the decals MG used on the Rosso Corsa?1 point
-
In Italy, when a lady goes out with a red mini-skirt, a red clutch handbag, she will wear red stilettos too.... not grey ones... I urge all who like grey to go to Italy pronto!!!!1 point
-
Hey fellow V11 MG fans. That would be me that bought this Rosso Corsa recently. I've been looking for a Rosso for a long long time. It was so exciting to ride it home. It is a really special bike with absolutely no flaws except the bubbling decal on the left side. It did come with the red valve covers as well. As was guessed, the previous owner liked the look of the dark gray covers and swapped those onto it. Now I have a 2002 red/silver Lemans that will need sold. My 2002 has the full Hepco Becker luggage setup including tail trunk, power commander, Leo Vinci carbon fiber exhaust and runs awesome. I'll list it here when it gets a bit warmer. Dave1 point
-
Last night had the honor of seeing the Orrin Evans Quintet, featuring Ravi Coltrane (son of John Coltrane) at Chris' Jazz Club in Philly. He's playing his father's sax. An evening to remember! https://photos.app.goo.gl/PzuxVRhtnLwiNs2C9 Sent from my SM-S901U using Tapatalk1 point
-
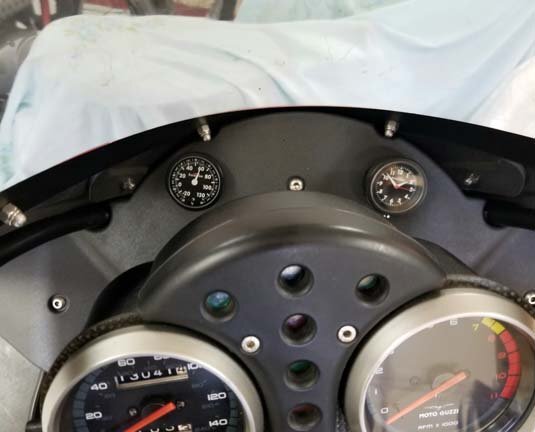
Got around to doing this. Not totally enamoured by the look but a clocks a useful thing on a bike so that tips the scales. I was struggling with finding somewhere to fit it that didn't look too odd and I finally went with a bolt on fit which involved a bit of work. If anyone is interested in the process I'll add to this thread. Ciao1 point
-
when one or more of these give up the ghost I'll look for a better solution, maybe just the clock the way Phil did it.1 point
-
My Formotion gauges are 10+ years old on my 03 Rosso...... have held up well even with just stick on tape and velcro mounts on my fairing inner. I have to change clock batteries about every 12 - 18 months and I just recently had to refill my thermometer with silicon oil, which was easy to do, and recalibrate the temperature. Quality stuff! Andy1 point
-
1 point
-
I was worried someone might ask this. I wanted the clock mounted some other way than a Velcro sticky pad or a double sided pad so I made up the following. This aluminium plug is a slight interference fit in the steering stem tube and is tapped in with some locktite on it to the required depth. The cap screw in the ctr is held in place by a rubber oring so it doesn't fall out when the clock isn't installed. So the cap screw head faces downwards and can be accessed from the bottom of the lower triple clamp up the hollow centre with quarter drive extensions and a 3mm allen head bit. So because you cant get a single long extension up the steering stem tube with the front wheel on you feed 4 short extensions up there as you go. The bit holder on the end has a collar I made to centralise the holder in the centre of the tube so its a simple task of feeding the extensions up the tube and connecting them 1 at a time and when the 3mm bit arrives at the allen head screw just twist it until it drops into the head. Simple and easy as the tool is centred and all you need to do is apply upward pressure and rotate until it engages. With the triple crown nut I machined it down until it was 1mm above flush with the top of the clamp and drilled out the std hex hole round to locate the spigot on the back face of the clock. With the hex drilled out you need a way to install and tighten the top nut now so I drilled 2x 3mm holes which you use a pin wrench on. The pin wrench is the small brass tool in the image above. The object was to have the clock as close to the top surface of the triple clamp as possible but the holding force of the fixing screw was taken by the spigot on the back of the clock so the fixing screw wasn't trying the pull the spigot out the back of the clock rear cover. So here it is ready to slip the clock into the locating hole with one hand and with the other on the ratchet and extensions tighten it down. Easier to do than it sounds. If you had the front wheel and fender off it would just need 1, 12" 1/4 drive extension and the ratchet. Yes I know, sanity is in short supply here. Ciao1 point
-
FWIW.. I can't remember the last time I changed the battery on the AeroLario clock, but it's been years..1 point


