Leaderboard
Popular Content
Showing content with the highest reputation on 03/01/2023 in all areas
-
4 points
-
4 points
-
This topic has been raised numerous times over the now two decades of this forum's existence, and there have been a handful of examples where owners have tracked down a paint or powder-coating color that approximates the OEM "anodized" red finish on some of the V11 Sport/Lemans models "porkchop" (sideplate) and valve covers. Since neither the porkchops nor the valve covers were actually anodized, it proved difficult to find a finish that would replicate the OEM faux anodized appearance. And unfortunately the finish on the "porkchops" didn't prove very durable, and the finish on the valve covers often faded as well. So the search for an appropriate finish started almost immediately. And BTW, I was told by an anodizing shop that one can't just get those parts anodized due to the type of casting... at least not the valve covers. Well, I recently obtained a powder coating sample from Prismatic Powders, called unsurprisingly "Anodized Red", that looks remarkably close to the original OEM finish before it faded and cracked: https://www.prismaticpowders.com/shop/powder-coating-colors/PPB-5936/anodized-red ANODIZED RED (Item: PPB-5936) I haven't applied this finish to a part yet, but the sample looks very good. So if you are looking for a finish to repair or replicate the OEM V11 "anodized" red color, this might be an option to consider.3 points
-
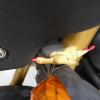
Not to steal MartyNZ's reply, but . . . . What would concern me about the heavy tape, likely added as a vibration damper, is heat retention. The relays get hot, especially #5 (fuel/ignition). Under-rated or under-built relays get really hot. Hot = bad = failure prone. Lot's of discussion in this lengthy, buy informative thread: I would think it telling just what relays you find under the tape, @activpop . . .3 points
-
Let's not jump to conclusions...lots of fiddle faddle needed here. Your original comment of "expect owner involvement" rings in my ears.😆2 points
-
Well, that explains the tape then. That's a goog thing... Yeah, and tape instead of mounting bolts might too...2 points
-
It is "possible" that this treatment of electrical tape is the same kind of treatment as cow magnets , clothespins , aluminum foil , etc. that was applied to fuel lines to carb. fuel systems to correct certain problems ! This is a long drawn out procedure but to remove each terminal and crimp the scroll ends of each terminal is the only way to go. Installing the BEST relay possible is the best way to help stop this trouble. The Caig Deoxit , Motorcraft electrical grease , etc. too . I don't go w/Vaseline because of the low melting point. Any electrical parts , go to an aircraft or marine supplier . Waytek is a good vendor.2 points
-
We've got some of the best riding weeks of the year around now in the south east and west. This summer has been virtually nonexistent around here but we're finally getting some almost perfect weather. Since Michael is on holiday I can skive off as well so I might take a ride down the coast and get some pics in the next day or two. Still won't know how to post them up but Docc or someone usually takes care of that for me.....2 points
-
I think the relays were taped to keep them dry. I was out on my 1100 sport and it started to rain lightly. The #4 relay got wet, the tach stopped, then the light got dim, then the bike died and I had to have towed home. After drying #4 with a hair dryer the bike started up and ran fine. I won't ride that bike if it looks like rain. I wonder if I sprayed the relays with cage deoxit if that would solve the problem and I'd be safe to ride.2 points
-
I have never had a problem bleeding any hydraulic lines on anything that was not malfunctioning or leaking in some way. While doing the job I try to keep my head wrapped around the physics of it and employ consistency and patience. I'm not afraid to use a LOT of fluid to insure a fully refreshed system. Even (and especially) the clutch. Yes I over-do it. I over-do most jobs, it makes me calm, what can I say? I was educated working on vintage bikes with water in reservoirs and mashed potatoes in the calipers. I tried a vacuum bleeder on my BMW that had an ABS system. Having to bleed the abs unit and the slaves I figured I needed it. I ended up trashing the vacuum kit and finished the traditional way. The clutch presents a challenge because of less "push back" or resistance. It takes more patience and finesse. Get comfortable and watch the tube. It's a different flow.2 points
-
2 points
-
Can we pool our collective experience and semi-mass produce a kit to replace the problematic shift lever spring with a coil? I just broke my second spring and am not looking forward to the possibility of another breaking in an inconvenient location (like the Mojave Desert). If the Indiana R&D team (Chuck and Footgoose) can figure out how to source stuff, I will contribute the pre-selector. I'll even send you a whole transmission if you think you need it. Of course, I'd like it back... But you can take your time since it's a spare. I've already done the polishing on this pre-selector per Phil's write-up. But I didn't get it adjusted correctly (ended swapping pre-selectors). http://www.v11lemans.com/forums/index.php?showtopic=19547&hl= I also installed a bearing on this one - instead of a solid disc for the detent gear. http://www.v11lemans.com/forums/index.php?showtopic=19514&p=213785 And can somebody post the links to the coil spring modification? I tried a few searches and didn't find it yet.1 point
-
Always a tricky topic but I wanted to share this interesting test report from Utac Ceram. A rather top end automotive technical service and independent/inpartial under ISO 17025 accreditation (I am not sure if this test was done under the accreditation). https://grippingstories.com/wp-content/uploads/2021/05/210428_BRIDGESTONE-test-report-Motorcycle-tyre-comparison-V2_ENG2_sub.pdf1 point
-
Haha, well, time to give some additional consideration to what else is under the seat . . . First, battery: > Notice how the seat has been cutting into the hold down strap. This could also indicate undesirable seat pressure on the battery case. While the seat pan can be relieved with a rotary cutter (Dremel®), consider a "battery basket drop" that places the forward basket mounts beneath the subframe. Drops the battery considerably and no more interference seat <-> battery. > The terminal stacks are prone to loosening and developing corrosion. While a simple loosening and dose of Caig DeOxit® would be well advised, tightening might best be achieved changing those fasteners to hex heads. > Check the date code on the PC545 and learn to "condition" it, especially if the static voltage has dropped below the 85% (12.65 volt) threshold. Next, ECU: > Check that the isolation blocks that fasten the ECU are intact. Very common that they separate and should be re-adhered or replaced. > Make certain the ECU case ground is clean, treated (DeOxit), and tight. Be careful not to make a connection with your wrench to the nearby Positive Battery Terminal! > Groom the connectors lying on top of the ECU off to the side so the seat is not pressing on the ECU through those connectors. Fuse Block and tail connectors: > The connectors that have been dragged into the tool tray can easily be serviced (cleaned, treated, tightened) and tucked back out of the way. > Open the Fuse Block lid and treat (DeOxit) all of the fuse connections. Carefully inspect the green 30 amp Fuse #3 (Charging/Regulator) for signs of excessive heat (melting/deformed case or burnt blades without "blowing the fuse"). Any signs of heat should lead to certainty that the Regulator case has an additonal ground strap directly to the engine timing chest. > By prying the fuse block up out of its isolation blocks you can inspect, tighten, and treat the hidden spade connectors that feed the Fuel/Ignition and ECU relays.1 point
-
They call them "Hypersport" tires. Whatever that means. In my opinion, not a racing tire. But perhaps a trackday tire. I have only ridden a few times on Bridgestone tires, and I wasn't impressed. But I don't think they are bad tires, just not my preferred tires. Also, what works best on the race track is often not what works best on the street. For race track use you want a tire that works well when hot. Cold performance doesn't factor into it. But for the street you want a tire that works well cold. Even when you are riding it hard, it is often given a chance to cool back down when you stop at a light or get caught behind a cage / car. Sometimes you will see racers crash because they backed off to build a gap between them and the guy in front of them. But then the tire looses temp and when they get back on it the grip isn't there. The window for temp in a true track tire is usually pretty small. Also, a track tire doesn't hold up to long term heat cycles. It is usually done after a dozen heat cycles or less.1 point
-
Heh, touché . . . I am reminded of a Rosso Corsa I tried to help someone sort. He said it came "from a Guzzi guy" and had paid a premium for it. I spotted the "Roper Plate" and made the (hasty) conclusion that the fellow must have known what he as doing. Eh, no. There was no oil on the stick, barely any drained out, and it was tar-like. I recall that bike trying to strand us with relay failure, as well. @audiomick makes some good points.1 point
-
Low and behold...they see the light of day! The plug block was not mounted, just stuffed into the space.1 point
-
I have Conti RA3 on my 2002 V11 Sport (rear a 170). This was because I could not get on terms with Dunlops. I spoke to a ex-Pirelly MC-tyre developer and he explained that this had probably to do with the first part of getting into the turn. A slightly different set-up of the compression damping could improve this. So this is something for the future to experiment with. Conti RA3 is known for the easy handling in this particular phase of steering. I also recall endless stability when being in the curve with the Dunlops, dry and wet, both very good. I bought the '99 V11 with T32 tyres. Very convincing and very good feedback. Since they where already used, I am not completely sure about the mileage. But that seems to me rather short for the Bridgestone T32. Somewhere between 7-10 thousand KM.1 point
-
Do that. I'll be looking forward to it. I rode the V35 to work today. Only in town, and only about 4.5 km. Barely enough to get it warm. Nice and sunny, but barely above 0°C. The seat wasn't frozen solid, but was very "firm", and provided a perfect practical example of what a heat sink does.1 point
-
1 point
-
I just re-read the ride through Wonthaggi to Poowong Thanks for taking us along! Seems some more riding should be in order for our Aussie and Kiwi brothers as our seasons change hands . . .1 point
-
Pre-treat and re-treat with Caig DeOxit®, add Vaseline® petroleum jelly for extra (sealing) measure, if you like. Compared to the 1100Sport, the V11 relays are not terribly susceptible to spray. Unless the fender/hugger systems have been modified/deleted. It is possible the PO of @activpop's V11 thought the shielding would be a weatherproofing. I would be more concerned that would hold moisture. Still looking for what relays @activpop finds under the tape . . . (Once the relay discussion is relatively settled, I have a couple observations/suggestions about what can be seen in the OP's underseat image.)1 point
-
1 point
-
Having been down this road before, I think it is important to revisit the valuable discoveries and solutions. Without neglecting the silliness . . .1 point
-
Docc is on to it (yet again); the two problems with the relays which have conflicting solutions; vibration in the sockets and heat dissipation. I tried to think of a heatsink that both held the relays steady and conducted away the heat, but the relays in my bike are all different sizes, so I decided that the problem wasn't big enough to need a solution.1 point
-
The Centauro controls mostly appear to be a simple bolt-on affair other than making and adding a small extension piece for the shifter, noted in the quoted excerpt below. They look to be something in-between the stock V11 Sport high-ish pegs and the very low and forward Motratech controls. The real trick is finding all the Centauro parts. But there are a few bits & pieces on eBay right now, so they do show up used and even NOS. One could probably call some of the prominent MG parts houses and they may have some old sets. And here you go, a write-up from a former forum member: Modifying a 2002+ Le Mans' ergos (obairlann.net)1 point
-
I hate bleeding brakes and clutch. Even with an Ezibleeder kit I can’t seem to get all the air out. Usually end up with the brake lever spongier than the wife’s home made cakes1 point
-
You know, now you say that it is so obvious! Mind blank! Now I just have to find the fastening clip that the screw tightens into that rattled under the work bench somewhere. It has an aluminum piece screwed into the headlight to hold the clip as the plastic piece fell apart. It doesn't hold the clip as well as it should. Thanks for the good guess Pete.1 point
-
As far as I know, Al.. none have failed. They shouldn't, of course. They are well into the "safe travel" area.1 point
-
I was wondering how they sealed these spoke nipples. So blind nipples with an oring on the OD that seals in a bore hole in the rim. So what 36 spokes/rim x 2 rims = 72 spokes and orings with matching rim holes, made in Italy. What could possibly go wrong, lol. Ciao1 point
-
I've had my Trail 90 for 50 years, probably will last another 50..1 point
-
Love my neo-retro. It was my first bike. 51,000 miles/ 82.000 km. Hmm . . . maybe it is not so "neo" anymore . . .1 point
-
This the best modern retro bike on the market. Smooth, reliable, excellent quality, and amazing value. This is mine. Ciao Ciao1 point
-
Thanks so much for the hard work Chuck! I learned a lot! You are a true pillar of the spine frame community.1 point
-
16mm is .630" especially, if it is *over* 16mm like Footgoose says, it would break. Honestly, I'm getting tired of doing this. I haven't kept track but have many hours in it. I hope it works. If it doesn't, we'll have to explore the coil spring, but getting something together that the average home mechanic could install would be difficult, at best.1 point
-
Alright, stress test complete. 250,000 down and up shifts without issue on the spring with 28 degrees preload. (over stressed) Here is my report from the reliability lab. This is what I'll recommend. .071 dia. spring with 2.45 active coils. The spring calculator says this spring has 62.5 degrees safe travel. Total travel of this spring in service is 39+15= 54 degrees. Max safe torque of this spring is 6.8 inch lbs. At 54 degrees, this spring generates 5.88 inch lbs. At 54 degrees it's inner diameter is .622" The post it rides on in the Guzzi part is .590" diameter. (15mm) Shouldn't be any coil binding. Now, it needs to go to the Winter Desert Proving Grounds in the deep southwest for "real world" testing to see if it actually works. I'll make up a couple and send them out to our test engineer, along with the preselector, early next week.1 point
-
I very seldom watch movies.. and almost never watch one again. I've seen O Brother several times. One of my all time favorites.1 point
-
1 point
-
Chuck, check the engine oil qty, there's none on the floor, must have run out:) Ciao1 point
-
Same as one weekend in the Santa Monica Mountains, right? Seriously, that's a whole lot of shifting. Hopefully the rest of the pre-selector is up for the abuse - but I don't mind if you kill it. I'll just have a spare tranny with a dead pre-selector. All in the name of science.1 point
-
The "Lucky Phil Extension Mod, made by Chuck" -owners club here in Finland would be eager to get such a retro-fit-kit :-)1 point
-
Of course the issue with this mod is 3 fold, lots of extra bits in the gearbox, the spring is now going to be extended in 2 directions during operation. A straight extension as the selector arm ramps ride over the wheel pins and a small rotating motion as the selector arm moves in a linier direction as it rotates the drum. Also we now have another oil leak point. The first shouldn't be an issue if its all loctited up, the second can be overcome without too much difficulty and the third I'm not sure about in the long term. I would suggest that the ends of the spring be able to rotate on the anchor posts if they dont already. It should be easy to measure the original spring tension with a digital scale with the cover off to get an idea whats required of a coil spring. Would it not be possible to stick with the original design and look to have a higher quality spring made. I'm sure Guzzi didnt use the best available spring material at the time. Ciao1 point
-
1 point
-
Photos from my old Guzzi Repairs web album. I have incorporated the photos from the separate album, which was called, A Roadside Repair Is Possible. A broken spring could be repaired out on the road. Lean the bike over to keep oil in gearbox. The biggest problem is access past the support tube to bottom Allen screws, so it is best to carry a modified Allen key. Carry a spare spring, or if you don't have one, or suffer 2 breaks on a trip (!) vice grips as well as pliers will help to bend the broken spring. If you want to be totally prepared, carry a file incase you need to reduce the pawl arm boss from 16mm to 15mm! (Or pack a spare pawl arm as well as a new spring.) (These photos were taken at 1,200 and 1,400 miles.) 1 Assemble tools appropriate for Guzzi repair. ok... these ones... Tools are easily carried. If no spare spring available, grips are also needed to grasp and bend the broken spring. Allen key. I filed the edges off and cut the short end shorter, to get at lower cover screws. 2 For a roadside repair, the bike would be leaned over to save oil in box. It should be a bit more, but garage space here is too narrow. Actual roadside repair procedure, side of motorway a long way from home (2006 photos)1 point


