-
Posts
36 -
Joined
-
Last visited
Content Type
Profiles
Forums
Events
Gallery
Community Map
Everything posted by LeMaynes
-
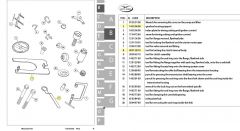
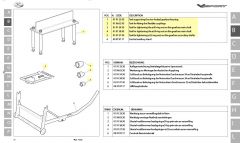
This is my tool check list: 14 92 96 00 01 91 37 30 01 91 38 30 30 91 28 10 01 91 34 30 01 91 25 30 01 96 63 30
- 13 replies
-
- 2
-

-
- Transmission
- recall
-
(and 1 more)
Tagged with:
-
-
Muscle memory. https://www.youtube.com/watch?v=ztNQXfHGBsw
- 82 replies
-
I almost bought at 88 honda hawk yesterday but I know my priorities. I have too many projects right now. https://sacramento.craigslist.org/mcy/d/folsom-88-honda-nt650-hawk/6783134152.html
- 13 replies
-
- 2
-

-
- Transmission
- recall
-
(and 1 more)
Tagged with:
-
ok. I knew it was not going to be as simple as I described. I appreciate all the support and will reach out to those who offer to lend tools. Very Kind.
- 13 replies
-
- 1
-

-
- Transmission
- recall
-
(and 1 more)
Tagged with:
-
I'm walking through my transmission fix and any hands on insight would be greatly appreciated. You may remember a post (https://www.v11lemans.com/forums/index.php?showtopic=20313). I broke the forward selector (aka. movable hose) on the lower secondary shaft and long story short, I need to do the recall service myself. I have the replacement parts in hand. So far, my best plan of attack is outlined in this thread but I don't think I have to do a complete tear down and rebuild. https://www.v11lemans.com/forums/index.php?showtopic=20021 - Firstly, can these parts be replaced without the "special tools" specified in the workshop manual? I am very handy but do not own any of these and I have never had a transmission on my workbench. - Also, can this be done without separating the tranny from the engine? Meaning, go in after removing the swingarm and leave the engine and all it's wiring intact. Also, can I leave the transmission case connected to the engine and pull off the gearbox backplate with the gear stacks staying connected? That idea may be laughable but I'm learning as I go here. So the overall process would be: Remove swingarm, Unbolt gearbox backplate(s) and remove it with gear stacks / shafts still connected. With the output side down and the shafts pointing up, unstack parts from the shafts in question and reassemble in reverse order with replacement parts. Reinsert it as one assembled part when bolting on the backplate. This is doable, right? I see you shaking your head... Many of life's failures are people who did not realize how close they were to success when they gave up. Thomas A. Edison
- 13 replies
-
- 1
-

-
- Transmission
- recall
-
(and 1 more)
Tagged with:
-
long story short... Local dealer = recall expired - without checking VIN Called NFTSA = looked up many recall campaign records per my request, all are expired and none confirmed link to my VIN. Called out of state dealer = very good talk (gave me hope) but no definitive answer from VIN on the record. Called Piaggio = VIN confirmed "Never Serviced" ( So I tried my local dealer again and they now say "Yes, it IS covered, but I have to pay in full". And when I question that defeats the purpose, they were quick to end the conversation by claiming either way "we don't service old bike like yours". OUCH! ...I just laughed and wished them well. I'm done. The labor of love is shared by few. My hats off to those always offering their support. Hopefully me for you someday. $140 for parts and a few hours of meditative tinkering is time and money better spent than in therapy, more so now after have been driven a bit crazy.
-
Thanks for the offers of spares parts. I have also seen used on ebay. Only Harper's and AF1racing have new parts, sold as recall Kit B, at an affordable price. I frequent the bay area but before I decide, I will definitely be contacting the local Moto Guzzi dealer with my fingers crossed. Some say it has expired: http://www.v11lemans.com/forums/index.php?showtopic=14913&hl=973260900016&do=findComment&comment=161263 justmike said: Posted 30 June 2009 - 04:00 PM What if the recall was already done on my bike? I'm not sure who to trust to tell me so and if so, I'm not sure if they would do it twice... for free. Hoping JBBenson is right... How long ago? ...and yes 8.8 hours to be exact, as per their own documentation. I will have this in my back pocket, in case I mess up that "secret handshake". https://static.nhtsa.gov/odi/rcl/2003/RCDNN-03V486-7355.pdf https://www.nhtsa.gov/vehicle/2000/MOTO%252520GUZZI/V11%252520SPORT#recalls
-
-
From the album: Bad Shifts..Now Nothing
-
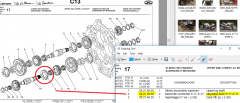
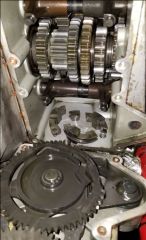
Yes. I know. Another Gearbox Post... But this one is different then anything I have found thus far. So I decided to post. I'm sure I will have a real question soon enough. I recently lost ability to shift into gears 4 5 6, but made it home without breaking down. Gearbox has been clunky, False neutrals and lots of "grind it to find it" type shifts. I don't think this is directly related but sometimes the foot pedal would get stuck higher than normal and I would need to pull over play with everything to get it back down. Now this: (see my gallery) Shattered the forward "movable hose" of the lower lay shaft. (part# 04214900) trans recall part kit B 973206900016 is on order. yet to decide which selector parts to order. Need to look at my notes. I might as well service the clutch since we are half way there already and fork oil too while we are waiting for parts. 2000 V11 sport just hit 15000miles. Recently did the breaks, so I'm doing all procedures left in the manual for 12000m. As previously mentioned, I'm sure I will have a real question soon enough. For now I'm just getting my bearings. (pun) Im sure I will have a real question soon enough.
-
-
-
From the album: Stucchi Fairing Hardware
-
From the album: Stucchi Fairing Hardware
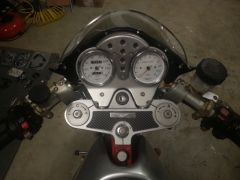
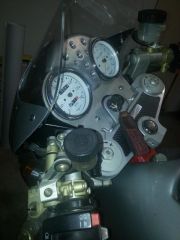
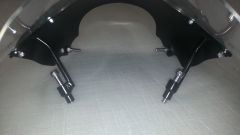
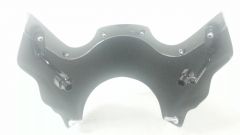
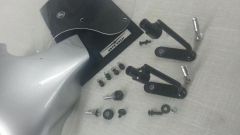
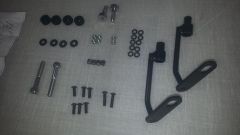
Had to get new hardware from Stucchi. Right and left bracket are not the same. Yes, that is carbon fiber inlay in the tripleclamp. -
From the album: Stucchi Fairing Hardware
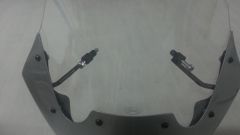
Primed. Sanded. 2 coats black on inside. 3 coats silver. Wetsand 1600. 4 coats clear. Wetsand to 2400. Should have put the decal under the clear in hind sight.© LeMaynes 2017
-
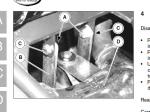
Just found this in the service manual. I have been through it multiply times and don't know how I never seen it.
- 12 replies
-
- Silent block
- Exhaust
-
(and 2 more)
Tagged with:
-
You read my mind. Duct tape! I just hate calling Central Services. Too much paperwork. "Have you got a 27B-6?"
-
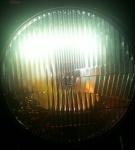
What is the purpose of the pilot bulb? Mine is burnt out. Never new it was there until I opened the headlight. Here is another pic showing how bad that blemish affects the beam.
-
YES. I can see where those feet would attach. I guess there is no harm in running without it. As long as it not still in there rattling around like it did. Any ideas on how to touch up or refinish the reflector?
-
It is not rust. But if there was something rattling around in there, that is where it would leave its mark. Sure is hard to take pictures of this darn thing. You can see from the back of the reflector that it is painted with a red oxide primer before the mirror coating. The location of the blemish inside transposes between the yellow sticker and the outer edge. Anyone got a pic of the "integrated reflector" I seem to be missing. I have scoured the web, workshop manuel and parts catalog to no vail. Maybe its just time to splurge on a trucklite or one from JWS. Fix a necessity as is? or might as well upgrade to something super badass.


