.jpg.23127264c1729dc35d9fbab10f7516eb.jpg)
PhillipLarsen
-
Posts
100 -
Joined
-
Last visited
Content Type
Profiles
Forums
Events
Gallery
Community Map
Everything posted by PhillipLarsen
-
I had the same 2 to 3 psi leak per week on my 2012 Stelvio last year(39,000 Km) on it. Wanting to fix it, put the wheel in the water tank and was leaking a very little at many spoke nipples (about 70 %) past the o rings. Three or four had subtantial bubbles. As I was about to replace the tire decided to address it. I found correct o rings in quantity and the right material reasonable price by the 100. Replaced all of the o rings one at a time on the rear wheel using correct silicone grease. There was white powder in the o ring / nipple area on most of them, I think was either salt or road grime. The bike had been used by the previous owner / friend in early spring when there is still salty water on the wet road when the snow leaves. I cleaned every thing very clean and lubricated. Was much better but still leaked about 2 psi per 2 weeks. This winter was wanting to cure the issue, considered either a tube or some sealant. Decided to put it in the tank again and see what was going on before giving up. It was leaking at the nipples past o rings again at about half of the o rings. Took the worst ones out to sample what could be going wrong. What was clear is the bores in the rim were not smooth, slight ridges and not very good finish. I decided to try something. Cleaned each bore very clean, then sprayed black thin gloss engine block paint in each bore, let it set a few minutes, then a second coat. it smoothed out the bores and imperfections, came out shiny smooth in the bores. Let it cure one day before putting nipple back in with oring / silicone grease. I did four nipples at a time over a number of days until done. When all done, tire back on, pressure in, let it sit 4 weeks, with no measurable change in pressure, into the tank to check to be sure, no leaks at any nipples. Have now ridden about 500 km and still no change in pressure. I think the imperfect bores were allowing the o rings to allow a little weaping. The front tire has always been much better, only leaking about 1 psi per month, but when the wheel comes off for tire change in about 5000 km, I will do the same to the front wheel, including the paint in each bore of the rim.
-
.thumb.jpg.91a67db8641cea72590980876d22ff5a.jpg)
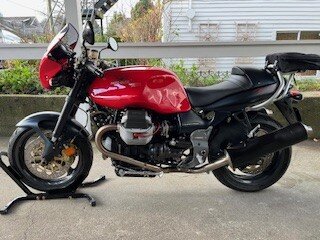
1993 Moto Guzzi Daytona 1000 on craigslist Vancouver BC
PhillipLarsen posted a topic in Personal Ads
I see this 1993 Daytona 1000, Dr John Wittner BOTT Racer Replica for sale here in Vancouver area. 93 Moto-Guzzi DAYTONA 1000, styled after Dr. John Wittner BOTT racer... (craigslist.org) -
Thanks Motortouring, you are right the LSL riser kit looks like it would work with the spacers to fill in the machined pocket on the top of the plate. That gives the two options. I think if I end up going non oem, I may still like the Stein Dinze upper plate better, with just the one piece all machined giving the cleaner look, even though about 65Euro more expensive. Either will work though. Appreciate your help providing this information.
-
I checked the Lemans Triple plate currently installed, and it does have bosses on the bottom of the plate at about 14 cm apart (quite wide), but the top of the triple plate is not flat as it has a machined pocked over a substantial amount of the surface area and the step is about right in the middle of where the bosses are on the bottom. I would need to get some machining done to create a place where the risers could be installed and have a flat spot on the top and bottom. I will keep my searches going for an OEM triple plate that will work without modification, and if cannot find one before spring, will order the Stein Dinze set up. Appreciate everyone suggestions.
-
Yes, that makes sense and good suggestion, much appreciated. I will check the current Lemans triple plate to see if it has the props for drilling holes and if so can search for another similar Lemans/Sport etc. plate.
-
Yes, I agree with Lucky Phil. Unfortunately the original unidirectional seal (only about 10,000 km on the bike) did not have a double lip seal (dust excluder second lip). I was very surprised as well. It looked like the issue causing the leak was all the dust and grime in the seal / drive shaft area as it is in an area next to the tire/wheel with high exposure to road dust and grime, especially here where the secondary roads are often contaminated with lots of dust and debris from logging truck, farm vehicles, etc. The seal had no visible damage, even when examined under 15X magnification. Given all the dirt in the drive shaft area, I was even thinking it would be beneficial if there was some way to enclose the area, but with the new seal decided to try it to see if it eliminates the contamination problem. The double lipped seal I obtained is also a unidirectional with the dust excluder second lip. The reason I had to wait a couple days for it was because I wanted the same uni directional seal, but with second lip in a high quality material, and in the exact size, which they did not have on the shelf but were able to bring in.
-
When replacing the pinion seal, I went to a bearing house and ordered a double lipped seal (high quality) that will not react to oils and solvents. They are not expensive and readily available, just took a couple days to get the exact size. Less chance for leak in future. Mine was leaking at the pinion seal and the evidence was a slight film of oil coming off the drive shaft area and onto the right edge of the tire and rim. After replaced no further leaks. I cleaned up the entire rear end, lubed everything, splines on driveshaft, grease nipples on drive shaft, cleaned large seal on rear drive from outside, greased everything on reassembly. Thousand of Kilometers ago and oil tight.
-
Thank you very much for the information motortouring. I am hoping not to drill the Lemans upper triple clamp to keep it looking nice, as I will still use it other than for long trips. The Stein-Dinse triple tree and risers looks very good. I will check into it further, if I do not find any OEM parts.
-
What I did when I needed to remove the #18 nut was buy a half inch drive socket the exact right OD and then use angle grinder with a thin hard wheel to cutout the socket to create the tool. It only took about 30 minutes to create it and worked very well. To hold everything while I removed the nut I reinstalled the rear end without the drive shaft and used the brake to hold everything from turning while I removed the nut. The nut was very tight, but worked well with a second person to hold the brake on.
-
Thanks fotoguzzi, I really appreciate the offer, from what I can tell so far they are not compatible. Maybe someone else will know for sure.
-
I am still looking for all of these Ballabio parts ( upper triple plate, handlebars, etc, ), if anyone has any available. Thanks
-
Ok, great thanks. If anyone may have an Upper Triple Plate for V11 Ballabio (the one drilled for the handlebar mounts), I would be interested in buying that as well.
-
I'm interested, no problem for helicoil. Can you check if they are there and let me know.
-
2004 V11 Ballabio Handlebars, Upper Triple Plate, Handle bar mounts wanted Looking for original upper triple plate, handlebars (grey preferred), and handlebar mounts for 2004 V11 Ballabio. My Ballabio came with the Lemans upper triple clamp, Lemans clipons, and speedo/tachometer relocated further forward. Apparently the dealer at the time had two customers, one wanted a Lemans with Ballabio bars, other wanted Ballabio with Lemans bars, so they accommodated both by swapping. I bought the Ballablio shortly after it was sold new, and did not even realize this was not the stock set up. I really like the current set up, but would like the original Ballabio set up so I can swap to that for some really longer multi day rides where my arthritis starts coming into play (67 years old). Appreciate any help or leads on who may have a set of these they may want to sell, as some people may have removed Ballabio set up to install Lemans set up. Main parts needed: Handlebars GU01600382 Upper triple plate GU01493180 upper U bolt (handle bar mount) GU01500680 need 2 LH Lower U bolt (handle bar mount) GU01500281 RH Lower U Bolt (Handle bar mount) GU01500280 Screw AP8150049 need 2 Screw GU89682430 or 600123 M8 x 30 Need 4 Washer GU95008210 need 2 Cup GU273530505 or AP8123721 need 2 Spacer GU91182019 need 2 Rubber Spacer AP8144222 need 4 Spacer 20 x 29 x 4 GU91182004 need 2
-
Moto Guzzi V100 Sport Tourer: water cooled, 120 HP (26th of August 2021)
PhillipLarsen replied to p6x's topic in Newer models
-
Moto Guzzi V100 Sport Tourer: water cooled, 120 HP (26th of August 2021)
PhillipLarsen replied to p6x's topic in Newer models
-
Moto Guzzi V100 Sport Tourer: water cooled, 120 HP (26th of August 2021)
PhillipLarsen replied to p6x's topic in Newer models
smallgreensidev100.jpg.7d8218c7a4c5006887b9c05c4c33da8c.jpg)
-
Moto Guzzi V100 Sport Tourer: water cooled, 120 HP (26th of August 2021)
PhillipLarsen replied to p6x's topic in Newer models
-
Moto Guzzi V100 Sport Tourer: water cooled, 120 HP (26th of August 2021)
PhillipLarsen replied to p6x's topic in Newer models
-
Moto Guzzi V100 Sport Tourer: water cooled, 120 HP (26th of August 2021)
PhillipLarsen replied to p6x's topic in Newer models
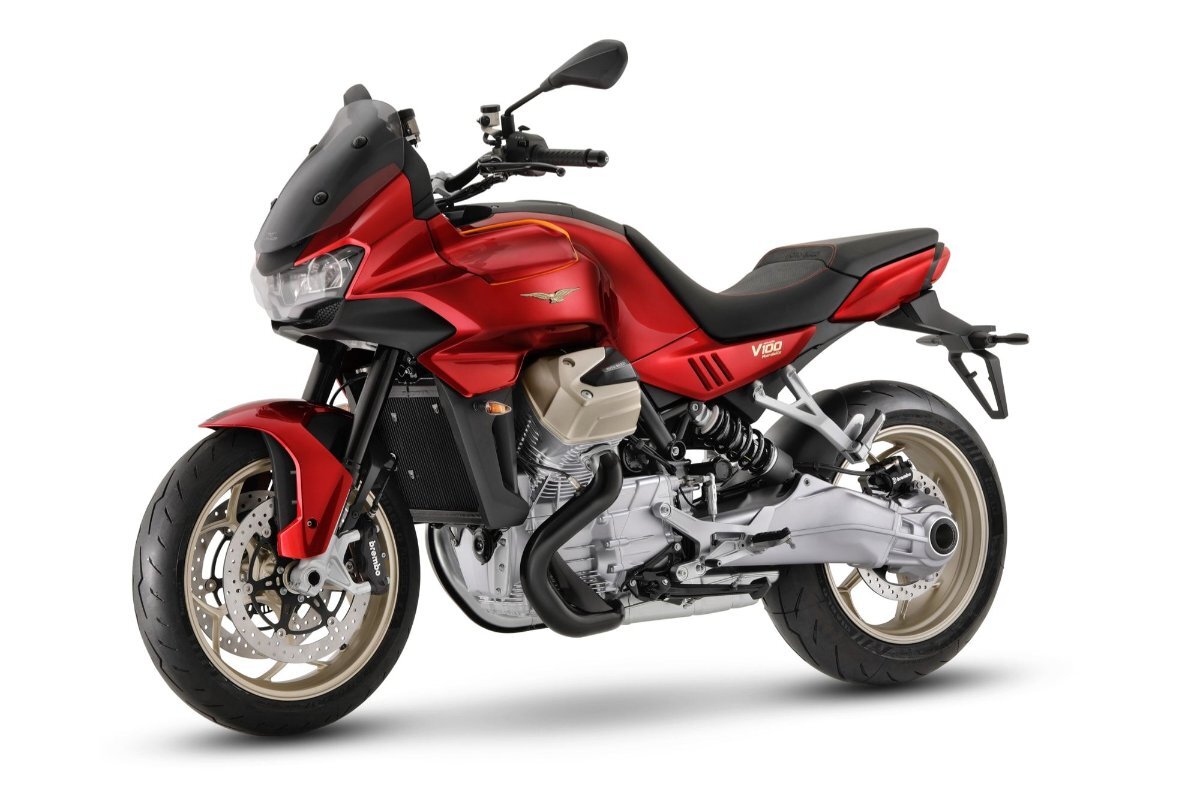
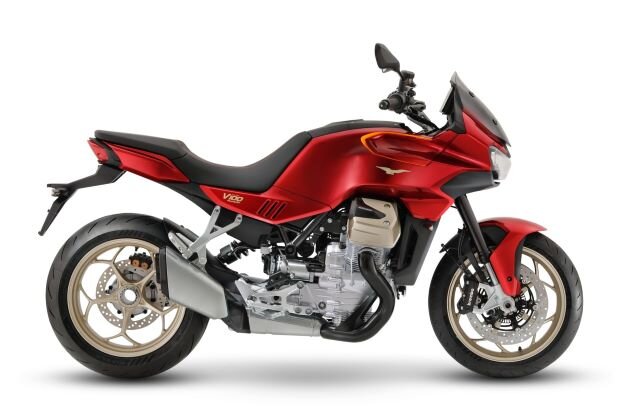
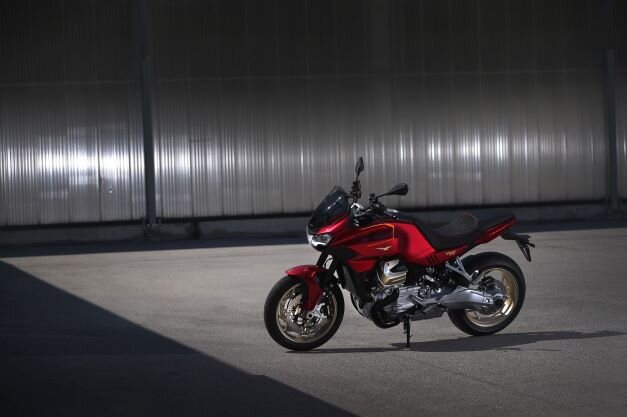
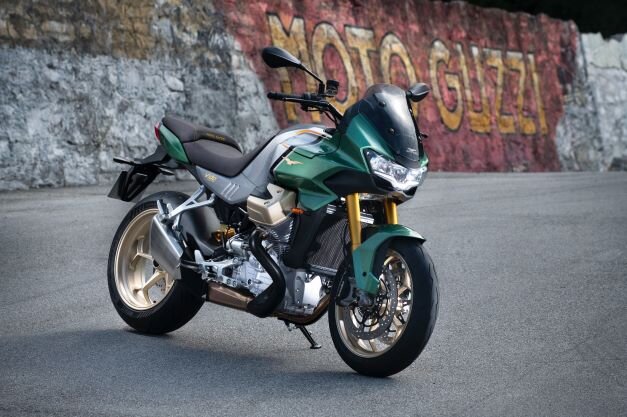
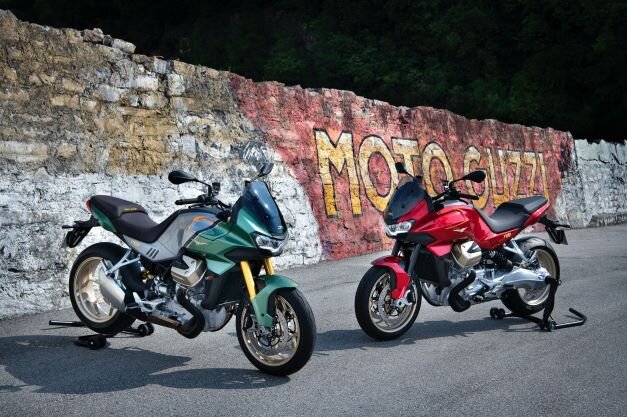
Some images of V100, 2 colors
-
Our local Firestone store here in Vancouver (on Commercial Dr) charges $5 Cdn ($4 USD) per tire to fill /purge/fill motorcycle tires. It used to cost a lot more but very reasonable these days. I use it on my car/SUV and it stopped very slow weeping of a couple of the tires there as well. Have it in 7 out of my 11 vehicles (8 motos, 2 auto, one airplane). So far the ones I have filled have lasted 3 years (that is the oldest one I have filled) or until I replaced the tire without measurable loss. What I have been doing is if one of the vehicles starts losing pressure that needs attention more often than once in 6 months, I go get nitrogen in the tires.
-
I use Nitrogen in my airplane (Glasair III) as was having problems with tires weeping a small amount of pressure (new tires and tubes). The larger N2 molecules stopped the leaking completely. Fill with Nitrogen once to purge, then second time to pressure. Use it in most of my motorcycles including V11 Ballabio and Stelvio. It cured the 1 psi rear and .25 psi front leak per week on the Stelvio which has the o ring sealed spokes. ( had replaced the spoke nipple o rings and tires with new tubeless, but still slow weeping of pressure). Rather than chasing these very slow weeping cases, now I just use Nitrogen. I used to work for major airlines and we used Nitrogen in all tires and landing gear cylinders.
-
Thanks for the info guys. I was able to get Collector plate for my 2004 Ballabio. I did not provide any info, just checked boxes that said 15 years old and less than 1500 manufactured. They must of already had the data you submitted to confirm low production. Picked up plate and insurance today. Saves a lot of money.
-
I just got approval for collector plate and insurance for my 2004 Moto Guzzi Ballabio in BC today. I checked the boxes on the application that said 15 years old and less than 1500 manufactured. I did not provide any data with the application. After about 5 weeks I got approved and just went and picked up the plate and insurance now. I assume they already have the data as I know of one other person in BC that had obtained Collector plate for 2003 Lemans. The cost per year is $ 219 for 2 million liability plus license plate fee for a total about 300. I just got 3 month worth and was $90 with license plate and fee cost. The license plate fee is one time, as long as you keep the same one.
-
On my 2004 Ballabio my Odyssey lasted over 12 years. Replaced with same. Is always kept on a battery tender when not ridden. That is the longest I have ever had a battery last in a motorcycle, aircraft, helicopter or automobile.