guzziart
Members-
Posts
305 -
Joined
-
Last visited
-
Days Won
3
Content Type
Profiles
Forums
Events
Gallery
Community Map
Everything posted by guzziart
-
From the album: '03 V11 Lemans
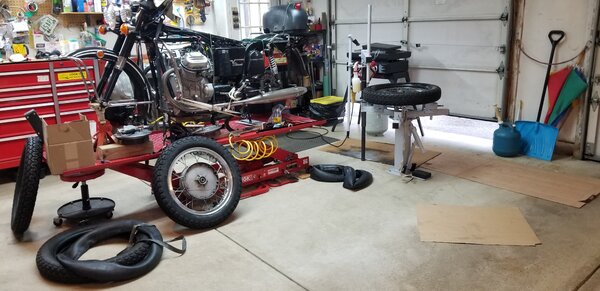
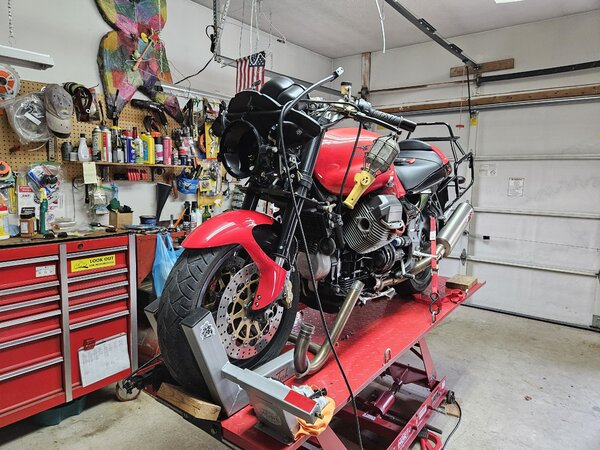
My Nomar. I was never able to manage the technique of using the Nomar tire bar so I went with the Mojolever (it can barely be seen lying on the edge lift table, white tip hanging off the end of the table). -
Hi LP, Nice, I don't think I came across the Rabaconda unit when I was looking back in 2017. I looked at the Max2H changer but thought I'm getting too old to be scrambling around on the ground. Yeah, I like the Rabaconda stopper pin, lube brush & lube bucket. I also like the duckhead, looks similar to the set-up on Coats powered changers, don't know why Nomar didn't put the like on their tire bar other than maybe a patent problem..idk. I have a Nomar, I never got the technique for using their tire bar, luckily someone posted something about the Mojolever ( https://www.mojotiretools.com/mojoweb.htm ), it made all the difference in the world for me, works great, no special technique needed to use. Another thing is the lube. I was using Ru Glide when using powered changers but found it drys too quickly, for me, when using a manual changer so it's the grease for me. I dislike using the Nomar lube...small tub, you need two hands to use, one to hold the tub & the other to dip in, get lube all over it, hit the tire and rim then wipe off hand....stupid. Rabaconda grease brush looks great as does their big grease pail....I'm gonna see about obtaining those items. The Max2H has a stopper pin set-up too, Nomar doesn't...I use a shipping tie down to keep the wheel from spinning in the wheel clamps or like Rabaconda recommends for use on laced wheels. I complained to Nomar about their wrinkle finish paint flaking off into the wheel bearing area when using the tire bar against the center pin, they told me I could buy a new center pin. My Nomar doesn't have the portability of the Rabaconda or Max2h. I stow the Nomar in the corner of the garage strapped to a HF two wheel dollie. When I need it, I wheel it into postion in the garage and bolt it down to the concrete threaded inserts that I have previously installed into the garage floor. The bolts only need be finger tight. So far it has worked out ok. FWIW, I use a Mark Parnes balancer too, it works good imo. I hate the price of wheel weights, I suppose it is what it is. Anyway, the Rabaconda changer looks great! Art
-
I agree with GuzziMoto & Doc. I had to rotate my #2 subframe forward/up to remove the timing cover to replace my timing cover gasket. I supported the engine from underneath at the oil pan. However, on mine, the spine was supported up front by the front end (front wh, forks, etc.) when I disconnected #2 from the engine. And, the front wheel was in a wheel vise to keep the bike perpendiculer to the ground and stable. So, if you don't have the forks, front wheel, etc. on the bike, I would say that the spine has to be supported (suspended from above) too by way of a chain fall, engine hoist, etc. so that there is some stability to keep it from falling on its side And, the tank has previously been removed. I suppose if you had the rear wheel locked up in a wheel vise and the engine fully supported you might be able to get away without support from above at the spine....I guess.
-
-
Yeah, been there done that. Those pin connectors in the background were blued/cooked on mine. If you've checked stator output and output is good and you are able to get new stator terminals & plug that'll save you a couple dollars. My stator/regulator wiring had got hot enough to melt the insulation into the wire strands of the stator so, I replaced the stator too.
-
Hey, Call Curtis...that always yields the best results for me. Art
-
From the album: '03 V11 Lemans
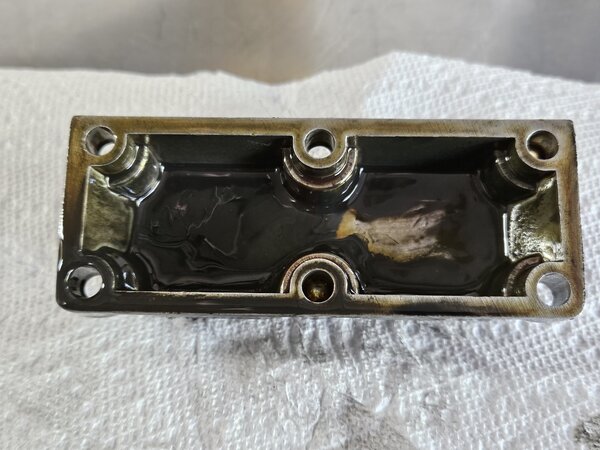
Sump from the rear drive of my '72 Eldo. The thick black stuff in the sump is liquid moly that seems to be heavier than the 80w-90 gear oil and settles to the lowest point in the rear drive when static. I can't say that it is the whole 20cc's worth of LM that I put in during the last gear oil change because I have already poured some off when I removed the sump just now but it still has a substantial amount. -
That's nothin', the retaining screw at that location was so long on mine it was wearing into the tank!
-
Both sides spark plugs are black; looks like my mixture is too rich!
guzziart replied to p6x's topic in Technical Topics
Another stupid question.....What is the ETS? Art -
Nice! I've got a HF venturi action vac bleeder that works well and a homemade job that'll suck gear oil...they're great. I had to open the system on my '87 LMIVSE back in '10 when I got it, to refill the system, I connected a 2 foot line to the bottom oriented caliper bleed and gravity fed through the caliper up to the reservoir or maybe I used a syringe to force fluid up into the system....I don't recall exactly how I did it now but a positive pressure bleed would have definitely been helpful/quicker/cleaner. Art
-
Yeah, I've had zero luck with H4 style stuff and have become very proficient at removing the Lemans fairing as a result.
-
ANSWERED V11 for sale online/ Craigslist and all others
guzziart replied to chamberlin's topic in 24/7 V11
Hey LR, I've got an '03 Lemans......what is the "bellhousing brace"? Thanks, Art -
What did you do to your V11 today?...... I installed a new timing sensor oring, changed engine oil, brake & clutch fluid, moved it off the lift and went for a 50 mile ride. Today was a beautiful summer Saturday in Northeast Ohio.
-
-
From the album: '03 V11 Lemans
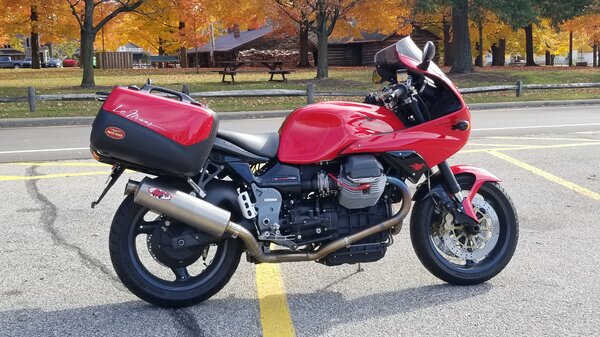
Took the Lemans for a quick 50 mile run after installing a fresh timing sensor oring, changing the engine oil, brake & clutch fluids and stopped at Punderson State Park on this beautiful Saturday for a picture. -
ANSWERED Do you ROCOL your 80W90 in your rear drive?
guzziart replied to p6x's topic in Technical Topics
I'll let y'all know the next time I change the r. drive oil on my '72 Eldo....it has a removable sump, a good place for 20cc's of liquid moly to coagulate. 8/29/23 Update: I removed the sump from the Eldo to change the oil. I didn't see clumping but it appears that the heavier liquid moly (than 80w-90 gear oil) settles out to the lowest point when static. -
ANSWERED Do you ROCOL your 80W90 in your rear drive?
guzziart replied to p6x's topic in Technical Topics
FWIW, I'm running name brand 80w-90 gear oil and Kalgard moly something or other additive I bought years ago for my MG's and have not enocountered a rear drive problem. That being said....... The rear drive issue I had a few years ago ( and complained about it here) was a result of the original owner of my Lemans replacing the r. drive with a used unit because the original r. drive began to leak and rather than fix it, he replaced it. When I got the bike I decided I wanted the original r. drive back in the bike and went through the effort to get it oil tight and reinstalled into the bike. Yeah, I got a good "spare" rear drive now. Does anyone need one?? It has black wrinkle finish paint on it whereas my original is black satin. Art -
The Bacon McDoubles are pretty good imho
-
-
From the album: '03 V11 Lemans
-
I wish MG would have stuck with the steel reflector for the Lemans. Or at least the bezel set up as the retaining device for the reflector.
-
One of the inexpensive clones I bought had a base that I felt was too thick to install. As a result of the thicker base, the bulb retaining springs exerted more pressure on the two retaining tabs on the reflector. I was concerned that the additional tension would break the plastic reflector tabs so I didn't install the bulb but instead bought another inexpensive bulb having a thin flat stamped steel base like a conventional H4. Anyway, the bulb only lasted a few months, if that and I've ordered another inexpensive LED H4 to "try". And, while I have the fairing off for inexpensive LED bulb research purposes I'm gonna have another go at my seeper/leaker timing sensor.
-
One of the inexpensive clones I bought had a base that I felt was too thick to install. As a result of the thicker base, the bulb retaining springs exerted more pressure on the two retaining tabs on the reflector. I was concerned that the additional tension would break the plastic reflector tabs so I didn't install the bulb but instead bought another inexpensive bulb having a thin flat stamped steel base like a conventional H4. Anyway, the bulb only lasted a few months, if that and I've ordered another inexpensive LED H4 to "try".
-
Hi FG, No the amazon bezel won't work, unfortunately but thanks for looking. The LED pilot bulb is a sylvania #194. I got it at Walmart, was about $7 and was on a hook in the automotive bulb display area. Don't forget to read the instructions....if it doesn't work initially, remove it, rotate it 180 degrees and reinstall...polarity sensitive. Art
-
Today, I'm doing more headlight work. I attempted to replace the original equipment H4 headlight bulb with an LED H4, the inexpensive LED H4 lasted 2-3 months. My 2nd attempt to move to an LED involved buying a 7" round "Jeep" style LED headlight assembly. Unfortunately I now discovered that the 7" Jeep thing will not install. Apparently, the OEM headlight/reflector assembly have the tabs molded into it that allows the assembly to be secured into the HDL bucket, a tab on top that fits into HDL bucket & a tab on the bottom that contains a speed nut for a securement screw, in other words the OEM assembly is NOT secured into the bucket by the headlight bezel/trim ring. The trim ring "snaps" onto the headlight/reflector assembly. So, I have no easy way to install the Jeep thing unless I can somehow find a trim ring that will fit onto the Jeep HDL, has a tab that fits the HDL bucket on top and a tab on the bottom to allow a screw securement. Oh well, live and learn. At this point I'm inclined to try another budget H4 LED, I've become very good at fairing r & r. Plus, I installed an LED pilot bulb so I'm not completely dark in front and it is brighter than I thought it would be. FWIW, I don't ride at night but would like to be more conspicuous during daytime riding. .

