andy york
Members-
Posts
601 -
Joined
-
Last visited
-
Days Won
15
Content Type
Profiles
Forums
Events
Gallery
Community Map
Everything posted by andy york
-
-
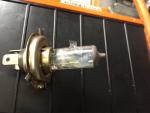
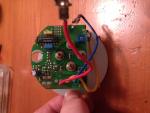
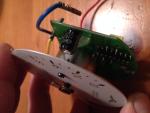
You guys thought I was messing around about the magic smoke. Well here's proof that it got out. I'll chase it down one of these days. to damn cold to ride right now.....oh wait ....I'm just getting old lol any leads on a white faced veglia tach lemme know...it lost its magic smoke too!
-
timing cover gasket, metal or original gasket?
andy york replied to SanderVdB's topic in Technical Topics
hence my statement about replacing it anyway lol . I would put nothing on the gasket, its made to "crush" once the cover is torqued down. "dab" is a high tech term for just getting it on the first 3-4 mm of threads.your not trying to seal the holes just keep the fasteners torqued. just fyi ....I have 105000 on mine - chain and tensioner also have fun -
That looks really top notch. I looked at the speed hut gauges after Kiwi Roy did his. Yours is about what I was going to do but I swear I read where the gauges were not water proof. Are yours? That was the reason I did not do it. I sometimes get caught in a real frog strangler and would hate to ruin the gauges.
-
timing cover gasket, metal or original gasket?
andy york replied to SanderVdB's topic in Technical Topics
The metal gasket is the proper one to use. When you do this it would help if you have air tools to remove the nut on the crankshaft. If you are using a bike lift, back wheel first so you can turn the forks. Up on reassembly, I would use just a dab of blue loctite on the fasteners. I have seen these leak because they were loose. Once again, if it were me, I would replace the front main seal while your there. just cause. Keep us posted.....I'm back to chasing the magic smoke lol -
Looks good... when you coming over and help me find the magic smoke?
-
Rear drive needle bearing and swing arm restoration
andy york replied to Bjorn's topic in Technical Topics
The seal below the big needle bearing : to remove the bearing use heat and a couple of picks with 90 degree bends on the end. heat the housing not the bearing ....should slide right out. Thats the seal you have to replace if you ever get lube dribbling down the outside of the bevel box...passenger side. you probably already figured that out . Looks to me like you have a handle on it. I just don't have good luck re-using seals ,hope you do lol -
Rear drive needle bearing and swing arm restoration
andy york replied to Bjorn's topic in Technical Topics
Speak of the devil ...Oh thats me ha Just now saw the thread.... So you pulled the the big gear out of the box ....what about the bearings and seals and spacers in the "bottom" of the box ? I don't have one apart right now but it seems like there is a bearing in there that can be a tad difficult to seat correctly. And everything has to be lined up all the way through the box .spacers ,washers, etc... so the spindle will go back through. If you have not taken the small gear "out" and there is nothing wrong with that assembly, DON"T DO IT !!! What a total pain in the arse it is. Now I don't know how good your luck is ....and we all need a little luck on these bikes...lol.... But if you don't put new seals in it now I'll bet ya a beer that it leaks. nothin personnel lol And remember HEAT is your friend anytime on these bevel boxes I'll be watching -
Rear drive needle bearing and swing arm restoration
andy york replied to Bjorn's topic in Technical Topics
i to have thought of using a brass bushing BUT the steel needles are harder than the bronze will be and I would hate to have bits of bronze floating around. Now ....On the other hand ....If you can get a bronze bushing to replace the complete bearing assembly ...thats and even better idea So your just not replacing the inner race of that bearing but the whole bearing. I can see this being misunderstood and someone just replacing the inner race. more thoughts later -
My guess would be that the straight rate springs are a bit shorter than the progressive. It's been a few years since I had the Marz apart. There used to be 2 valves available from Ohlins. All I can find now is the 20 mm kit. I don't remember what size the assembly's are in the Marzs, but since yours are apart you can measure. I thought at one time Ohlins made a valve for your forks,but like everything else for our bikes, nobody makes much for an out of production bike. Surely there is a suspension guru down there. As much racing as goes on down there ....bound to be a bunch of folks that could help you out ....for a price of course.
-
So...What we know is that someone else had already been in the forks before your drama and possibly put different valves in. Most of todays "modern Forks" have one of two sizes of cartridges. Since I can not remember I'll just say a big one and a small one. Ohlins makes two sizes of cartridge inserts that fit about 90% of the forks out there that are not already Ohlins. This way you can have "fake Ohlins" As emry said ....spacers from PVC. My advice on length is to "make it as long as possible and still get the cap on without screwing up the threads." Anybody that has done this job themselves knows what Im talking about ..lol.. I did not want a limo ride so I have what I consider a race sag setup. Its just what I like. Plus you can always "shortin" if its to long. You also need to consider what springs you have ...straight rate or progressive. keep us posted
-
As much as I would like to fix it, I like the route you went Roy .I need to find that article.
-
-
-
i think gstallons missed your location. lol If that type of piece is in my 02 forks its made of metal. It looks like the valve assembly that the oil flows through. If thats what it is it should attach to the damper rod somehow. I scanned the workshop manual ...if you pm your email i'll send it on .
-
PDoz, you need to look up that guy that rides a green Griso with a pink seat. oh yea Roper …Pete Roper(just kidding pete) He's probably forgotten more about Guzzi's than most people ever knew. In the mean time ,I'll see if I'm smart enough to scan and post something out of the shop manual
-
Well ...I don"t have a clue about the 50 volts Roy. I suppose theres a very real possibility that I could have left off one of the main positive leads on the initial new battery install. Ya never know without a crystal ball.I do know that the tach has lost all its magic smoke. Nada, Gone, not happening, and I don't have another one of those. Well I do but its a later model ITI. Not even remotely close to the Veglia. I'll keep an eye on things ...as well as a used tach -) later
-
Sorry Docc ....there was pun intended there .....substiute "your head" for "Valve cover". This seems to have fixed the problem.....Idle ..I'm getting approx. 12.8 - 13 volts at the battery -lights on or off 13.7-13.9 at 4k rpm -lights on or off and no blown fuses. Roy ...I think the wiring schematic is the same.The factory service manual does not really make note of the various species ...there is a 3 -4 page addenndum in the back but I'll have to visit that and see what it is. On the Sports this whole process my have been easier. You can readily access the wires for the VR and Alternator. And you can see everything in the steering neck area. Had I not removed the fairing I never would have seen that little broken wire on the Le Mans. So now the rain is here ....might as well put it all back together.... Thanks Guys
-
It remains to be seen if this was THE problem. Off to try and find the connectors to fix this. Then we will know for sure. Roy, the lemans has a smaller headlight bucket than the sport. The headlight plug has a male plug that pushes through the bucket and locks in place.....then the 6" jumper plugs in from the outside the bucket and then the flat 4pin connector plugs in at the steering neck. oh well ...bbl
-
Hello Docc so….you know off the top of your valve cover where those special little wiring harness's came from ?
-
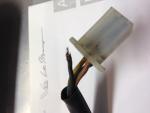
Maybe SUCCESS ! Yes ...I was getting 50 volts to the fuse block..I pulled the blown fuse again and put the meter probes in and with a little rpm was getting 50 volts. For grins I unhooked the 4pin headlight connector and started over. Hot battery installed, all cables connected and tight, another new fuse, minus the headlight 4 pin connector. Could it be ....Yes !!! up and down through the rpms and no blown fuse. So what the hay is going on.? 4 pin wires look good ....bucket headllight connector looks good...Ahhhah the square plug that goes into the headlight bucket has a nasty,frayed,broken black wire. The hard part is going to be finding the crimps and things to fix it. I remember a post about some custom wiring adaptors ...have to try and find that. Thanks for all your help Roy. -)))) PS: I am assuming that this will be the fix
-
I'll back up one step further. After 8 years I installed a new Oddssey PC 545. My assumption is that this is a recently manufactured battery, New store chain in town…hasn't been sitting around forever….blah blah blah anyway yes …it has the electrosport setup on it right now..2 years maybe ...shortly after Docc did his ( he keeps notes) Bike cranks normally Yes ….I put a dedicated 12 g wire from the regulator to the battery because it was melting the 30 amp main fuse. So i'm back out there snooping around stay tuned
-
Well, Found another alternator...swap out ....no fix. found the other regulator....swap out....no fix Ac volts between 45 & 50 volts between yellow leads on alternator #1 and #2 Ohms between yellow leads .2/.1 on #1 and #2 I'll have to go back and check for 12v at the regs black wire. I have a headlight switch on the bike fyi. off / running lite / headlight So all the while i've been getting a no charge situation....15a blue fuse blowing so leave it out till we remedy this situation. puit a 60 w lite in there and gave it some revs ....blew the 60w lamp (12v lamp) Put a new fuse in....start the bike...idle ...12.8-13v charging at idle -))) rev it up a little ...pop...15a fuse gone going to buy more fuses and see what kind of 12v lamps are available BRB
-
voltage key off 12.2 key on 12.2 running 3k 12.2 found the other regulator and installed it bypassing the "bike" regulator voltage in all scenarios is 12.2 me thinky my alternator has shat itself but I will await further instruction(as I don't think I have another alternator) still no tach so I am guessing it may have shat itself with a voltage spike also. need coffee so ( maybe I do have an alternator) be back later
-
I'm still pondering "the 4-pin plug under the headlight relay". Searching memory banks I don't recall a 4-pin connector in the relay area but I will look . trying to get a little heat in the man cave then I'm on it


