danl
-
Posts
83 -
Joined
-
Last visited
-
Days Won
3
Content Type
Profiles
Forums
Events
Gallery
Community Map
Everything posted by danl
-
Turn key and no anything -- all fuses and relays fine
danl replied to griswoia's topic in Technical Topics
Going from cranking to absolutely nothing one moment to the next is really odd. Looking at Carl Allison's diagram for the '99 (not sure how your bike differs) it looks like a blown ignition switch fuse would cause the symptoms you are seeing in an instant fashion. I know you said you checked all the fuses, but sometimes they can fail without being really obvious visually. If you only visually inspected the fuses its worth checking the voltage at both sides of the fuse at the exposed pads on top while installed. The ignition switch fuse should be powered at all times. -
That front end is going to look really trick! Not sure I've ever seen an inverted fork with a drum brake. Suzuki 4LS? Keep us posted...with pics! edit: Sorry for that diversion from the original post...I don't have any experience modding the Marzocchi forks, but I know a few people here have done mods or sent them out to have work done (maybe to Todd at Guzzitech?).
-
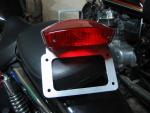
I made a fender eliminator that uses the stock tail light (which I actually like), turn signals and the turn signal spacers from the front lights. I always intended to complete a set of DIY instructions to share on the forum. I got about 80% of the way there, and that 80% is attached below. There are printable patterns for 2 brackets that will need to be cut out, bent and welded together. The design also incorporates a plastic splash guard, but I haven't made a pattern for that. Anyone who can get through the first part can figure out the splash guard pattern (start w/ the license plate shape). I'll take some pics of mine and post them up here soon. By the way, making one of these assemblies, then installing that assembly onto a motorcycle and operating that motorcycle anywhere other than your garage is most likely illegal and could in result in gruesome injuries. I'm not advising that anyone do so! Dan V11 Sport Fender Eliminator Bracket (preliminary).PDF
-
Voltmeter / Charging indicator - What are you using and how is it wire
danl replied to danl's topic in Technical Topics
That's true, and definitely a consideration. My instrument lights did noticeably indicate the overcharging, but that's not really ideal!! There is something to be said for reducing the feedback resolution to just Good or Bad (keeps me from overthinking tiny voltage changes and enjoy the ride). The kuryakyn one is going to be the one I try first. I'm also going to get one of these to check out: http://www.amazon.com/Voltmeter-2-7~30v-Digital-Display-Detector/dp/B00M6KZ4CG I think I could have a little housing made up for it that would fit in the same location on the dash where I'm hoping to put the kuryakyn. -
Voltmeter / Charging indicator - What are you using and how is it wire
danl replied to danl's topic in Technical Topics
Thanks for all the replies guys. I see a fairing makes it much easier to add little extras like this without having them look awkward and out of place. Trevini - I like how you installed that LED. Did you have to modify the plastic light housing to mount that or were you able to slide it right in place? How do you guys prefer to tap into the ecu relay circuit? I've always been a little leery of the insulation displacement/piercing type connectors. I liked the non invasive idea of using the petcock connector, but I guess there's no way around some sort of splice. -
Hi All, I just replaced my voltage regulator because my last one was intermittently overcharging. Without an actual voltmeter, my only indication of when this was happening was that the headlight and instrument lights would get very bright. One of my winter projects will be installing a voltmeter or other method of monitoring the battery and charging system. I'm curious what you folks are using / have tried, and how you like them. I'd also be interested to hear how you have them wired (where you picked up the reference signal). My first thought was to put a Superseal connector on the end of the voltmeter wires and pick up switched power at the now unused electronic petcock connector. Unfortunately, there is a .9v drop between the battery and this connector. It seems like the only way to get a good switched reference might be to add a dedicated relay? Seems a bit overkill. I'm considering this: http://www.kuryakyn.com/products/872/led-battery-gauge https://www.youtube.com/watch?v=bzSySJafoIE which seems like it might fit nicely on the dash between/below the gauges, or on top of the frame ahead of the tank. Or this: http://www.twistedthrottle.com/electrical-connection-led-motorcycle-battery-voltage-monitor-flush-mount-kit which only provides basic info but is discrete Or this: http://www.amazon.com/Waterproof-Digital-Voltmeter-Motorcycle-Battery/dp/B009XQKCQY/ref=sr_1_7?ie=UTF8&qid=1422066991&sr=8-7&keywords=digital+voltmeter Or even an analog gauge Any pictures would be appreciated! Thanks, Dan
-
I rebuilt mine a year or so ago. I think this is the kit I used (not positive - double check that D6RA is the starter we have before ordering): http://www.euromotoelectrics.com/product-p/val-tkplus.htm I read all about the magnet issues that are common to these Valeo units, but it turned out my brush springs had rusted out and were barely holding the brushes in contact with the armature. There is a molded rubber seal on the endcap of the starter, but it didn't work so well in my case. I do remember trying to find an automotive cross reference for this starter. It seems like they are used on a bunch of VW's, Seats and other small cars, but none that are imported to the states. I believe that the motor portion is not specific to our application, but the planetary drive and housing is. Dan
-
Thanks for the comments everybody. I think I will T the lines together and run one single vent / drain down to one of the areas I described earlier. I did read a number of comments in another thread about just leaving the hoses off. It seems pretty well proven by many accounts that this doesn't result in immediate fiery death, but I still feels a little wrong to leave them off. Yes, my bike originally had all the emissions plumbing but it magically fell off one day and landed in a rubbermaid bin in the garage. Thanks for the tip about the through hole into the Gearbox. Glad I didn't find that out on my own! Dan
-
I'm in the final stages of reassembly after doing a bunch of work on the bike and I can't remember exactly how the vent and overflow hoses from the underside of the gas tank were routed (it's been apart for a while!). If anyone remembers or happens to have their tank off now could you give me some advice? It is a 2000 naked. Here is what seems right based on the length and shape of the hoses: The hose on the left will run along the left side of the spine and down between the transmission and the starter motor. The hose on the right will run down along the top of the spine, under the airbox, between the shock mount, to the right of the shock, then down between the frame and swingarm, behind the gearbox, through one of the hose management loops above the exhaust crossover. Thanks in advance if anyone is able to help out!
-
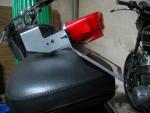
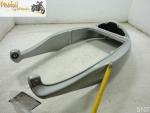
I made one a few years ago. I have a PDF of the pattern I used to make it, but it is missing a lot of detail. I always meant to make some changes to the design, clean up the drawings and post them here. If anyone is interested in making their own I'll dig up the files to see what changes they would need to make sense to someone other than myself. Attached are some photos of what it looks like. Its made from 2 pieces of sheet steel that are bent up and welded together. I used the original spacers for the front turn signals to mount the rear ones to this bracket. Sorry, I don't have any pics of what it looks like on the bike. I'll take some in the next couple days.
-
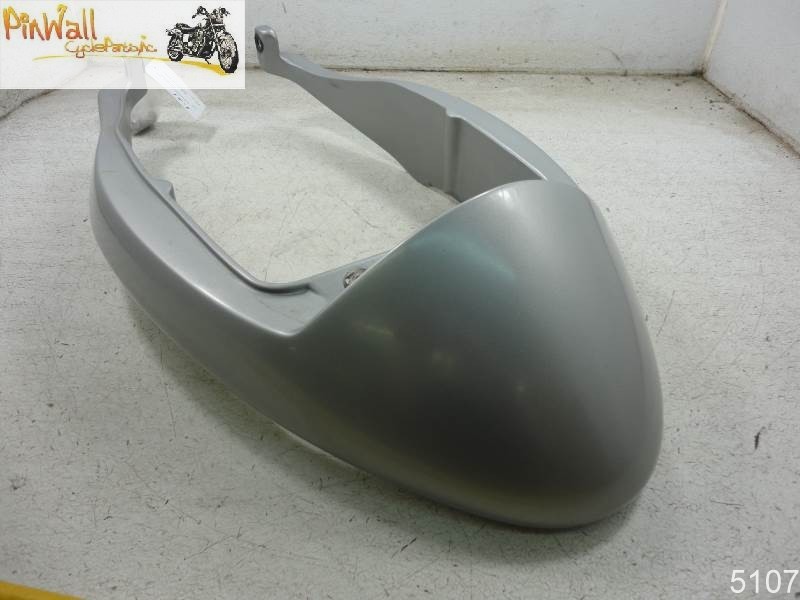
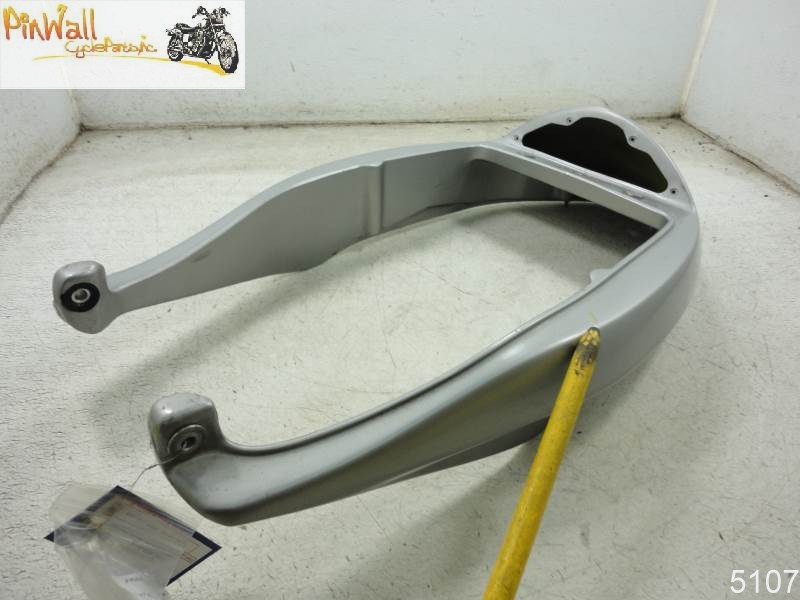
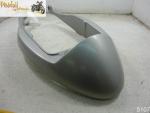
Sorry, that wasn't the best description. The tail on my 2000 looks like the part seen below, where the sides are a complete volume. They are hollow, and if you put small parts in the storage compartment they can slide forward into the sides. I noticed in this post: http://www.v11lemans.com/forums/index.php?showtopic=967&hl=pciii that the tail on later bikes seems to be just the outer surface. Also, the cover on the underside now attaches to brackets on the subframe rather than directly to the tail.
-
The ecu is mounted connector up on the early bikes (like mine) and so the harness length is different there. I just noticed that recently in another thread about Power Commander mounting. Anyone know why? Did this change coincide with the more shell like tail section?
-
Hey Andy, I can't imagine they'd refuse. It's no extra effort for them. Dennis seemed nice and was pretty responsive - can't hurt to ask. Dan
-
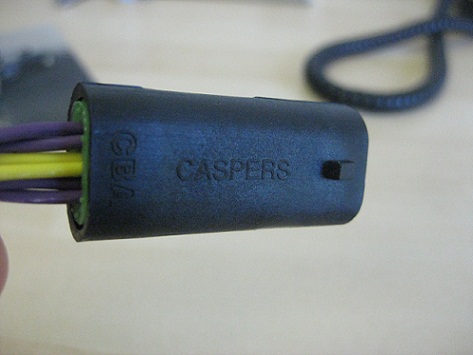
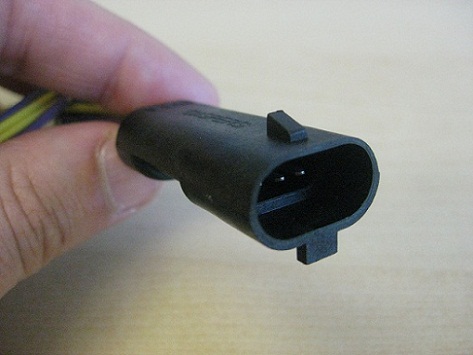
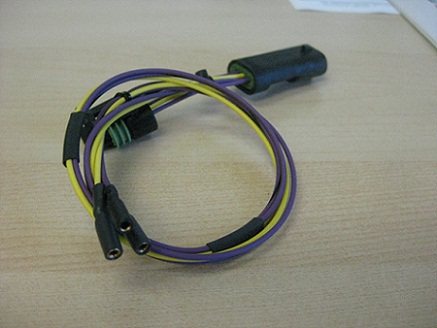
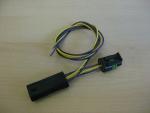
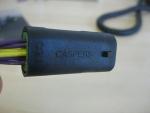
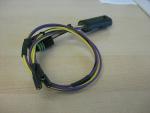
Hey All, I found a company called Caspers Electronics in Colorado that made me an inline TPS breakout harness with colors to match the Guzzi harness for $20! This harness uses one Delphi Metripack 3 wire female connector and one male mating connector of Caspers' own design (which Delphi never offered). Caspers sells the mating connector alone here: http://www.casperselectronics.com/cart/index.php?route=product/product&path=9_60&product_id=561 I know you can just back-probe the connector to measure the TPS voltage. That is what I have done in the past, but I wanted something a little more secure that I could leave connected during a ride to try out some slight adjustments on the road. The guy I dealt with was Dennis (dennis@casperselectronics.com). He finished the harness within a few hours of my request and shipped it the next day. If anyone else wants one of these, here is what I asked for: "I am looking for a TPS breakout harness that is similar in concept to your part #108106, but uses the Metripack 150.2 pull to seat 3 way connector (the oval shaped one w/ the green seal, not the round one) and your mating connector (part # 410016). Can you give me a price for a harness like this?" (the price was $19.95) These are the wire colors of the Guzzi harness: A - Violet B - Yellow C - Black/Violet I didn't specify any wire lengths and he gave me about 20" of unterminated wire for the breakout part and about 2-3" between the connectors. I terminated the breakout wires myself with some 2mm sockets for my multimeter leads. Edit: This harness is now a stocked part (#109172) at Caspers. http://www.casperselectronics.com/cart/index.php?route=product/product&product_id=853 Dan

- 61 replies
-
- 3
-

-

-
- TPS
- TPS connector
- (and 2 more)
-
Thanks for the replies everyone. I figured it just needed some more force, but I wanted to see if anyone had run into serious trouble doing this. I was able to get the axle free using a more convincing hammer and a piece of wood to protect the end of the axle. I also had a friend of mine sit on the right side and push against the swingarm with his feet to prevent it from flexing out too much. Last time I replaced the rear tire I used a fair amount of wheel bearing grease on the spacer and the needle bearing. Apparently I need to pull the rear wheel more frequently than that to keep things happy and protected from the elements back there. Dan
-
I was trying to remove the rear wheel last night to get a new tire fitted, but the axle seems to be frozen to the needle bearing spacer on the drive side. The nut has been removed and the axle rotates freely with an allen wrench, but does not want to come out. I can see the spacer rotating with the axle. Has anyone else been through this already? I thought I remembered reading about this problem here before, but wasn't able to find anything by searching. It is soaking in PB Plaster at the moment, and I'm going to give it another shot tomorrow, but I figured I would see what you all had to say before I resorted to barbarianism!! Thanks, Dan
-
That really illustrates the effect of aerodynamics! I wonder if the extra 20mph was due only to the fairings or if there were other changes made between the two classes.
-
Hey all, I was at a dealer just south of Keene, New Hampshire on tuesday and they told me they are selling a bunch of '08 guzzis at invoice. I don't know how common this is towards the end of the season, but I thought i'd mention it here. He had a 4valve Griso that was a demo for 11,000 or 11,500 (can't remember) Also on the floor were a Breva, 1200 sport, Norge and i think a California, but I didn't get any prices on those The shop is called Eddies Vintage Motorcycles. http://www.getpowersports.com/eddiesvintag...track/index.asp
-
oops, I was just re reading and noticed that I had repeated exactly what jtucker wrote in one of his posts. Sorry for the plagiarism Jason! I hope it won't hurt my political career.
-
What does the computer do with the input from this sensor? I assume it adjusts advance and or fuel trim, but i don't know how it does this (does it adjust the TPS voltage going into the computer?) or in what direction it would correct them for an increase in temperature? I do a lot of riding in the city, so i really want to get mine out from under the tank where it is soaking in heat and reading higher than the actual intake air temp. If I brought it out to the ducati position near the headlight it would sense ambient temperature. I assume the Ducati airbox draws air from the same location, which would make this an accurate reading. In theory, since I have pod filters I would want it right next to one of the pods so it indicates closer to the actual intake air temp (which would be lower on the highway and higher in the city). I have foam filters, but if I had K&N's I could mount it in the chrome end plate so that it read the actual temp and looked a little better.
-
I made a U shaped bracket that wraps around the frame spine and picks up the through holes that secured the pump. (my bike had the pump under the frame, and the filter above.) The pump and filter are now side by side on top of the frame, behind the original filter location. I think that this is the layout: Pump on left with the intake facing to the rear. Filter on the right, intake facing forward. I thought I had some pictures, but I can't find any on my computer. I will try to take some soon and post them here. (actually, I may post them in the vapor lock discussion going on in technical topics, since it is a little more relevant there.)
-
I completely agree with Jason in reccomending Roland at the Spare Parts Company. He is a great, honest, capable guy who specializes in European bikes, Primarily Guzzi and Bmw. Fast by Ferracci may carry Moto Guzzis, but they are clearly more interested in the "other" italian motorcycle line that they carry. Roland, by contrast would prefer to work on Guzzis and other less mainstream brands. He even imports vintage french cars for gods sake! I am very grateful to have a shop like this in my vicinity. I would encourage anyone in the area who appreciates the interesting and obscure, or who prefers a local hardware store to Home Depot to support Roland!
-
2000 bought in 2006 with 3200 miles 10550 miles now. I have replaced the rear tire, removed the airbox, relocated the fuel pump and filter, set up the TPS, made a new taillight/license plate bracket, and had the gearbox recall done. I will be changing relays, setting up the suspension, swapping in a brass temp. sensor fitting, and possibly installing headlight relays in the bucket in the near future.
-
What kind of tankbag is that in dliang's photo? I have a marsee bag that doesn't attach very well, and definitely does not have a fancy fuel filler hole.
-
My subscription to MotorCyclist has run out, and I think I want to give something else a try. Motor Cyclist is a little too oriented towards Japanese sport bikes for me. I am a member of the BMW MOA and I really like the magazine they put out, but oddly enough they only seem to talk about BMW's! I want something with good touring articles, lots of varied bike reviews (including dirt bikes and dual sports), and almost no pictures of guys in leathers doing wheelies on the street!