-
Posts
2,345 -
Joined
-
Last visited
-
Days Won
61
Content Type
Profiles
Forums
Events
Gallery
Community Map
Everything posted by Kiwi_Roy
-

I grounded positive batt post to ECU. with an allen wrench
Kiwi_Roy replied to murphy3303's topic in Technical Topics
Second. The grounding wires from the ECU case are small. Very small for a direct battery short. I would hope it's something that simple also. The ECU is rubber mounted so it relys on the small ground strap for it's battery Negative connection. Check for voltage between the ECU case and chassis (or battery negative) with ignition ON, you shouldn't see any. In future allways disconnect the battery negative first to avoid a short. Test Point Layout.pdf If it's not the ground strap heres a drawing that may help, unplug relays 4 & 5 then check for voltage at the 30 pin in each relay base to chassis, let us know what you see. Roy -
Here's a way you can upgrade your headlight using just one relay. The Low beam is wired to the Normally Closed contact and the High beam is wired to the Normally Open contact This circuit uses the existing fuse and headlight relay but bypasses the main current around the small wiring and dimmer switch. Headlight Relay.pdf
-
+1 on Michelin Road Pilots
-
I posted this here again because I couldn't find an earlier link Relay Base Repair.pdf Roy
-
That will be the connections under the tank on the left side, I think it was the wires from the clutch/side stand are a bit loose. Just a wee crimp with pliers and thats another problem out of the way!!!. My bike does exactly the same from time to time, full right lock and it starts every time. One of these days I will have to fix it. I figured it was a broken wire but I will check the connectors first as you suggest. You Know what they say about a mechanics car, it applies also to an electricians bike, I'd rather be riding than wrenching LOL I like to apply vaseline to all the connectors also, prevents any corrosion issue Cheers Roy
-
Joe Kenny makes a part much better than the original, comes with a spare toe part. Nice engine gaurds too http://www.swva.net/jkenny/
-
When I got my bike the tool kit came with a large nut, I couldn't figure out what it was for then one day it dawned on me it fits into the sump cover so you can grip it with regular wrench. After reading through the posts I elected to remove the sump, much easier to remove the filter that way and only takes a few minutes. You might find the filter has a hose clamp fitted for security in which case it would be impossible to remove through the cover plate. You need to remove the hose that attaches at the rear although I think some leave it in place. Have a new gasket on hand but don't replace the old one unless it tears. Good Luck Roy Jaap beat me to it, that's the sort of good advice I listened to Update. I found this pretty good description of the task. note the oil filter hose clamp http://motoguzzimaintenance.wetpaint.com/page/Moto+Guzzi+Metal+Stone+Oil+Change
-
Yes, 150/120 sounds low, I got 165/170 on my V11 a few days ago. With the throttle closed it would only need the throttle bodies slightly out of sync to give a variation like that.
-
It is possible to remove the lamp out through the bottom, after all that's the way the holder went in, use a little lube on the rubber grommet like thing you see and wriggle it out with a pair of pliers or something. They are such a shoddy holder I was more than glad to ditch them and replace all the lamps with LEDs which are much brighter. Read the note I posted earlier about single sided lamp base contact or you might be blowing some fuses.
-
Is yours the mushroom shaped aluminum thing, you remove the 3 screws exposing a white plastic arrangement, the coulourd lens is just sitting there, you might need a sharp knife to pick it out. LED Panel Lamps.pdf
-
Just for the hell of it after overhauling my Valeo I did an experiment and left the heavy wire off the battery to simulate a bad starter main contact. The 15 amp fuse popped in about 1/2 a second. For your fuse to last 4 seconds and assuming your starter contacts are OK I would suspect a high resistance, say 1/2 Ohm between the 15 Amp fuse and the starter solenoid coil via the relay allowing it to pull say 25 amps but not pulling the main contacts closed to spin the motor, I would check the relay base contacts to see if they are tight, also check the fuse contacts it could be a bad connection there also. A way to check this would be to run a jumper wire from the small terminal of the starter and touch it on the battery post to see if the starter performance improved MAKE SURE THE BIKE IS IN NEUTRAL FIRST Valeo Starter.pdf
-
A good tip there, actually the relay base contacts are the same as a standard spade connector (2 sizes) so you could use the male half. I tried to unbolt the fuse block on my bike the two screws were super tight. Finally in frustration I grabbed the block and wrenched on it, much to my surprise it popped right out, that's the way it's supposed to be removed, it plugs into a couple of rubber grommets.
-
Yes the headlight, Horn, Tacho, Stop light and charging all rely on the starter relay and the headlight relay to work. I have a theory that the relays hardly ever fail, it's bad relay base contacts that cause you to think they have. Some of mine were quite loose from much relay shuffling. Here's my write up on checking (and greasing) the contacts. Just pull one terminal at a time so you don't get them mixed. Relay Base Repair.pdf I had some spare time to burn so I figured out if I put an LED on each of the 87 contacts it would prove out the relay coil, the contacts and the relay base in one fell swoop. It saves the relay shuffle and looks quite sexy. Relay Base LEDs.pdf Heres a simplified diagram showing how the starter and headlight relay are essential for Tacho and Charging Guzzi Wiring - Simple.pdf Oh, by the way the starter relay has to be a 5 pin, a 4 pin won't work in that position. The normally closed 87A contact in the starter relay powers up the headlight relay. Don't buy 4 pin relays, 5 pins work in all spots. Enjoy
-
Im a sucker for old technical books, I was reading one on Marine Diesel engines written by John Lamb. I would highly recommend this book to any Guzzi rat, it gave me a whole new appreciation on the workings of an internal combustion engine. One of the things John Lamb pointed out is that rubber is Non compressible, it just deforms, it should not be constrained, he was referring to "O" rings, but the same should apply to the cush drive. In the pictures it looks as though the rubber wedges have no room to deform. Drilling a series of holes as discussed should provide room for the wedges to squish, it's on my list of improvements to make also. I'll be lucky to get all my work done before next riding season. I helped my buddy put his 70s Kawasaki back together, it has a similar arrangement in the rear hub, I think he thought I was crazy when I suggested he drill his.
-
I don't know about the variations in the curves if at all. If you look at my signature you will see that I make an ignition module that will replace the Digiplex and I've got one in a Sport 1100 producing good results. You should continue to try and find one you can test with.It sounds strange that it goes bad but still runs the bike. I would think it works or it doesn't. The fuel side sounds much more likely the problem. How do you know it doesn't advance? Have you seen it with a timing light? I can vouch for Cliff's products, I have one of his MyECU units on my injected Sport http://www.jefferies-au.org/MyECU/technical_site_map.html
-
As Jaap points out the extension item 10 in the drawing If you have lost these you can make some out of 1/4 OD tubing tapped to 4mm.
-
And Just in case you wondered how I measures the starter current, heres how, an old electricians trick. Revised sketch High Current Meter Shunt.pdf I used 12 gauge wire, it easily passes 170 amps for a short time. If you use a different gauge your measuring points will be closer or further apart accordingly.
-
Only 1, I must be improving, Actually the drawing program has spell cheque LOL I fixed that typo and probably made several more.
-
I just use plain old grease in the gearbox and motor oil in the bushings, your lithium is probably better, I don't think it's critical. BTW I did some testing this afternoon, I was curious to verify the current I calculated. I was surprised how quick the 15 amp fuse blew when I simulated a bad solenoid contact by disconnecting the main cable, My starter drew 175 amps from the battery when cranking, I think it would easily reach 200 with a fully charged battery The drawing has been revised Cheers Roy
-
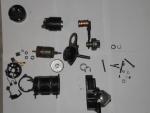
Wow that's quite a task flipping the rotation, the slip clutch would have been wrong too, I must admit I pulled it apart far more than I needed to, I'm crazy that way. Another shot of the main components.
-
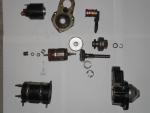
I had a few hours to spare so I thought I would overhaul the starter motor. While I was about it I took some measurements to confirm the solenoid wiring. As my bike has done about 80,000 km (only 10,000 are mine) I thought the starter might need some new parts but the brushes still have plenty of length and the bushes are fine so I just stripped it and cleaned everything. Perhaps the previous owner replaced it at some time but he never mentioned it. Starter Circuit Rev 1.pdf Here are the parts laid out It's very difficult to remove the wire clip (on right side of photo) that holds the gear and clutch in place, and even more so to get it back under the cup washer, you might want to skip that part The main solenoid contact on my starter is sealed out of sight inside the solenoid, I decided to leave well enough alone. Once in a while the starter may fail to engage perhaps the teeth clash or something causing the contacts not to make and the 15 Amp fuse to blow, I don't think this is a big deal if it sounds like this is happening just release the start button and give it another shot. If you need to replace any of the phosphor bronze bushes a trick to lube these is to put it on your finger tip, pour in a little oil then close the top with your thumb and squeeze, you will see the oil seep out through the pores in the metal. I'm never sure if I should oil the point where the engagement gear slides along the shaft or leave it dry, I have seen them stick at times when the oil goes like chewing gum. I used a little engine oil in this case because the starter is so easy to remove. Fresh grease in the planetary gearbox sure quietens it down.
-
I will show you my lights if you will show me My ECU
-
Guzzi Wiring July 2010.pdf The Injectors, Ignition and Fuel pump are all powered by Relay 5. It poweres the pump from Fuse 2 see attached. Relay 5 coil is powered by Fuse 1, through relay 4 the main supply for the ECU. The bike will crank over still because the cranking voltage comes from Fuse 4 & Fuse 5 If it's not the fuses it can be the relays or relay base contacts not making properly. If you don't hear the pump priming and it still cranks I suspect F1 or F2 Note the Diode in the coil circuit of Relay 4, that protects the ECU if you accidentaly put the battery in backwards.
-
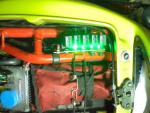
It's a bit slow around here so I will go over my relay upgrade. I removed the relay bases then attached a resistor and LED to each of the 87 contacts. The 87 contact only has power if the relay is energized and the contact is closed. Now I can tell as a glance if one of the relays are out of order. Normally when you turn the key on relays R2, R3 & R4 power up then a split second later R5 picks up for a couple of seconds (primes Pump) Press Start R1 picks up R2 drops out, and R5 picks up When running R2, R3, R4 & R5 are on. Sure beats blindly shuffling relays. Relay Base LEDs.pdf While you are about it, a good time to check the other relay connectors for tightness Relay Base Repair.pdf Enjoy the light show
-
When I replaced my Spark in my 2001 the dealer said it was the original The first Yuasa lasted Roy


