-
Posts
5,330 -
Joined
-
Last visited
-
Days Won
58
Content Type
Profiles
Forums
Events
Gallery
Community Map
Everything posted by Admin Jaap
-
Huh? Are you being sarcastic? It's hard for a not-native speaker to understand
-
Never heard of fog lights (connectors) on a V11, but maybe someone else does.
-

V11LeMans.com Continental Meeting 2010
Admin Jaap replied to Admin Jaap's topic in Meetings, Clubs & Events
Just a quick update: I just received an e-mail from La Chaussee. Paul would like to know if anybody else would like a room/bed. If you want a room please book this week. After next Sunday he will give out the rooms to non-meeting guests. Please book directly: www.lachaussee.nl -
Thanks for refreshing my mind! I must be getting old...
-
What do you think? The new logo of course!
-
-
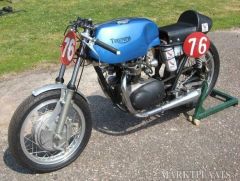
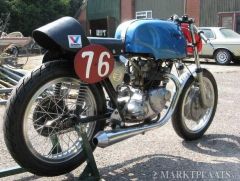
From the album: Triumph Racer
-
From the album: Triumph Racer
-

Boring boring
Admin Jaap replied to belfastguzzi's topic in Special place for banter and conversation
Actually I was listening to some really good Italian music: NOT !!! -

Boring boring
Admin Jaap replied to belfastguzzi's topic in Special place for banter and conversation
I turned it off. Listening to some nice music. -
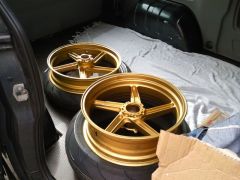
I was thinking, as I bring my wheels to the powder coater, I just as well have the pork chops coated. Again, I seem to remember there were some issues with the aluminium it was made off. Any experiences/knowledge?
-
My black wrinkle painted engine case has become very ugly in the past years. There are grey/white stains on it. I seem to remember there was a product available to clean the black paint. Do you remember it? edit: Found it: http://www.s100.com/s100_eb.htm
-
V11LeMans.com logo on the front (and maybe the Guzzi logo on the back. Depending on costs)
-
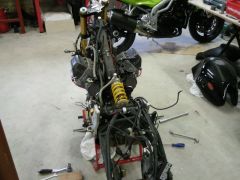
Done a bit more work today. Bike is stripped as far as necessary (I think). Wheels are ready for powder coating. I have decided on a color scheme, but I'll keep it a surprise I have also taken the cardan housing off. Looking for a guy who can mill the edge off. (As seen on Paul's Daytona:)
-

The result of a one and an half hours of stripping.
Admin Jaap posted a gallery image in Modifications
From the album: G&B Sport Monza
-
From the album: G&B Sport Monza
-
An oldie, but still very funny! Breathalizer test
-
I'm sorry, it wasn't exactly the same what I did. And I don't know how to fix the Cafe Sport fairing directly to the forks. (If that's what you're planning to do)
-
Moto Guzzi V11 Sport Valve Adjustment and Head Bolt Torque Instructions Steps 3-5 can be skipped over for a simple valve adjustment; no need to retorque the heads. (Thanks to Docc for the feedback) Tools: Spark Plug tool Torque wrench with from 20 to 34 ft/ LB. (27 to 44 NM) setting 17mm socket 10mm allen socket 10mm socket 5mm allen key or 5mm allen socket Ratchet with (at least) a 3" (75mm) extension Feeler gauge, probably .01mm (004") and .015mm (.006") see Step 6 details 11mm wrench Tool (such as 4mm open end wrench) to hold valve adjustment screw A shop stand or bike lift A light as a flashlight (torch) or work light Optional: To turn the engine via the alternator nut add #2 Philips screw driver to remove the four screws holding the alternator cover 24mm socket (better) or wrench (OK) to spin the alternator nut Notes: Your author is not a Moto Guzzi expert, what you will find below is a combination of basic mechanical experience, advice from people who are experts, the Guzzi manuals and the wonderful book "Guzziology". Only you can determine if you should undertake this work. If you are at all uncomfortable consult an expert or simply take your bike to a professional mechanic for this work. Guzzis are fairly easy to work on but, like any engine, they can be severely damaged by even minor errors. Proceed at your own risk. All of this should come apart and go together with a minimum of force. If anything requires more than a slight push STOP, something is wrong. If you can't figure out what is causing the problem consult an expert. Cleanliness may or may not be next to godliness but it is a very good thing for engines. Keep your tools clean, the surface you are placing parts on clean, etc. It is optional but anytime steel is threaded into aluminum it is a good idea to use a small amount of anti-seize paste to prevent corrosion from bonding the parts together. Read the whole article before you pick up a tool. The engine shown below is a 2001 V11 Sport. Your Guzzi should be similar but may not be identical. The gaskets under the valve covers seem to last a long time but having a spare or two handy can be an advantage if Murphy's laws comes into play. This is the same reason having a flat fix kit prevents flat tires. ;-) The factory manual is not great but it is good to have. The real thing in expensive and not always available. A couple of places offer photocopies. Sport Cycle Pacific for one. The book Guzziology is invaluable for a Guzzi owner. Read a sample of Guzziology at the Moto International web site. You can find the book at your Guzzi dealer, Moto International or at Amazon.com. Step One: Make sure the bike is completely cooled off; overnight is recommended. Put the bike on a shop stand or bike lift. If you do not have a shop stand or bike lift you can work on the side stand but it will make the work more difficult. MG Cycle sells a very nice shop stand. Select the "V11 Sport" link for more information. Remove the spark plugs and valve covers (8 X 6mm bolts with 5mm allen heads). The valve covers may require a light tap with the palm of your hand to pop loose. You will then see a nice, simple OHV pushrod valve train. Note the numbers on the image below. The items marked "1" are the five 17mm head nuts; note that two are almost completely obscured by the rocker arms. That is why the rocker arms must be removed before the head can be re-torqued. The single item marked "2" is the cover for the sixth bolt. Both the cover and the sixth head bolt are 10mm allens. The two bolts marked "3" are 5mm with a 10mm hex head. They hold the pivot shafts for the rocker arms in place. Step Two Find TDC for the cylinder. First, remove the black rubber plug over the flywheel. The plug is behind the right cylinder and directly below the right throttle body. Once the plug is removed you will need to find Top Dead Center (TDC) for each cylinder BEFORE you begin working on that cylinder. This is where the light will come in handy; shine it in the inspection hole while turning the crankshaft. In the graphic below the left cylinder (indicated by the "S") is at TDC. For the right cylinder a "D" indicates TDC. You can spin the engine by putting the bike in a high gear and turning the back wheel or by taking off the alternator cover and using the 24mm nut to spin the crankshaft. The next problem is determining if the cylinder is on the compression stroke or not. This is very important, only at TDC on the compression stroke are both valves closed. If both valves are not closed removing and replacing the rocker arms without causing damage is nearly impossible and adjusting the valves after the head is torqued is impossible. If the engine was running well before doing this work there is a simple test, on the compression stroke both valves are seated and therefore the pushrods should spin freely. If one or both pushrod will not spin turn the engine one revolution and try to spin the pushrods. If they both spin you are ready for the next step. If not, something is wrong. Do not take anything more apart until you can be sure you are on the right stroke. Tracy Martin has a neat way to make finding TDC easy. If the above doesn't work for you try Finding TDC on the Guzzi tech pages. The procedure for the right cylinder is the same other than using the "D" mark on the flywheel to indicate TDC. Step Three: Remove the two bolts (marked "3" in the first graphic) holding the rocker arms in place. Very carefully slide the pivot shafts out of the head. Note the rockers and the washers and springs SHOULD stay in place but may not; be careful. With the pin completely removed slide the rocker arm and the washers and springs out. Again, there is a small amount of spring pressure, don't let any parts get loose. Carefully note the orientation of the parts. Reassemble the rocker arm, washers and springs, exactly as they came apart, onto the pivot shaft. Put the rocker assembly aside in a clean, safe place. Repeat on the other rocker arm. Finally, use the 10mm allen tool to remove the plug over the 10mm allen head bolt, this is marked "2" in the first graphic. I would advise you to only disassemble one cylinder at a time. This makes it easier to keep the parts organized and gives you a reference in case you have a problem. The order of assembly for the rocker arm shaft in the "square fin" Guzzis engine should be (from top where the retaining bolt is found) silver (steel) washer, spring, bronze washer, rocker arm, and bronze washer. Note that this is a good time to replace the rubber O-ring under the plug (item "2" in the first graphic) hiding the sixth head bolt. I understand it is a pretty generic part, anybody have a part number or description I could give my local parts house to get a bag? Edit (Gio): with recent concerns on tappet / lifter wear it would be a good idea to inspect these whilst the rocker arms are removed Step Four Now you have access to the head nuts and bolt. Using a crossing pattern (i.e. top left to bottom right, etc.) gradually loosen the nuts and bolt until they spin freely. Once all the nuts are loose you can (finally!) torque the head. Set your torque wrench to 20 ft/ LB. (27 NM) and start to tighten the nuts and bolt in the same crossing pattern. You can re-set the wrench to 32-34 ft/ LB. (42-44 NM) and tighten nuts and bolts in a corossing pattern or you can slightly reduce the stress on the head by repeating the pattern in steps of two or three ft/ LB. to the final setting of 34 ft/ LB. Step Five Re-assembly is pretty straight forward but here are a few hints: The best way to reassemble the rocker arms by sliding the pivot shaft into place from the top. Place the washers and spring on the shaft. Being sure the washers and spring are still on the shaft push them (and the shaft) back to provide room to slide the rocker arm in place. Finally push all the parts (washers, spring and rocker arm) up enough to slip the final washer into place. However, if you have not removed the fuel tank this is not possible. If you are willing to be very careful and patient you can reassemble the rockers with the tank in place. I have found the best way to replace the rockers with the tank in place is to make a "sandwich" with the spring and the two washers. I do this by putting the three parts on the shaft below the lower mount and squeezing them together. Without letting the spring expand put the "sandwich" in place above the rocker arm and slide the pivot shaft into the top mount. The pivot shaft bolts are tightened to 6-8 NM or roughly 53-71 in/ LB. In Guzziology Dave Richardson has an interesting bit to say about these simple seeming parts. Buy the book, read this and many other useful things. Books I couldn't find a torque setting for the 10mm cover for the allen bolt. I used 20 ft/ LB. anybody have a verified value? Step Six: Next, check/ re-set the valve clearance. Since the cylinder is already on TDC you simply need to use the feeler gauge to check the clearance and, if necessary, adjust the screw and lock nut on the pushrod end of the rocker arm. The lock nut is a standard 11mm; the adjuster is an odd shape. The best tool I've found is a 4mm wrench from my ignition wrench set. There may be a special tool to hold it but I am not aware of it. As with any pushrod engine, a little pressure on the pushrod side of the rocker arm (see graphic below) will take up the "slop" in the parts between the camshaft and the rocker resulting in a more accurate setting. Now, what should the clearance be? This seems to be about like asking for the best beer, lots of opinions. The one thing everyone seems to agree on is that the US setting of 0.002" intake 0.004" (or even 0.002"!) exhaust are too small. On the plus side, the US settings will slightly reduce the clatter from the valves. Personally, I used the "world" settings of .004" (.01mm) intake and .006" (.015) exhaust. Another thing commonly done is to add .002" (i.e. .006" intake and .008" exhaust) to the setting for engines with new head gasket. This is intended to allow for the compression of the new gasket. Also, if you are building a new engine Guzziology has a procedure to compress the head gasket, again worth the price of the book. Step Seven: Repeat on the other cylinder, replace the valve covers, put in new plugs (gaped .032" or 0.7mm), replace the rubber cover on the flywheel inspection hole (hint, a little silicon lubricant helps it go back into place) and you have torqued your heads and adjusted your valves. For the next several thousand miles (18,000 according to my manual) you can skip steps 3, 4 and 5 and just adjust your valves. By the way, all 6mm bolts (including the six allen bolts that hold the rocker cover in place) are tightened to 8-12 NM or roughly 77-105 in/ LB. Being a middle of the road kind of guy I use 10 NM or 90 in/ LB. Good luck, Lex
-
- 3
-

-

-
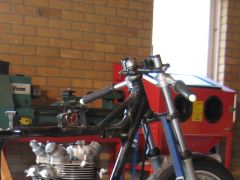
Luhbo, that's a picture from 2008 just before I left for the Eifeltreffen, but the bike hadn't changed since the and it was my only decent picture. Btw, my brother's garage is not a bad place. Big woodstove, lounge seats, tv, radio, etc. Looks like I'm going to spend a few hours there in the next few months.
-
Definetely on the 1200S. The G&B looks like back breaker and I will use it only for trackdays and sunday morning runs
-
It's my brother's workshop. He practically lives there... it's about 150 m2
-
As you may know I recently ordered the G&B Sport Monza kit. When I first saw the it on the net I really liked it. A classic lump in a modern jacket. In this thread you will be able to follow the continuing story of the Moneypit. My V11 as it was this morning: This it how it looked after a few hours of stripping: Not much to show yet, I know, but hopefully I will able to show some interesting stuff soon.
-
From the album: G&B Sport Monza


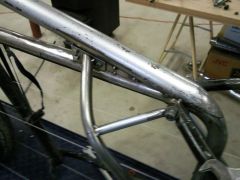
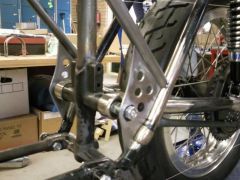
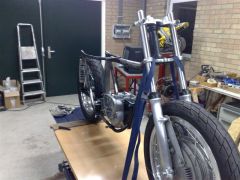
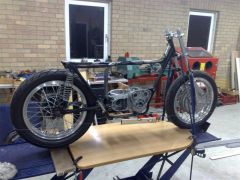
![TR21RS-intake01 [800x600].JPG](https://www.v11lemans.com/gallery/1213732660/sml_gallery_27_5436.jpg)
![TR21RS-framenumber [800x600].JPG](https://www.v11lemans.com/gallery/1213732660/sml_gallery_27_38406.jpg)
![TR21RS_cylinderhead01 [800x600].JPG](https://www.v11lemans.com/gallery/1213732660/sml_gallery_27_82392.jpg)
![TR21RS-frame02 [800x600].JPG](https://www.v11lemans.com/gallery/1213732660/sml_gallery_27_27390.jpg)
![TR21RS-enginenumber [800x600].JPG](https://www.v11lemans.com/gallery/1213732660/sml_gallery_27_28990.jpg)
![TR21RS-engine01 [800x600].JPG](https://www.v11lemans.com/gallery/1213732660/sml_gallery_27_50359.jpg)
![TR21RS-engine02 [800x600].JPG](https://www.v11lemans.com/gallery/1213732660/sml_gallery_27_50227.jpg)
![TR21RS-frontdrum [800x600].JPG](https://www.v11lemans.com/gallery/1213732660/sml_gallery_27_64570.jpg)
![TR21RS-complete03 [800x600].JPG](https://www.v11lemans.com/gallery/1213732660/sml_gallery_27_31732.jpg)
![TR21RS-cylinderhead02 [800x600].JPG](https://www.v11lemans.com/gallery/1213732660/sml_gallery_27_43394.jpg)
![TR21RS-frame01 [800x600].JPG](https://www.v11lemans.com/gallery/1213732660/sml_gallery_27_43749.jpg)
![25072008082 [800x600].jpg](https://www.v11lemans.com/gallery/1262136320/sml_gallery_757_87_27664.jpg)