-
Posts
250 -
Joined
-
Last visited
-
Days Won
1
Content Type
Profiles
Forums
Events
Gallery
Community Map
Everything posted by edge
-
Mike, You already have the springs needed. The one that does the seat latch is the one that should be swapped ith the fast idle. It is probably a better qyality than the spring from a pen.
-
Saw this Tach on ebay.. Might be worth your trouble shooting. http://cgi.ebay.com/ebaymotors/ws/eBayISAP...&category=50465
-
Mike, If you have not swapped springs, I would do that first. This tread talks about the stock spring being too strong and limiting both travel and setting of the fast idle. Before I did the swap, I don't think I could get 60% travel out of the fast idle and when I did it would not stay unless I held it. Now I have 100% and it stays where put. During the spring replacement you will have to adjust the static position with the set screw mentioned. Even though I never use the feature now that things are broke in, it is nice to know it works as it is supposed too.
-
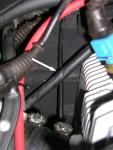
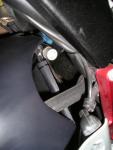
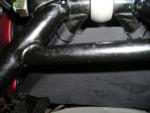
Finally got around to swapping springs today... Wish I did it years ago Now things work like they are supposed to... on both ends When doing the swap I noticed the fast idle cable was routed on top of the speedo cable causing a bad angle at the throttle body and down pressure on the speedo cable (neither good). When I removed the cable for the spring swap, I routed the cable under the speedo and everything works much better and no cable binding. You can see the dent the cable left in the speedo in the attached picture
-
Finished wiring the heated grips and ended up running a hot lead to the fuse bus from the battery and used the last spot (as suggested). I didn't realize the aft 15A position was along for the ride Simple wiring with blade connectors. Unfortunatly it is not switched but it is fused. I'll pull fuse and nueter it in the summer to prevent inadvertant acativation of the paw warmers thanks guys
-
Another version of the chopped top airbox lid. I had an extra lid that I ran a bunch of holes in the sides. I did not put holes in the top due to concerns of the tank insulation getting sucked down on top of the lid as reported several times here. Also left the "ram-air" PVC mod on the lid. Not sure if it does any thing now that the lid has holes in it but before I did the holes in the lid, I got rid of the rubber inlets and opened things up with the PVC. The larger opening stopped the pinging under load imediatly.. it surprised me too but I used to have a lot of pinging at highway speeds cranking things up in 6th.
-
Thanks guys, Last night I was thinking this would be too easy, with the bullet connectors right there. I was sure they were aux somthing but I don't get good readings on the multi-meter and I do remember reading on the forum they might be ECU diag connectors... So not wanting things to real expensive real fast, I have left them alone I think I'll hit the fuse block as Al suggested to keep things switched. Either I'll forget to turn them off or some kid will turn them on wondering "what does this do?" and a dead battery on a goose is a bad thing. Especially when you have somewhere to go Q: Al, do I need a realy if I tap the fuse block direct?
-
I bought heated grips a while back and I am finally getting around to installing them. I'm down to the connecting part and I am looking for a fused switched wire that can drive the grips and not effect headlight, ecu , etc.. I am generally pretty good at wiring, splicing, etc. but as I was probing with a multi-meter, I some how blew a 5 amp fuse and made a few relays click. I have no idea how I did it, and I am hoping there is no residual damage beyond the fuse. Before I go any further and do something that is going to get expensive or dead line the bike, I'm going to use a life line and ask the board for some help I have already searched the board for help on this but didn't find anthing that said "use this wire dumb ass!"
-
Cool, Keep me posted..
-
Sorry Guys.. A couple of reasons for no contact... I found out I had a bad email address tied to my account on this board which I have just fixed. So if you tried contacting me through the boards email... I never got it. (I had a board regestration a couple years ago that changed my address during the great purge a while back) And your right about me running out. I have already sent 5 out (3 US and 2 INT)and I just ordered more Kydex to do another run. I should have the stock by tomorrow and will have some done by Friday. Unfortunatly I have not gotten any feed back from those I have sent to... I just want to make sure all are happy before I get too far into this. I think I the templates and jig are right but you never know with the other models and the Luigi factor I have tweeked the jig a little to make things "more better" but feed back is appreciated and will help me ensure we got this thing right. And like anything else, I can get this couple bucks cheeper if I can buy the Kydex in bulk from a local supplyer if the demand is there. If you want to email direct for feedback or request, please use, edginton@hotmail.com (this was supposed to be my old forum account) or edginton@gisco.net (this is my new forum account)
-
I use just a little tiny dab of anti-sieze compound when runnig in SS bolts/studs to lube the SS threads that are torqued for weight bearing.. i.e clip ons, fork assemblies, etc. Dry assembly with SS into alloys definatly will cause gaulling and difficuly in obtaining a good torque wheather measure or felt. Learned this lesson the hard way long ago working on car alloy engine blocks/manifolds
-
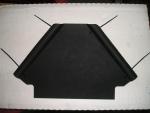
Ok, More on the mud gaurd... I followed this thread and started with the diagram that was posted for general dimensions. Didn't much care for the attaching method so. I did mine out of thermal plastic (Kydex) and formed the left and right sides to wrap around the vertical members to help seat the guard and further limit the amout of spray that will sling forward and make a more finished look. I extended the bottom abit just because I could too. I used zip-ties to hold this puppy on for simplicity and it works like a champ. The one that is mounted on my bike is the "proto-type" so it is not as nice as the final ones I made. I did a run of 6 of these and the are mixed between .06mm and .08mm Kydex as I experimented with forming, templating, cutting etc.. I have 5 of these left over. They are all hand formed, and checked for fitment on my V-11 LeMans. If you want one, I'll send it out US priority for $20.00. If there is enough interest, I'll get some more plastic and do another run now that I have the templates and forming technique down. I am not sure if this will fit the same on a sport as a LeMans so accept it back if not happy. I'm not trying to make a killing on these, just want to recover my time and expense in getting this right. If you are intersted, drop me an email at edginton@hotmail.com and I'll get a head count for the next run. The first 5 can have what I have already made. I should be able to get the others made in about a week due to ordering the Kydex, cutting, forming, etc.. If there is much interest, I'll move these things to the classifieds. I just wanted to share whats been happening in my basement a couple of picts
-
Wildguzzi post extract on oil filters... "Oil Filters Fram PH3614 will fit but construction is questioable. Fram PH6022 WallMart SuperTech ST3614 for around $2 (vs $15 for the Guzzi filter). This filter is made by Champion labs, is better constructed than a Fram, and has a 94% multiple pass efficiency rating. Just be sure to remove the decal on the filter before you install it. (Tip from Wildguzzi.com site) Also the Amsoil SMF125 is supposed to work." I belive if you are using a quality oil, changing filters and oil frequently, and are most importantly you are; meticulous in ensuring you do not introduce sand, dirt, grit into the system while changing, filling, or assembling, it is all the goose needs
-
Like Al he said... I am convinced their lack of action over the past couple of years has already cost them the bulk of customer base they were holding out for.. How hard could it be, the already have scores of configurations that could be adapted once the got the Marz fork diameter cut and those with Olins, diameter wasn't even an issue... A shame, a good product, lots of flexibility, and it looked like it was the Cat's Ass (no-pun intended) to the bar height problem that many try to change. As you can tell, I'm one of the folks that gave up waiting and being lead-on (18 months) and spent my money elseware. In my case, Two Bro's was the 80% solution but at least the were avaiable and in my hands two days after being orderd
-
Just got this Motorcycle Safety Foundation (MSF) booklet today at the work place, and was pleased to see several Guzzis used to ilustrate the booklet. Book was first done in '88 and revised in '01. Apparently the MSF had the good taste to keep the classic pictures along with some of the new material. Booklet was illustrated by George Tomer... Wonder if he rides a goose?? Enjoy
-
I concur that nitrogen is a better solution for high presure systems; tires, struts, accumulators, etc.. It has been the gold standard in aviation for decades. As far as cost benifit in motorcycle tires...
-
Yeah... Like he said... took me about 30 minutes, and cleans rear right up. I also relocated the botom reflector and kept original plate bracket.
-
Thanks for the link.. Just like Christmas around here..
-
There's Neptune Exhaust out of NZ. A US vendor in NJ (Adventurers Workshop Inc, 973-258-0034) handles them here and did a great job with the shipping etc. Mine were $935 delivered, with removable inserts, in the brushed SS. They are also avaialble polished SS (ala Staintune), and "Black Crome". I love 'em for fit, finish and look . Tried the MG Ti's last year but none to be had.. http://www.neptunemufflers.co.nz/
-
I suppose you could use your stock cross-over for input-output pipe locations & dimensions, as for the middle, it's a siamese kiss in the middle easier said then done, I'm sure
-
Dan, not sure the non-Frank Zappa types or those not familiar with Montana would understand the the pygmy ponies and dental floss bit...
-
Interesting peg set up... looks like he swapped with a V-11 owner
-
Had mine polished last summer to remove a bit of road rash and they have held up very nice. Up keep has been no issue for me. Even allowing a bit of patina to set to me looks better than the paint. Tx sugest taking to a truck stop to have the them stripped and polished for cheep by the guys that do all the bling on an 18 wheel. I sent mine out and probably paid too much but it's done and was cheeper for me to polish instead of replace.
-
The brand and a Picture would be apreciated..
-
my 2 cents ; If your talking about 2 steering stop "nubs" that are cast into the lower triple tree, I would drop the whole head assembly to get good access to the nubs for a weld build-up, clean-up and paint.. Of course the thing is some kind of AL alloy with a powder coat type finish so it's got to done right. I think your operating too close to the pretty stuff i.e. tank, fenders, fairings, etc. to do this on the bike. I'm sure it can be done, but I don't think you would be happy if anything got buggered up and I'm sure who ever is doing the weld would like the freedom to manuever. I went through this drill last summer, my stops were knotched and bent from a drop. I ended up getting a new lower TT (~300 US ) for peace of mind and cosmetics Maybe it was over kill but I got to spend a couple of days of quality time with the goose going through the the whole front end


