Mr. Bean
-
Posts
193 -
Joined
-
Last visited
Content Type
Profiles
Forums
Events
Gallery
Community Map
Everything posted by Mr. Bean
-
Thanks all for the info. I noticed that MAW has the EBC's for $26 per pair. I'm pretty sure the problem with squealing has more to do with the chipped pads rather than the design of the OEM brakes. Hopefully just replacing the pads will solve the issue. I figure I'll probably go with the sintered even though they are harder than the organic ones unless anyone has had issues with noise on these? Randy
-
Hello all, I'm looking for opinions and info on replacement front brake pads for the Ballabio. Mine began squealing under normal braking after about 1000 miles. I took the pads off a month or so ago to put some anti-squeal paste on the backs of the pads. At that time I noticed that 2 of the 4 pads had chunks broken off of the wear material. Each missing chunk was near an inside edge and was about 1/4 inch square or so. Other than that they appeared fine and the rotors are wearing ok. After applying the paste, the squealing stopped for about 300 miles but is now gradually increasing again. Rather than play this game I'm just going to replace the pads. Does anyone have a favorite brand and part number? I'm not looking to replace the calipers or rotors, just the pads. Thanks, Randy
-
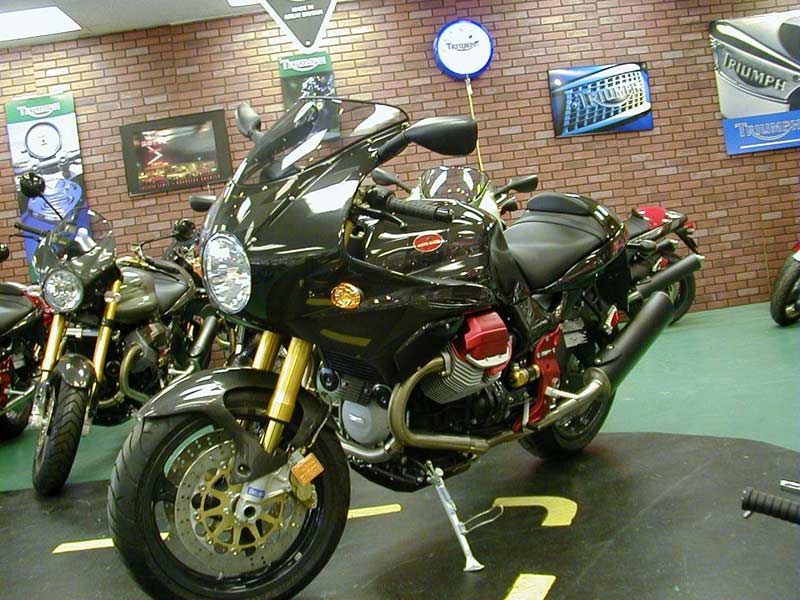
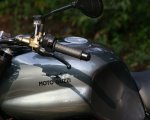
Here's a picture of a 04 Nero Corsa. It has a hollow axle on it like my 04 Ballabio. Randy

-
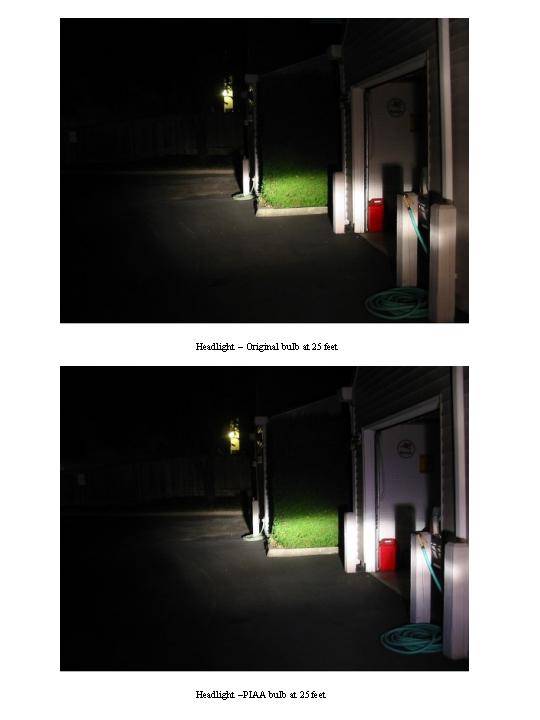
Just wanted to post an update on the new bulb. Got the replacement headlight in short order...Looks like MGNA keeps these in stock I spent some time making sure I got everything aimed right then took it out for some night riding. There was some improvement in overall lighting...Roadsigns seemed to be brighter than before and the lighting effect was much "whiter" than before but it wasn't a huge improvement by any means. Got out of work late today...night and raining. Now THIS is what I was looking for! The lighting difference in the wet is very noticeable. The regular bulb's light is pretty much neutralized by water on the roadway...Not this one! The effect is very interesting and I don't even begin to understand the why's of it...but it almost appears that the light penetrates the water better and lights the roadway surface. Maybe this is the "glare" some complain about, but it sure makes it easier to see the surface which I'm all for. Based on my short time with this bulb I would say that if you ride in predominantly dry areas, save your money...the improvement is not that huge. But if you ride alot in the rain like me, it seems well worth it.
-
I use a Widder vest with the adjustable controller. I hook the vest directly to my Battery Tender connector which in turn is connected directly to the battery. I used it last winter this way with no ill effects and also did the same thing for two years on my MZ Traveller (also not known for it's high powered elec system) with no problems. Randy
-
Thanks Jaap, I had heard that before but went ahead and just ordered from M.I without even looking at BMW. Actually I gotta admit the price is cheaper than I expected at $143. I was thinking it was going to be north of two hundred. Oh well...this still turned out to be the most expensive bulb replacement I ever had! R
-
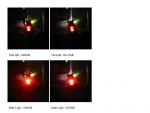
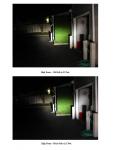
Well, I recieved the new PIAA bulbs the other day and finally had a chance to put them in. Some good, some bad... First the results: The new headlight bulb appears to be brighter to my naked eye on both low and high beam...more so on the low beam. It is definitely a "whiter" light than the OEM bulb. The tail-light seems dimmer on both running light and brake light than the stock one. The pictures I took also seem to bear this out. The bad news is that now I have to go and get a new headlight! I have never seen a flimsier bulb mount in my life...The bulb is held in by a small spring clip that hooks under a tiny piece of plastic that broke away as soon as I put the spring back in. I was able to jury-rig it to hold temporarily for the pictures but there is no way I can trust it with the vibrations from riding. It all looks to be a single molded plastic part. Anyone have an idea how much a new headlight costs? Oh well, here are the before and after pictures for everyone to make their own comparisons. The bottom right shot of the four taillight pictures should read "Brake light - PIAA bulb" Randy

-
That's a good idea Lex, I'll try and set up some sort of useful comparison pics...I'm a pretty lousy photographer though! I agree with TX in that it probably is all in the perception of the light or color of the light rather than increased brightness. But if it works, I am not gonna complain! Hopefully next week or the week following I'll put the new bulbs in. I went ahead and ordered the taillight one also. Randy
-
Thanks TX, I think I'll order one up. Might even try the taillight bulb they offer while I'm at it. Randy
-
Wondering if anyone has tried any of the PIAA H4 replacement headlight bulbs. Now that fall / winter commuting is settling in I would like a bit more light output but don't want to increase power usage. (Yup, I want my cake and want to eat it too! ) For commuting I use an electric vest and spend a lot of time in slow Seattle traffic which I'm sure taxes the already limited alternator. PIAA advertises the same 60/55 watt power consumption with the equivalant light of a 110/100 watt bulb. Sounds a bit too good to be true but if they give a noticeable improvement it might worth springing for one. Randy
-
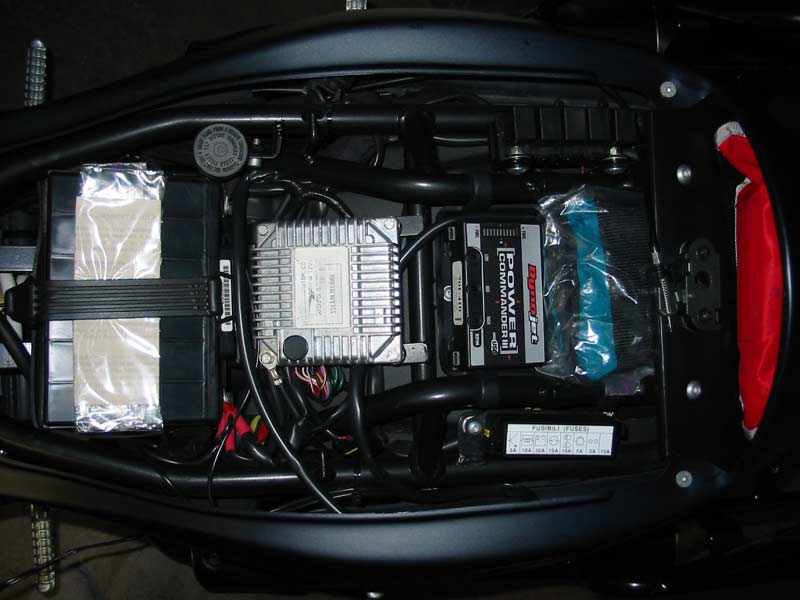
I did just about the same as Brian, only turned it 90 degrees so I could squeeze my tire repair kit, spare spark plug, and fuses behind it. I put the Guzzi toolkit up in the rear cowl. The PCIII fits real well in there. Randy
-
Just wanted to see if anyone else is planning on going to the Oyster run this coming Sunday, the 26th? It's been fun in the past. This will my first year with the Guzzi, the last two I went on my MZ and drew lots of questions..."Who makes MZ???" Wondering if the same will happen on the Ballabio. BTW Jaap, I like the new look! Randy
-
Yup, My Ballabio does not have a generator light. Instead the center row from top down is...High beam, Oil, Neutral, and Fuel. It has both right and left indicator lights as well. Randy
-
Not too difficult. You'll need a multitester, a couple pieces of stiff 22 or 24 gauge wire...and these intructions don't hurt at all! http://home.pacbell.net/guzzi007/tps/TPS.html The last couple paragraphs are the best part to focus on. Randy
-
Did it have the same lack of power before you removed the evap cannister? I can't think of anything related to that which would cause a problem. Be sure your TPS is set for what the PCIII map is designed for. I was having trouble with my PCIII when I first got it from GuzziTech. Once I did what a very patient Todd told me to do and set my TPS correctly...The bike runs great! Randy
-
Hi Erik, You're looking at your evaporative cannister. An emmisions part that is supposed to contain any gasoline vapors that want to escape from your fuel tank. A lot of us have removed the whole affair and simply vented the tank to the atmosphere. No real performance gain but solved my tank suck problem. Randy
-
Mine seems to be the reverse of that. When it is in a normal temp range it idles at 1100 rpm +or- a bit. When it gets hot the idle actually seems to drop down to 900 to 1000 rpm. This is about the same when I come to a stop at the bottom of an off-ramp after a good highway run. It'll idle around 900rpm for a few seconds before slowly going back up to it's usual 1100. Once it really gets hot again though, it will drop back down to 900-1000 again. Oh well, as long as it doesn't die anymore at lights (it doesn't) and it doesn't idle too high (again it doesn't) I'm happy Randy
-
Hmmm...as much as I hate to admit it, it will probably be a while yet before the chicken strips on my bike are narrow enough that metal starts touching down! The bike has waaaay more in it than I have. But hey, that one of the reasons I love this bike...you don't have to be pushing the edge of the envelope for it to be fun! Randy
-
Sure thing. Just let me know when... Still waiting to hear what's up with your bike? Randy
-
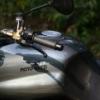
It has been from what I have seen . The water leaks IN past the glass to rim seal , lies, trapped in the bottom of the housing . The sun comes up ,the water warms and vaporizes. Liquid water goes down , vaporized water goes up. When it gets to the glass it causes the fogging . It can and does indeed occur on both the speedos and tachs . My LAPD Eldo has no tach ,but it has fogged up the morning after getting caught sitting out in the rain .The water sitting in the corner at the bottom of the rim can leak past easily . It is just a matter of the effectiveness of the seal . No matter Tach or Speedo . A very common occurance with many makes . That makes sense. It also might explain why after I drilled my tach housing I have never had the fogging happen again...dispite riding/parking in the rain. Rather than trying to duplicate the odometer reset stem hole, I drilled a 1/4 inch one in the very lowest point on the housing when it is mounted on the bike. This way any water that does get in there simply drips right out. Before I did this, the tach would start fogging up after the insides started warming up. Once the bike cooled back down again...overnight or during work...it would be back to normal. Randy
-
Thanks Graham! I tried your settings out on my Ballabio. I must say it has a noticeably improved ride now...at least on our crappy Seattle streets. With the settings straight from the factory I was practically getting bounced right off the bike on some of our roads. This is a much more compliant setup. I haven't taken it out on any fast and smooth mountain roads yet so I don't know how it will feel there. Hopefully today... Randy
-
My 04 Ballabio had the same problem when I first got it. Folks on this site gave the advice of drilling a 1/4 inch hole in the back of the housing (THE BLACK PLASTIC HOUSING ONLY...NOT THE INNER TACH SHELL) I drilled mine at the lowest point in the housing when it is mounted on the bike...sort of like a drain hole. Problem solved. Even in rain or muggy days it is nice and dry. Randy
-
Oh, I'm sure it's highly likely they were blowing smoke up my ass. I asked him how the exhaust sniffer would differ from the one I have on my home machine and he said they buy different ones to handle different types of exhausts. He said the "part" that Dyno Jet showed for the V11 sport was different from ones he had on hand and that they didn't want to buy it because it only fit Moto Guzzi and he didn't get enough in to make it worth his while. Maybe someone on this list has one of these dyno's and can verify this...although even if it were not true I don't think i would try to push the issue with them. Either they are idiots or just don't my business...either way I think I will look elsewhere. Randy
-
For the Seattle area folks... I finally got around to talking with Renton Motorcycle Center about their new Tuning Link Dyno. They are not able to do Moto Guzzi's because the don't have the required exhaust adapter. They have no plans to purchase one either since it's too small of a market. Such is the life of owning an "exotic." Randy
-
Thanks for the info...I will stick with the laminer lip until something better comes out. Sounds like you had the same trouble I mentioned with the older version of the product when I tried it on my MZ Traveller. Randy