-
Posts
4,004 -
Joined
-
Last visited
-
Days Won
247
Content Type
Profiles
Forums
Events
Gallery
Community Map
Everything posted by Scud
-
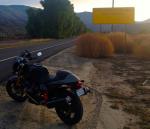
This is one of my favorite signs. I visited it today shortly after sunrise. It's on Route 74 in Riverside County, California - leaving Hemet on the way to Idyllwild and Palm Desert. Is there a special sign, scene, or other landmark that says to you: "This is where the fun starts."?
-
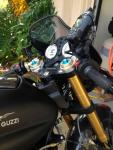
Here's how the GPS attaches to the RAM mount. Nice to have a map, clock, turn-by-turn directions when needed - and info regarding the ride - like 191 miles this morning. Finally got around to the transmission and drive oil changes last night. The only remaining original fluid is in the forks. Meanwhile the silver screws and bolts are disappearing - replaced with black ones when possible and painted when not. In this photo, you can see black pinch bolt, frame shroud bolt, and tank pad bolts.
-
Maybe Santa will bring you a key to his shop. I especially like the seat and am looking forward to seeing it on the bike - but not as much as you are.
-
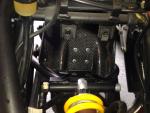
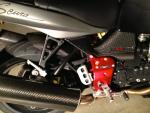
Removing the battery and tray is the way to go. I had the nuts inside the fender originally and figured that was a bad idea. Swapping it was a breeze with the battery and tray out of the way. In this picture, you can also see how the fender is not mounted squarely to the bracket - because it aligns to the non-square swingarm. The fender itself would be a breeze to take off and on now - but I'm not sure why I would need to. It just seems to float over the rear wheel and I'm sure I can get the wheel out without removing it. Installing the bracket is what made this a big job. Re payment methods to Bruno at Ghezzi-Brian: I agree. I suggested he at least get a paypal account. I talked my bank into waiving the wire transfer fee - but that could be a big extra cost for some, a hassle for others, which results in no sale for Bruno.
-
How about a picture with the seat on the bike?
-
I installed the rear fender and put some more info about it in a new thread. http://www.v11lemans.com/forums/index.php?showtopic=18833
-
-
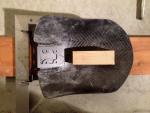
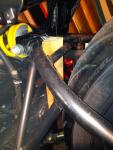
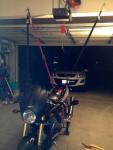
The Ghezzi-Brian fender didn't come with instructions, so I thought I'd document what I learned in case it could help someone else. First I put the bike on a swingarm stand, blocked the front wheel, and supported it from above with tie-down straps so I could unweight the suspension. This would have worked better with two ratchet tie-downs, but I only had one. The holes were not pre-drilled. The fender is asymetrical, but so is the swingarm. I used a square and a wide board to help me get it lined up and mark the locations for the holes. The block of wood in the fender weighted it so things would stay in alignment. I drilled pilot holes from the bottom, then the final size holes from the top. I inserted a block of wood between the bottom of the shock and the swingarm before trying to remove the shock bolt. This gave me leverage to move the shock and get the bolt out easily. A little waterproof grease on reassembly, along with the wood as a lever, made it easy to get back in. I had to ream the holes in the mounting bracket to get the shock bolt to fit. The mounting hardware is tiny (2.5mm allen wrench and 7mm socket needed). It was difficult to work both sides. If I had to do it again, I'd pay a kid with tiny hands to do it. Or remove the battery and tray to get at the fender bolts from above. If you leave the shock bolt loose, you can flap the fender up and down to get access to the screws and nuts - then position it right where you want it before tightening the nut on the shock bolt.
-
Fitted the Ghezzi-Brian carbon fiber rear inner fender. It was quite a bit more work than the belly pan, and I am pleased with the result. Went for a quick 30 mile night ride - and the fender stayed on. All is well.
-
I don't have any experience with the parts - so can't help there. However, I'm curious about why you want the new headers. Are you trying to solve a cosmetic or mechanical problem? If cosmetic, have you considered ceramic coating the existing parts? I've been thinking about that myself. Supposedly, there are performance advantages (heat management and durability) - and you get the bonus of a custom look. If you're solving a mechanical problem, maybe get the less expensive stock ones and spend the extra on the coating. I haven't done this either, but here's one site I've been looking at: http://www.performancecoatings.com/headercoatings.html
-
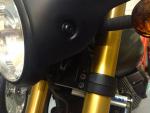
To continue my darkening game, I made a another trip to my local hardware store, where I discovered a very nice selection of black fasteners. IMO black parts should have black fasteners; chrome and silver fasteners draw attention away from the more interesting parts. Sometimes, it's all about what you don't see instead of what you do see, as in the attached, which shows three replaced bolts (lower triple clamp) and one painted bolt (fairing). So far, I have darkened over 80 fasteners - and I have not even done the valve covers (which will be 16 more if I can find them in black). Edit/warning: The zinc-plated bolts are not suitable. There are two types of black zinc coatings, one looks flat and the other looks semi-glossy. The flat finish rusts quickly. I didn't see any rust yet on the semi-gloss ones (which is a more durable finish), but I did learn that they are not recommended for outdoor use. The original bolts are going back in (after paint or powder coat). Interestingly, the bolts for the Napoleon mirrors are black, but the finish appears different still - like they have some kind of heavy duty clear coat.
-
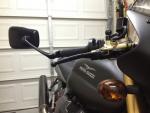
Valve stems on Amazon.com for $25: Here's the item description: 83deg Aluminum 8.3mm Racing Angled Valve Stem - Black - 2 Pack To install the Nappies: I held the nut in a vise-grip and used a bench grinder to grind down the flange till it fit inside the threaded bar-ends. Reducing the diameter of the rubber bushing is harder. I mounted it on a long bolt with various washer and nuts to keep it firmly in shape (stepped-diameter inside the bushing). Then I used the wire wheel on the bench grinder to get it down to size. The Nappies have a screw to adjust the tension for the stalk rotation. Too loose and the mirrors shake like mad. Too tight and you can't rotate the stalks.
-
Even though I am having fun wrenching, it IS ultimately all about riding - which is why I am so amazed the previous owner only did 185 miles in 12 years... And I FINALLY got a decent ride in today. Between travel, work, waiting to get good tires on, then rain (and scary-sandy roads), I've been itching to get out into the mountains. Grabbed a window of time and did about 140 miles of mostly curvy roads this afternoon. Over 1,200 miles on it now. Totally thrilled with this bike. If it's true that the Ohlins are set up for a 150-160 pound rider, I may have lucked out. I'm 165 and feeling pretty good about the suspension. Very happy with the new tires. Per your earlier question re mirrors. I've settled in with the mirrors at 45-degree angles - nice wide view and for some reason they seem to vibrate less than when sticking straight up.
-
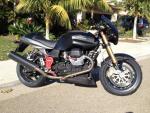
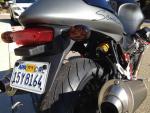
It's been raining in San Diego (much needed). Meanwhile, a little more darkness also moved in over the Scura. Installed the chin spoiler (aka belly pan) from Ghezzi-Brian. See the thread "Chin Spoiler Search" for discount code good till year-end. I also got Ghezzi-Brian's carbon fiber rear inner fender - but didn't install it yet, because I only have a swingarm lift and need to get the tension off the shock bolt to install the bracket. I am currently fenderless. The new fender is way smaller than the stock one; it will show a lot more tire and other interesting mechanical stuff. Darkening in the back includes: Shortened the outer fender (quite a lot of parts and wires need to be removed to get that thing off) Removed the California vapor canister Tinted the indicators (please excuse the electrical tape on one, I over-tightened the screw and broke the lens) Painted the chrome plastic tail light base (all except for the reflective part by the light) Painted a few more bolts or screw heads: rear fender, passenger peg brackets, side panels, seat lock, screws that held stock fender - and added neoprene washers to cover the threaded inserts Time to go riding...
-
Here's another clean Champagne LeMans in Los Angeles, which has been for sale for a long time. The one in Texas is a bargain. http://losangeles.craigslist.org/wst/mcy/4785183822.html
-
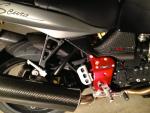
I failed at installation today, because I only have a stand that lifts the swingarm. I have not figured out how to raise the bike in a way that will release the pressure on the shock so I can remove and reinstall the bolt easily. However, I took a couple photos to show how the bracket and fender will be positioned. They will protect the shock-eye from tire spray. The stock fender left it wide open to spray - probably even channeled extra spray onto it. This makes a lovely retrospective rationalization for my purchase...
-
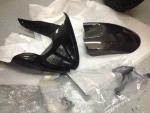
I didn't install the rear fender yet. To do so, I will need to remove the rear bolt for the shock in order to install the bracket. Unlike the chin spoiler, the holes are not pre-drilled in the fender - but all the screws and washers are included. The CF fender is a lot smaller than the stock piece, but it seems like it will still offer pretty good protection from spray. I'll post a picture in a few days.
-
Chin spoiler went on easily. Four L-shaped brackets using the four corner bolts of the oil pan - each of which takes a rubber compression fitting with a built-in rubber washer for the inside of the spoiler. I think I will get some little rubber washers for the outside - just to minimize the stress around the screw holes.
-
I got a package from Italy today. It appears that the chin spoiler will bolt right on with the supplied hardware, but I will need to drill holes in the rear fender to mount it with the supplied bracket. The weave of the carbon fiber material is a bit finer than the stock Scura parts, but they look really good - and they weigh nothing. Should be able to install this weekend.
-
Looking good. That transfer printing is getting better all the time. A pieces of CF look cool - but as Steve said, it's possible to go too far with it. I like the look of the CF front fender on my Scura. Cool thing about wraps - if you don't like them, you can always peel them off. Try it and see.
-
I think he has a plastic one too. Maybe a bit cheaper than CF - and better for paint. He had quite a lot of other stuff for V11s and said he's going to start a new section of his website just for parts. He called them "tuning parts." That must be a nearly-accurate Italian to English translation. When I think "tuning" I think of getting the engine to run right. I think a better English word might be "custom parts."
-
Earned the "street motorcycle tire change" endorsement for my man-card today. Did a quick 30 mile bed-time-snack ride to Elfin Forest - I like new tires. Took the opportunity to install angle valve stems, which are Scura-er than the stock ones. Soooooo convenient. Definitely recommended. I'll probably check my tire pressure more regularly, because it's so easy.
-
Thanks. I flipped the piece. Mirrors were a bugger to get on. See Bar End Mirrors thread for details. As for vibes, I won't claim that they've reduced the vibration - but I'm not sure they've increased it either. Maybe the same - maybe a touch more or different, but not dramatically so. The mirrors weigh less than the combined bar-end weights and stock mirrors - but they are further out, so maybe that compensates a bit. I got the Napoleons on Amazon for $30 each. Even after installation, the stalks rotate - so you can stick them way out, below the bars, or at 45-degree angles. I like them a lot - even if they are a little shakier than the stockers. Thanks. Pads are still new (just over 1,000 miles on them). I saw no sign of leakage and the system is holding pressure. I can only assume somebody did something to it - or it was poorly installed from the start. Definitely worth keeping watch for the next few rides.
-
New entry on an almost 10 year old thread... I just did my first street-bike tire change. While it did take a long time to figure everything out, I think I will be a lot faster next time. I used stuff as described earlier in this thread: Harbor Freight tire changer, which serves as the base for their motorcycle tire changer adapter (2 parts). I needed a thinner center post the one that came with the changer. Fortunately, I had an appropriate diameter solid copper ground rod stashed in a dark corner of the garage. Mojo blocks and Mojo Lever: the Harbor Freight changer would destroy any decent rim without these blocks - in fact, I'm not even sure it would work without the blocks. The mojolever was great too - well worth it. I also used bunch of extra padding and protection. I used split vacuum line to shield the clamps, and leftover pieces of surfboard traction pads (basically adhesive foam sheets for you land-locked riders) for the base of the bead breaker. Marc Parnes wheel balancer - also got wheel weights from him. This was more expensive than other balancers, but it is excellent and he makes all sorts of adapters for other bikes - so forward compatibility is worth a bit extra. Within a couple minutes, I was able to get each wheel balanced so that I could put it in about any position and it would not start rotating. Ru-Glyde tire bead lubricant - 1 gallon (lifetime supply) - had to special order it from my local auto parts store. I watched this guy on YouTube before deciding to give it a try myself. He shows how to do a front tire, which I found easier to do than the back (but I did the back first and was still figuring it out). I did put a little scratch on my rear rim (dammit, dammit... and dammit that paint IS soft) - but left no marks on the front. I probably should have practiced on a dirt-bike tire first - but I normally just do those on a 5-gallon bucket - or a stump - or whatever's handy on the trail when it goes flat. This setup should make dirt bike tires super easy. I took a long time at it today - my wife said: "you should have just taken them somewhere." True - if it was a one-time thing. But I think I will be a lot quicker in future - especially since it's all properly set up now. It'll take a few more tire changes to break even on cash. However, I can do it myself any time now - and faster than the total time of going somewhere and waiting for them to do it.
-
I ordered the belly pan and rear fender in carbon fiber. Still awaiting delivery - hopefully any day now. Pics are from G-B. Maybe someone else can help you regarding the rear-sets - I didn't order any - but but I thought they looked like quality parts for someone who might want them.


