-
Posts
4,003 -
Joined
-
Last visited
-
Days Won
247
Content Type
Profiles
Forums
Events
Gallery
Community Map
Everything posted by Scud
-
Get the rear wheel up and move the selector rings until you can rotate the rear wheel. Then it's in neutral. If you look closely while you move those rings, you can see how they engage - and disengage - the gears. Then get your preselector to neutral, I think first is where the dots on the gears align, then neutral is one click up. Dry fit it to be sure. you can even put the level on temporarily and run it through the gears as you rotate the rear wheel. Make sure everything is in neutral before you apply sealant. http://www.v11lemans.com/forums/index.php?showtopic=20021&p=222646
-
The pep-talk is working... Took out the injectors and used MartyNZ's fabulous injector cleaner again. New fuel hose and the good injection clamps. Repainted all the silver parts on the rear drive (VHT Cast Aluminum Engine Enamel and VHT Engine Gloss Clear Coat). The new paint is closer to the original silver of the wheels. And this 180 tire needs to come off... Hard to tell in this photo, but the sidewall is at a weird angle.
-
I know where there are some viable options... a green one and a champagne one... both just need a little more love. Hey - I'm also wondering about the focus on the clutch slave's seal. Of course, I haven't felt what you are describing, but I have had a leaky slave cylinder on a dirt bike - you lose pressure and fluid. In the case of the dirt bike, the fluid "disappeared" into the engine oil. But with the V11, it would dribble out the opening in the rear case of the transmission. You have previously reported a very noisy clutch. Perhaps you are trying to avoid pulling the engine or transmission, but it seems that's going to need some attention soon. Has there been so much wear in the flywheel that the plates are getting bound up and not allowing the clutch to re-engage? That could also explain what you are feeling - and seems more likely to me than a sticky piston.
-
Like GStallons says, service and adjust the linkage first. The pivot bolt can get gummed up or overtight, which restricts movement. Also, the forward part of the linkage can jam between the gearbox and the starter if the bolt loosens or is installed backwards. Also check the small arm at the front of the linkage to see if the pinch bolt has worked loose. If that lever slides on the shaft, it can also jam in the starter. Maybe take the starter out, which gives you a clear view of what's going on and easier access to all the linkage. If if shifts with the starter out, you've found the problem. If not, you needed to take the starter out anyway to remove the pre-selector from the gearbox (that's where the springs live). FWIW - A broken pawl spring results in a floppy lever, not a stuck lever.
-
Your Coppa Italia will thank you. PM sent with details. That leaves 3 plates available.
-
Ad-bump. I still have some plates available.
-
Have you tried wearing some padded bicycle shorts on longer rides? That's a cheap, quick, and easy solution that works for me.
-
Here are the other food groups. Sent from my iPhone using Tapatalk
-
Haha not Mongolia. That's the Owens River Valley in California, just North of Lake Crowley. Sent from my iPhone using Tapatalk
-
Love my truck. Happy 4th of July to American members.
-
Quotes about Bikes & Guzzi
Scud replied to nobleswood's topic in Special place for banter and conversation
"Driving a car is like sitting in the living room; driving a motorcycle is something like riding a horse - it's driving and controlling something that is almost alive." - Soichiro Honda, as quoted in Honda: The Man and His Machines by Sol Sander (1975) If you can find a used copy, it's a great read and an interesting view of Honda in 1975, when they were not sure how well the whole "car thing" would work out. -

Quotes about Bikes & Guzzi
Scud replied to nobleswood's topic in Special place for banter and conversation
That's an excellent book. -
This bike has only 5,000 miles. There is no noticeable gear wear. But I do think it's worth removing as much rust as possible from the output shaft. I'll remove the rust from the driveshaft too - then use Staburags grease for the splines (that's the recommended lube for BMW K-bike splines, but the Guzzi is assembled dry). The seals all looked good and with such low mileage I decided to leave them in. Just put a little gear oil around the lip when you re-assemble. First time I did this I was really nervous. But I've done three now, and the other two work. Like a lot of things, it's not so hard once you get into it. And a tranny service can be very expensive.
-
Yeah, you can find used subframes on ebay. But this one was in great shape, except for that one spot. I masked it around the weld. Nobody's gonna see it. But there are some little chips and rusty bits on visible parts of the frame and porkchops - so a bit of touch-up paint would be welcome.
-
Thanks, but it really won't matter. It's just a small section that goes behind the porkchop - where the bolt goes in. It was rusted so bad from the battery acid that I had drill the head off the bolt. I think I might send one of my daughters on a mission to match the color with nail polish for touch-up. And the fork caps... the RH fork is leaking. If I need to take them off, I suppose I could paint the caps. That spotty aluminum corrosion is really hard to remove.
-
Admire your work. A six-speed V11 tranny is a thing of beauty. I only painted the rear case, because it was peeling badly. How long are you supposed to wait to put oil in? Read the directions on your adhesive. Then put the tranny in and go riding (some other steps required). I swore I was gonna remember to attach the ground cable to the tranny... but I didn't. Shoulda put the cable with all my other stuff on the table. Now I have to pull one of the bolts out and re-torque it over the cable (after scraping the paint off that spot).
- 45 replies
-
- 10
-

-

-
Put the input hub back on. Special tools required. But you already have the special tools, cuz you used ‘em when you removed the gear. Torque to spec and fold one tab of star washer into a slot on the ring nut to lock it. You might want to use a new star washer, but I think that as long as you don’t fold the same tab twice that you can re-use the star washer.
-
Get the transmission in neutral by disengaging all the gears – by sliding the selector arms. Make sure the pre-selector is in neutral. Dry-fit it to be really sure. Are you sure yet? You don’t want any adhesive on till you’re sure. Are they both in neutral? Really? Are you sure?
-
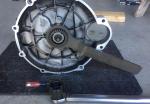
Put the shift arms (which you kept organized in exactly the right locations) onto the grooved gears and make sure you can slide the gears back and forth. Then put the shaft in through the case and into the arms. Note that one end of the shaft is threaded. This is helpful for disassembly too. Then put the rear case on and insert the clutch pushrod, throwout bearing and cylinder. Sorry, I didn't take a picture of this step, but you can see that it's on in the next photo.
-
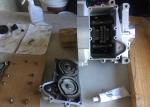
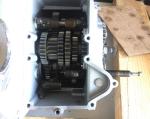
Gears are in the case. Did you remember the bolt that goes in from the other side? I think the leak in this one was caused by the bolt at the 8-oclock position. It was very loose on disassembly and that’s where the leak was coming from. There’s no way to access that bolt without removing the rear cover. No anti-seize compound needed. The bolts get bathed in gear oil.
-
OK – nervous time. Reassembly. Do I have all the right tools? Is everything clean? What adhesive am I going to use? What torque settings for two different size bolts? It’s a good idea to dry fit the parts a couple times before applying the adhesive. The shop manual shows this step with a special tool that holds the case upright in a vise. I borrowed one from Andy once and it was very convenient. But you can lower the case over the gear stack instead. Note that you cannot lower the gear stack into the case, because one of the shift selector gears will fall off. I used Threebond 1184 (after a final quick-clean with alcohol). This is a very stringy grey adhesive – super strong stuff and about the same color as the transmission cases. Originally, this tranny had unsightly dark red-brown adhesive lines on it. Permatex Right Stuff also comes in grey (or black) and is very good. It cures faster than the Three-bond, so it's really good for just doing the pre-selector with the tranny in the bike. You can ride after 30 minutes.
-
-
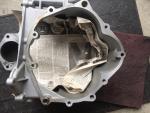
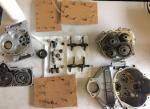
Clean up all the mating surfaces. I use a flat blade and a little oil – followed by a scotch-brite pad to remove all the old adhesive. I use a pick around the locator pins, which have a lot of goo on them. Try to work so debris and dust falls away from gears or bearings – or cover them while you work.
-
Keep your stuff organized; there’s a lot of it. Clean the adhesive off the bolt threads. Clean the breather. Where is the little washer that goes at the bottom of the speedo drive gear? If you don’t know, it’s probably still in the main case and you don’t want it to fall into a bearing. This is a good time to refer to the Lucky Phil shift improvement thread if you are inclined to do stuff “while you’re here.” This is a also good time to decide whether you are going to replace any or all of three oil seals: Input shaft, output shaft, gear selector shaft. Actually the time to decide that is probably before you start so you would have the seals on-hand. I didn't replace any seals or mess with the pre-selector, because this tranny only has 5,000 miles on it.


