-
Posts
4,003 -
Joined
-
Last visited
-
Days Won
247
Content Type
Profiles
Forums
Events
Gallery
Community Map
Everything posted by Scud
-
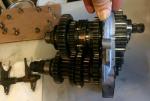
Step two, break the tranny. Remove input hub (special tools needed, see reassembly for picture). Remove shift pre-selector. Then the rear cover. Some soft mallet and leverage required, especially around the locator pins, which probably have a lot of adhesive in them. When the rear cover is out, you can remove the shift arm shafts and the arms. Then the gear stack comes out of the main case – but not until you have removed the speedo gear. This case will also be stubborn around the locator pins. I used carpenter shims to drive the cases apart – a steel screwdriver can cut into the aluminum, but I still had to use a wide screwdriver for leverage in a few spots.
-
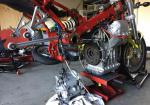
Here’s the basic process of removing, disassembling and resealing a leaky transmission. Two years ago, this was in the “do not attempt” category for me. But now that I’ve done a few with help from other members, I figured I should share what I learned – because the best way to really learn something is to teach someone else. Ready, set, remove transmission. Some pre-steps required. The frame is strapped to the ceiling by ratchet-straps (not shown) to enable “crabbing” the frame.
-
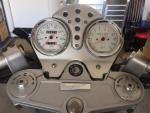
...and here's how the aluminum paint looks on the light cover. I think it's a pretty good match for all the other silver stuff up there. I also replaced the rusted-chrome top-nut with a brushed one from a 2002 bike and replaced the aguila badge. Now, what to do about those fork caps?
-
The front of the swingarm and one corner of the subframe were badly rusted from a battery leak. Used VHT Gloss Black Rollbar and Chassis paint for the swingarm. It's a good match, but it's not my best paint job... mostly concerned about grinding off the rust and stopping further rust. I used the Chrysler, Duplicolor Flame Red that LowRyter suggested on the subframe. It's a great match from a distance, but up close it's a slightly darker red than the original. Horns de-rusted and painted. Alternator cover stripped, sanded and painted with VHT nu-cast aluminum and gloss clear coat. It's a pretty close match to the wheels and the swingarm end-covers, which has me looking at the poor-condition paint on the final drive... And one of the main reasons for digging in this far... the tranny is all sealed up and has fresh paint on the rear case. I didn't paint the other three cases, because I saw the slippery slope leading to the engine. Had a pep-talk with the parts on the left of the picture: "OK men. You need to get yourselves onto the towel and ready for installation."
-
Uhhhhh.. Aw c'mon Chuck. It's cheap, effective, and there's a high risk of injury if the tourniquet sticks start spinning like propellors.
-
If you have to ship it, consider a shop that has on Ohlins specialist on staff. I think Chuck spoke highly of Ducati of Indiana. Many Ducati or Aprilia dealers would probably be willing to service the forks. There is a very well regarded suspension shop in Northern California: Kyle Racing. Dan Kyle is known as sort of a Ohlins guru. I had a good experience buying parts from him - he will also accept shipped components.
-
Yeah - at that price, it's a collector's bike, not a rider's bike. I looked at some close-ups - it seems to have a lot of light surface corrosion (which might clean up). Then you've got all the old fluids and tires to deal with... but if it's just gonna sit in the living room next to the grand piano I guess none of that matters.
-
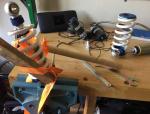
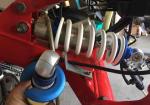
How do you like my spring compressor tool? And here is Czakky's old shock, installed on the Greenie (but with spring and shiny blue bits that were originally on the Greenie). Thanks again. That's one thing off the garage floor today. And the offending crack on the lower mount of the original shock. Does the shock with the crack have any value to anyone - or is it trash?
-
Used Sachs shock arrived from Czakky... and used voltage regulator on the way to Wisconsin. Good trade. I love this place.
-
-
All measurements same as Andy's. I only posted things he didn't.
-
Moto Guzzi parts catalogs only show the complete slave cylinder - not the component parts of it. The diagrams do show the O-ring for a secondary piston that rides in the rear transmission case, but that is not the O-ring in question. Maybe you could find a Grimeca rebuild kit to compare O-rings? By the way - I want to know more about the spring. I ass-u-me-d that a hydraulic clutch slave would work the same way as a brake caliper, which does not have a spring. Why would a clutch slave need a spring that would apply force in the same direction as the hydraulic pressure? I don't feel like taking a perfectly good one apart. Andy - do you still have the failed one from your bike? Can you pop the piston (probably just needs a puff of compressed air) and see if there's a spring behind it?
-
I used a digital caliper and rounded up to nearest mm. 40mm was actually 39.something; 38 was 37.something.
-
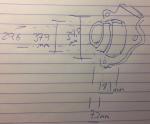
Outer diameter of cylinder is 40mm at base, and 38mm at the stepped part. The cylinder extends 18mm from the flat surface. 11mm for the thick part, and 7mm for the stepped part.
-
Well to answer that question, I'll have to get air in the system. But ok, I planned to flush out the fluid anyway. My questions: Where's that spring go and what's it supposed to do? Why two banjo bolts? (why no bleeder?) And the fasteners are different - which is probably good, because the original screws with allen heads are quite weak.
-
My Greenie's is dangling now. Post your measurements and I can compare - possibly late this evening.
-
I hope so too. The gear oil was pooling on the crossover, making for stinky, smoky starts. And now that I've been into a few of these 6-speeds, I don't fear them anymore. Tips if you ever have to split one: You do need the special tool to remove the nut from the input hub before pulling the gear stack out of the main case. You don't really need the transmission case holding tool (in the shop manual) The rear case and center case (that holds the gear stack) can be stubborn. I used a soft mallet and gentle leverage to start the separation. Then I used composite carpenters shims (not soft wood ones) to hold the gaps open as I worked around the cases to free them. (but still had to use a flat screwdriver between the cases in some spots) The toughest parts to separate are if sealant got into the alignment pins from original assembly. By the way - has anybody found a perfect match for the silver case paint? One of the cases is peeling. I have some silver VHT engine case paint that is close, but a bit brighter/bluer than the original.
-
The label on the box says Stornello. Is that subtle enough?
-
Tranny is split... don't see any evidence of cracks or other damage, but haven't cleaned it yet. A bolt near the suspected leak site came out with almost no effort. And Swoosh - I "went big" for the flickr photo.
-
That is clever - and probably less work and less expense than replacing the clutch line. I like what you're doing. Keep posting the progress.
-
He said he didn't have any more from the first run. He's using a different shop to cut the next batch, getting them powder-coated red, and supplying mounting hardware. Thanks again for taking the initiative when your bike was down. That should prevent problems for other people.
-
Thanks Czakky. JBBenson also has a Sachs leftover from his recent suspension upgrade and it's closer to home, so I'm gonna get that one. I also ordered a transmission brace. Don at MotiveCycleWorks, who fixed LowRyter's cracked tranny, is having another batch of the braces made. He thinks they'll be done (and powdercoated red) by middle of next week. For anyone else who is interested, here's his website: http://www.motivcycleworks.com/
-
Opened a Flickr account... here's my first photo. Cleared out the last of the dark green electrical tape from the wiring harness. Still no evidence of damage or modifications. Why did somebody feel the need to cut into the loom? I don't know. Flipped the ECU - also noticed that two vibration dampers were broken - so the ECU was a bit wobbly on the remaining two. Fortunately, I had some spare dampers on hand. It does seem more secure and protected this way. Sprayed Deoxit in every wire loom connection and re-connected. Cleaned the dirt off the shock to find a big (dangerous) crack in the lower shock mount. I should have caught that in the pre-purchase inspection. The Sachs shock commonly fails at the lower mount.
-
I ran some seafoam for about 10 miles of low-speed riding - and several heat/cool cycles in the neighborhood. I also ran some techron for a bit. since the bike sat for a while I am going to give the injectors a proper cleaning - and I'm wondering if I should pull the heads to clean the ports out and test for valve leakage.
-
California... land of fruits and nuts... producing over 90% of many of the nation's edible fruits and nuts (and vegetables too)... and possibly more than its fair share of people who are certifiably nuts (self included).


